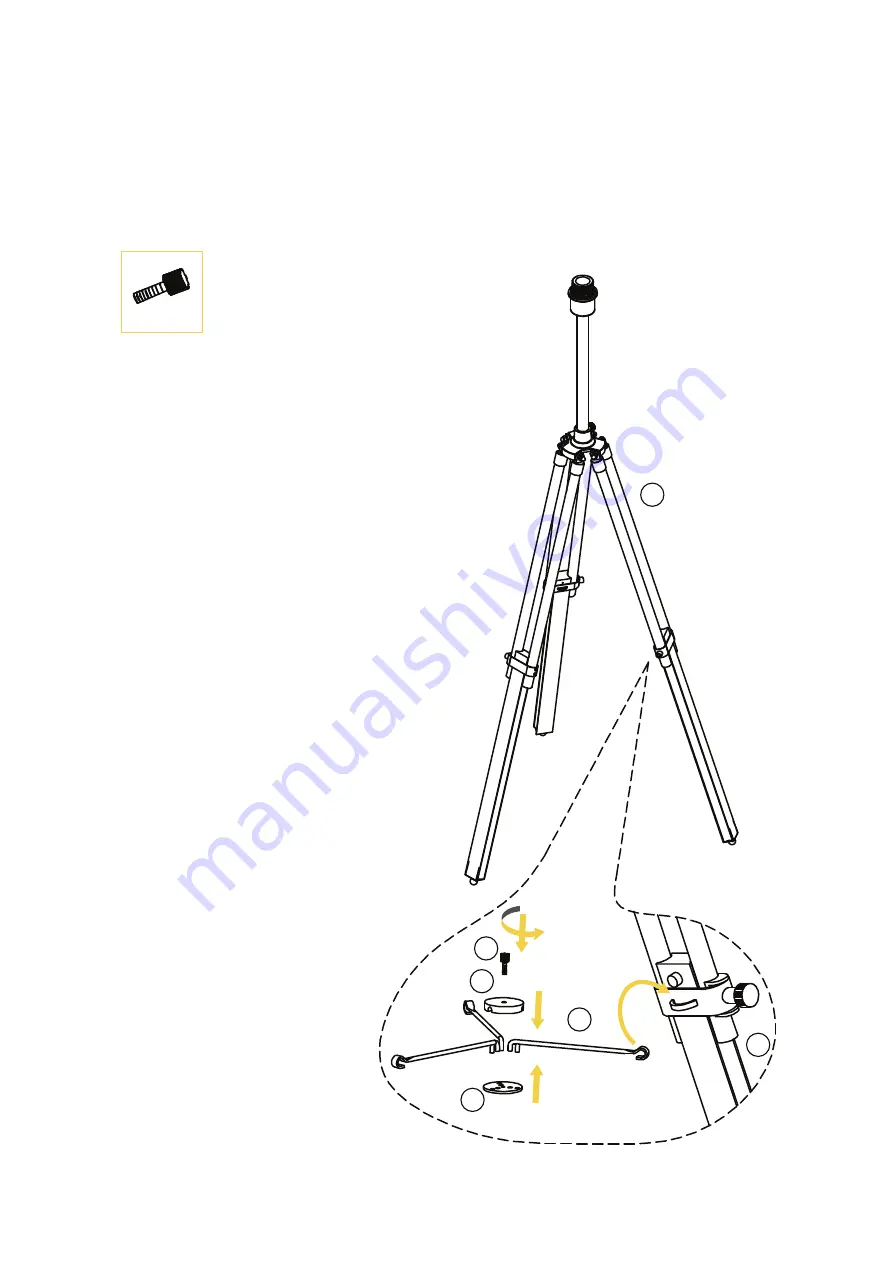
Step 1
Pull the tripod
(1)
legs out. Attach three hooks
(2)
to
the loops on the legs. Attach top
(3)
and bottom
(4)
circular pieces so that the hooks are fixed and secure
the joint with a bolt
(A)
.
A x 1
1
2
3
A
4
Page 1: ...ASSEMBLY GUIDE Tarus Tripod Floor Lamp v1 0...
Page 2: ...low If anything s missing please visit www brosa com au pages product return and parts request and we ll sort it out right away What you need Hardware A x 1 Bolt Tripod x 1 Shade screw x 1 Shade x 1 T...
Page 3: ...be replaced by a professional 4 Never use a bulb of a greater wattage than recommended 5 To replace the bulb unplug the lamp from its power source and allow it to 6 Periodically check and re tighten...
Page 4: ...tep 1 Pull the tripod 1 legs out Attach three hooks 2 to the loops on the legs Attach top 3 and bottom 4 circular pieces so that the hooks are fixed and secure the joint with a bolt A A x 1 1 1 2 3 A...
Page 5: ...over the pole 1 Carefully adjust the shade and tighten it in place with the shade screw 6 Gently screw the correct bulb not includ ed into the bulb socket Use the knobs on the tripod to adjust the he...
Page 6: ...Step 3 Check if all parts are secure Enjoy We hope your new lamp lights up your life...