A
x 2
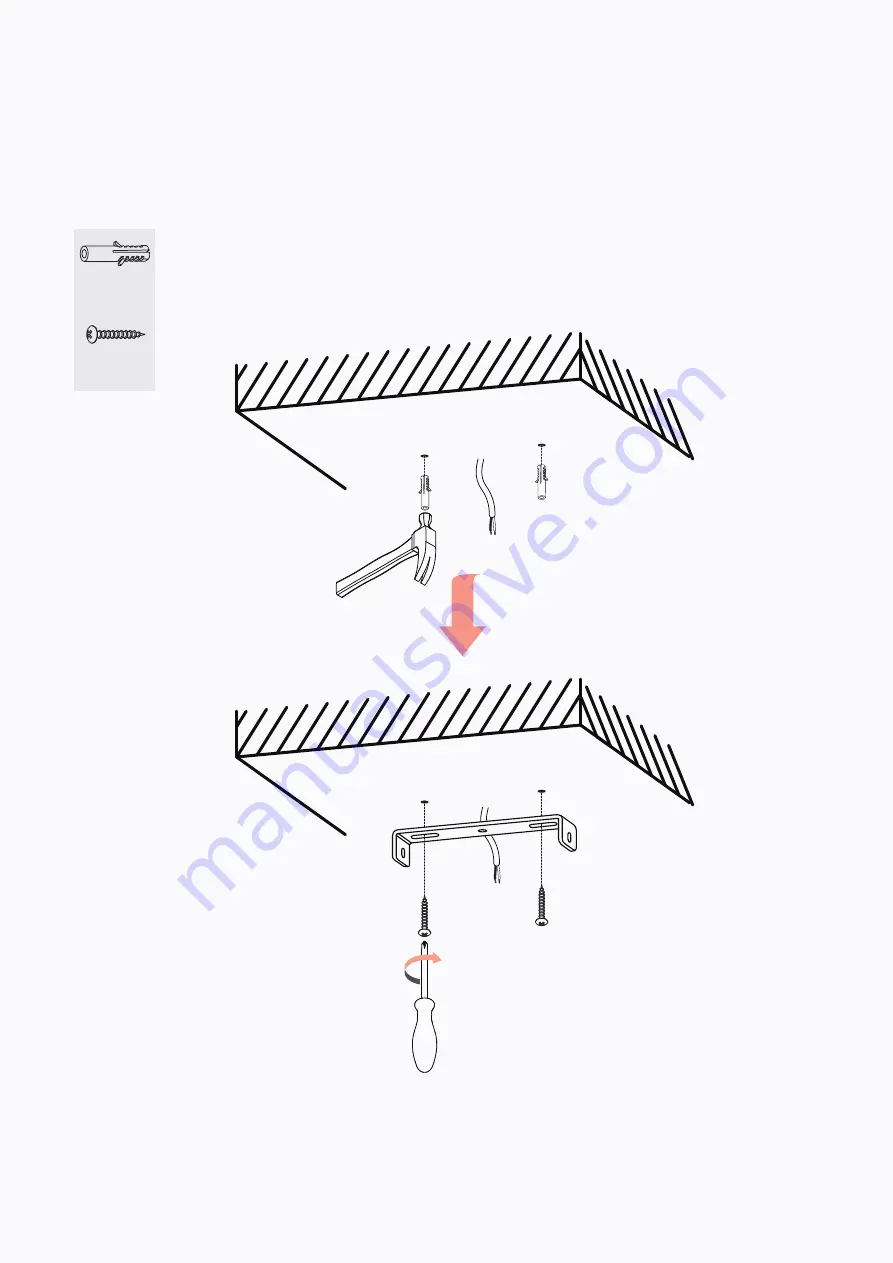
Step 4
Knock the plugs
into the holes using a hammer.
Place the mounting bracket against the wall again and fix the bracket in place with the screws
B
.
Page 1: ...Dakota Pendant Light A S S E M B LY G U I D E V1...
Page 2: ...duct Avoid loose screws Tighten xtures every few months Assembly requires 2 people It s always easier with a friend Contact our support online or call 1300 027 672 Check the assembly guide for require...
Page 3: ...ed L or Live and or coloured Brown Connect the neutral conductor of your house wiring normally Blue or Black to the neutral terminal or wire which is marked N or Neutral and or coloured Blue 9 Double...
Page 4: ...Before you get started check you have all of the pieces below If anything s missing we ll sort it out right away Simply visit www brosa com au pages product return and parts request A x 2 B x 2 Light...
Page 5: ...n appropriate wall plug provided you are sure your wall is sound Cavity Wall Special toggle wall plugs are needed Seek expert advice Because of the variety of wall compositions we can t provide you wi...
Page 6: ...the bolts attached to the ceiling rose using a Phillips head screwdriver Remove both bolts and the mounting bracket attached to the ceiling rose Keep the removed bolts and mounting bracket for the fol...
Page 7: ...th of the cable Loosen the rubber screw attached to the cable holder with a Phillips head screwdriver Adjust the cable held by the plastic clip to its desired length Tighten the rubber screw again to...
Page 8: ...ceiling beside the terminal Mark location for xings using a pencil through the bracket slots Remove the bracket and drill holes for the wall plugs using a drill Instructions below demonstrate how to...
Page 9: ...A x 2 Step 4 Knock the plugs A into the holes using a hammer Place the mounting bracket against the wall again and x the bracket in place with the screws B B x 2 A A B B...
Page 10: ...the junction box and distinguish live terminal marked L from neutral terminal marked N Lead the cables of your house wiring through the pipe to the junction box Insert the live and neutral wire into...
Page 11: ...p 6 Align the ceiling rose with the mounting bracket and make sure the bolt holes on each part overlap Insert the bolts removed in Step 1 into both holes and tighten them with a Phillips head screwdri...
Page 12: ...Step 7 Gently screw the correct bulb not included into the bulb holder...
Page 13: ...Step 8 Unscrew and detach the bolts attached to the hanging bracket Attach the shade to the hanging bracket and make sure the holes on the cup of the shade overlap with the holes on the bracket...
Page 14: ...Step 9 Insert the bolts again into the holes on the cup and secure the shade in place by tightening the bolts...
Page 15: ...Step 10 Check all parts are secure Enjoy We hope your new Dakota Pendant Light lights up your life...