BROSA Caledonia Rattan Compact Entertainment Unit Assembly Manual Download Page 16

User Recommendation

Rattan is a natural material which is both durable and flexible. Most 
rattan furniture only needs basic cleaning and care to preserve its 
natural strength and colour. Follow these steps to keep your rattan 
furniture looking beautiful for years to come and ensure its longevity.

Assembly
1. Assemble furniture using our Assembly Guides. You can find them at 
support.brosa.com
2. Do not dispose of any packaging or contents of the shipping carton 
until assembly is completed to avoid accidentally discarding small 
parts or hardware.
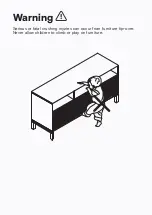
3. Furniture can be dangerous if incorrectly assembled. Assembly 
should be carried out by competent people.

Placement
1. This product is for indoor use only.
2. Keep furniture on flat, level ground. Placing it unevenly may cause 
deformation.
3. Do not place heavy objects on furniture.
4. When repositioning furniture always lift, don’t drag.
5. Keep sharp objects away from furniture. They cause scratches and 
splinters to the surface.
6. Do not stack furniture.

General Cleaning and Maintenance
1. Clean furniture regularly with a white soft cloth. Slightly damp fabrics 
help absorb dust, but remember to dry it once you’re done.
2. Clean spills and stains immediately with a clean cloth. As long as 
you’re on hand to wipe up any spills straight away, you shouldn’t 
encounter any problems.
3. Keep liquids away as they may damage the finishing.
4. Avoid harsh cleaning chemicals such as alcohol or gasoline 
solvents. Avoid using sponges or dirty cloths.
5. Cover furniture that isn’t being used to protect from dust and 
ageing.
6. Re-tighten screws and attachments if they loosen. 

Summary of Contents for Caledonia Rattan Compact Entertainment Unit

Page 1: ...Caledonia Rattan Compact Entertainment Unit A S S E M B LY G U I D E V1...

Page 2: ...duct Avoid loose screws Tighten xtures every few months Assembly requires 2 people It s always easier with a friend Contact our support online or call 1300 027 672 Check the assembly guide for require...

Page 3: ...ck you have all of the pieces below If anything s missing we ll sort it out right away Simply visit www brosa com au pages product return and parts request Hardware A x 6 M6 x 40 B x 6 8 x 25 C x 6 8...

Page 4: ...the stickers match as per the diagram below Fit a spring washer C to a bolt A followed by a at washer B Insert the bolt into a hole on the leg frame Screw the bolt with your hand and leave it loosely...

Page 5: ...Step 2 Once all leg frames are xed in place tighten all bolts with the Allen key D D x 1 D...

Page 6: ...Step 3 Place the completed piece of furniture the right way up in its desired location Adjust the foot stoppers to make all legs sit rmly on the ground...

Page 7: ...Step 4 Enjoy your new Caledonia Rattan Compact Entertainment Unit...

Page 8: ...Serious or fatal crushing injuries can occur from furniture tip over Never allow children to climb or play on furniture Warning...

Page 9: ...d as screws can easily pull away from the core structure Brick or Masonry Use an appropriate wall plug provided you are sure your wall is sound Cavity Wall Special toggle wall plugs are needed Seek ex...

Page 10: ...What You Need Attach the brackets a securely to the back top of the unit using the short screws c provided Step 1 a x 2 c x 4 a c...

Page 11: ...a using a pencil Move the furniture out of the way so that the brackets can then be mounted to the wall Step 2 Instructions below demonstrate how to attach the kit to the wall using the wall plugs pr...

Page 12: ...Drill holes for the wall plugs using a drill Knock the plugs e into the holes using a hammer Place the brackets against the plugs again and x the brackets with the long screws d Step 3 d x 4 e x 4 d e...

Page 13: ...Lace the nylon strap b down through the brackets Slide the thin end of the strap through the receiving end on the nylon strap Pull to tighten the piece of furniture snug against wall Step 4 b x 2 b...

Page 14: ...1 Upon receiving your product you might nd that the door doesn t align well Please note that it s not a product aw and can be adjusted following the instructions below Troubleshooting...

Page 15: ...t the end of the hinge arm Step 1 Gently pull the door so that it is separated from the body Step 2 2 Follow the steps below to disassemble your doors when needed Reverse the steps above to get the do...

Page 16: ...y 2 Keep furniture on at level ground Placing it unevenly may cause deformation 3 Do not place heavy objects on furniture 4 When repositioning furniture always lift don t drag 5 Keep sharp objects awa...

Page 17: ...4 Humidity may cause rattan webbing to go loose and bulge slightly It will eventually dry tight Should the rattan webbing stay loose and look stretched wet the webbing with a damp cloth and dry out th...

Reviews: