background image

reMoTe baTTerY insTallaTion

For first use, remove the insulating pull-tab inside the BATTERY COMPARTMENT  
to engage the battery contacts of the included CR2025 button cell battery .

To replace a spent battery in the remote, slide out the BATTERY COMPARTMENT 
TRAY located on the back of the remote control .

Insert one new CR2025 battery according to the polarity indicator on the TRAY .
Replace the BATTERY COMPARTMENT TRAY .

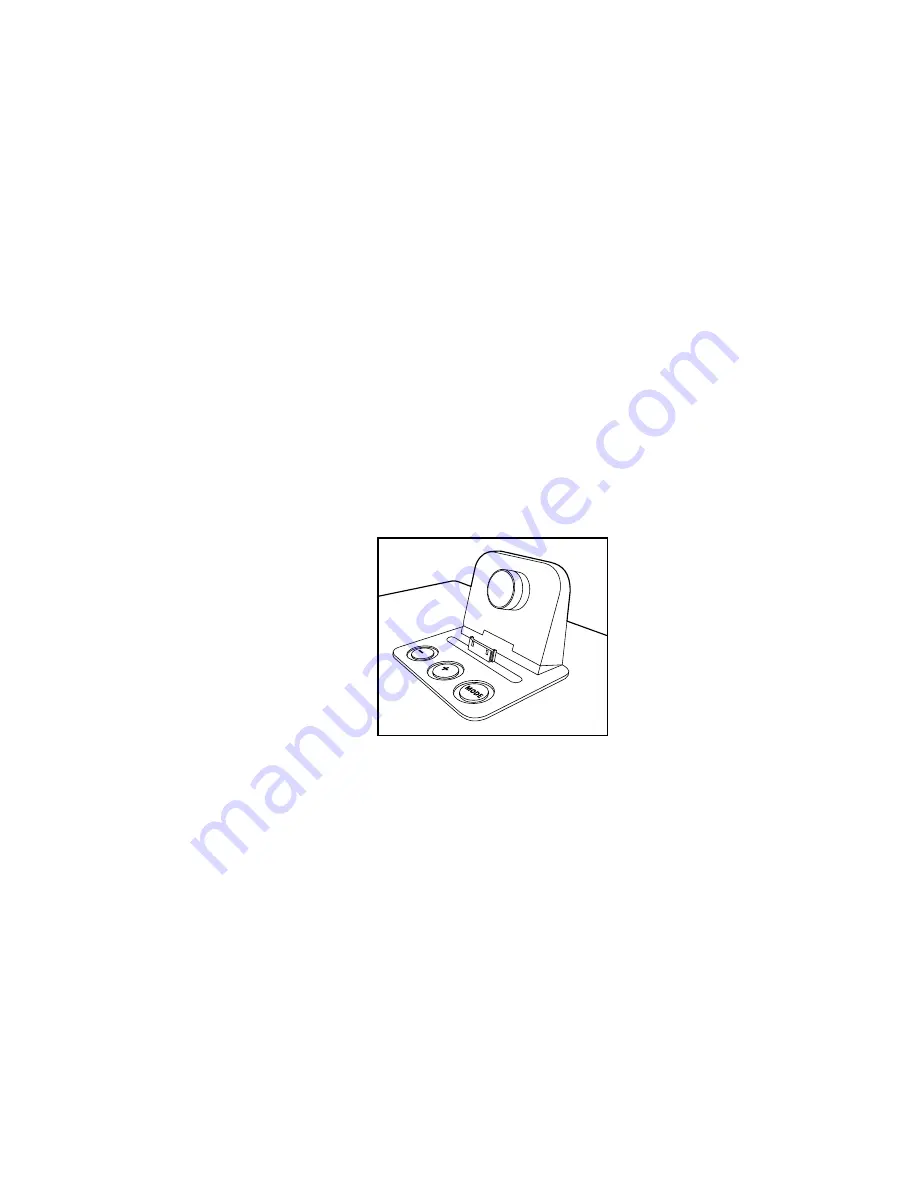
adjUsTing The dock sUPPorT

Insert the DOCK SUPPORT  

on the top of the main unit  
(see to the right) .

You may adjust the DOCK SUPPORT by turning the knob on the back to move  

it forwards and backwards to support iPod/iPhone or iPad device . 
IMPORTANT: Make sure the DOCK SUPPORT is adjusted correctly to support  
your device securely . The DOCK SUPPORT should make enough contact with the 
rear of the iPod/iPhone/iPad to fully support it without pushing the device too far 

forward . If your device is not secure against the DOCK SUPPORT, it may damage 
the 30-pin connector on the main unit or your device .

10

65

03

9

0_

IN

S

_P

ow

er

 S

pe

ak

er

_5

”W

x4

.7

5”

H

_O

ut

pu

t:1

00

%

_P

rin

ts

:1

/1

,B

lk 

Summary of Contents for iDesign Power Speaker

Page 1: ...Power Speaker Stereo for iPadTM iDesign...

Page 2: ...d Controls 7 Remote Battery Installation 10 Adjusting the Dock Support 10 Basic Operation of the Speaker 11 Charge Your iPod iPhone or iPad Device 13 AUX In Function 13 Resetting the Unit 14 Care and...

Page 3: ...htning flash with arrow head symbol within an equilateral triangle is intended to alert the user to the presence of uninsulated dangerous voltage within the unit s enclosure that may be of sufficient...

Page 4: ...rpose of the polarized or grounding type plug A polarized plug has two blades with one wider than the other A grounding type plug has two blades and a third grounding prong The wide blade or the third...

Page 5: ...vases should be placed on unit The main plug is used to disconnect the unit if you do not want it to remain readily operable In order to disconnect the unit from the main plug it should be pulled from...

Page 6: ...s convenience receptacles and the point where it exits the unit BATTERY PRECAUTIONS Dispose of old batteries properly Do not dispose of old batteries in a fire Do not leave batteries where a child or...

Page 7: ...ision reception which can be determined by turning the equipment off and on the user is encouraged to try to correct the interference by one or more of the following measures Reorient or relocate the...

Page 8: ...7 Location of parts and controls Top 1 30 Pin Connector Dock 2 Mode Button 3 Volume Button 4 Volume Button 5 Speaker Cover 6 Dock Support not shown 5 4 3 2 1...

Page 9: ...8 Location of parts and controls back 1 AUX In Jack 2 DC In Jack 1 2...

Page 10: ...ared Transmitter 2 Power Standby Button 3 Left Button 4 Menu Button 5 Mute Button 6 Volume Button 7 Volume Button 8 Down Button 9 iPod AUX Button 10 Right Button 11 Enter Button 12 Play Pause Button 1...

Page 11: ...RTMENT TRAY Adjusting the Dock Support Insert the DOCK SUPPORT on the top of the main unit see to the right You may adjust the DOCK SUPPORT by turning the knob on the back to move it forwards and back...

Page 12: ...press the POWER STANDBY button on the remote or press and hold the MODE button on the unit Using Mode Press the AUX iPod button on the remote or press the MODE button on the unit to switch between iPo...

Page 13: ...DE button on the main unit to select iPod function If the iPod iPhone or iPad device is connected the unit will start playback The device will be charged automatically until it is fully charged 3 Pres...

Page 14: ...ically in STANDBY mode iPod Mode and AUX Mode AUX IN FUNCTION 1 Connect an MP3 player to the AUX IN jack using a 3 5mm to 3 5mm cable not included 2 Press the POWER STANDBY button on the remote or the...

Page 15: ...the unit from the electrical outlet wait a few seconds and reconnect it to reset the unit Care and maintenance Disconnect the unit from the power source when cleaning If the unit becomes dusty wipe it...

Page 16: ...volume of connected music device Unit does not respond to the remote control Move the remote control closer to the unit Issue Solution The remote s batteries are low Replace the remote s batteries Th...

Page 17: ...iPod iPhone or iPad respectively and has been certified by the developer to meet Apple performance standards Apple is not responsible for the operation of this device or its compliance with safety an...

Page 18: ...given the original product must be returned to Brookstone and becomes Brookstone s property ObtainingService Toobtainwarrantyservice callBrookstoneLimitedWarrantyServiceat 1 800 292 9819 Please be pre...

Page 19: ...hed items or h a product that is used commercially or for a commercial purpose Brookstone SHALL NOT BE LIABLE FOR INCIDENTAL OR CONSEQUENTIAL DAMAGES RESULTING FROM THE USE OF THIS PRODUCT OR ARISING...

Page 20: ...650390 Merrimack New Hampshire USA 03054 800 846 3000 www Brookstone com...

Reviews: