background image


- 37 - 


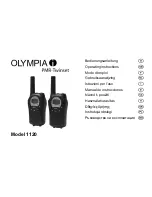
FX-400 Twin   

PMR446 

Private Mobile Radio


Gebrauchsanweisung–Deutsch


Summary of Contents for FX-400

Page 1: ...FX 400 professional Twin PMR446 Private mobile radio Instruction manual English ...

Page 2: ... the PMR is scanning all channels Displayed when the Key Lock feature is activated Displays the current Speaker volume level Displays when the call signal is ON Displays when the vibrator function is activated Antenna LCD Screen Displays the current channel selection and other radio symbols PTT PUSH to TALK button Press and hold to transmit CALL button Press to send ringing tone to other PMR units...

Page 3: ...the rechargeable batteries by following the orientation as shown in Figure 3 the arrow is showing and pointing upward c Replace the Battery Compartment Cover See Figure 4 Important Read these Safety Warnings before you charge the batteries When placing the FX 400 in the charger use only the rechargeable batteries supplied with the FX 400 Don t try to recharge non rechargeable batteries Make sure t...

Page 4: ...ket set to OFF c Switch ON the main socket The FX 400 must be charged using the mains adaptor provided Using any other adaptor will result in non compliance with EN60065 and will invalidate any approvals warranty d Place the FX 400 units in the charge cradle in an upright position and facing outward The Charge LED indicators will light up e It takes about 10 hours to fully recharge the batteries i...

Page 5: ... the battery level reach it minimum level in FX 400 on mode unit will emit two beep tones and automatically the power will turn off Important Charge the unit for 10 14 hours Battery life The FX 400 has a built in power saver feature to make the batteries last longer But when you are not using the units turn them OFF to conserve battery power 3 Operation 3 1 Transmitting range The talk range depend...

Page 6: ...ing Note Refer to the Channel Table section of this Owner s Manual for detailed frequency listing 3 4 1 Setting the CTCSS sub channel Each channel also has 38 sub channels to let you set up group of users within the same channel for more private communication If you have set the sub channel you can only communicate with other PMR users turned to the same channel and sub channel a Press the MENU bu...

Page 7: ...e current channel a Press the MENU and DOWN buttons at the same time RX will be displayed on the LCD Screen Your FX 400 will pick up signals on the current channel including background noise b Press the PTT button to stop the channel monitoring 3 5 Setting the VOX Voice Activated Sensitivity In VOX mode the FX 400 will transmit a signal only when it is activated by your voice or other sounds aroun...

Page 8: ...s within the transmitting range and turned to the same channel and sub channel if applicable will hear the Call ring tone 3 9 Selecting a Call Ring tone The FX 400 is equipped with 5 different types of Call Ring tones a Press the MENU button 8 times the LCD Screen will display Call Icon and blinking b Press the UP or DOWN button to select the desired Call ring tone A respective Call Ring tone soun...

Page 9: ...e PTT button to exit 4 Auxiliary Features 4 1 Key Lock The Key Lock feature allows user to disable the UP DOWN and MENU buttons so that the FX 400 settings could not be changed accidentally a To activate the Key Lock feature press and hold the MENU button until appears on the LCD Screen b To deactivate the key Lock feature press and hold the MENU button until disappears on the LCD Screen The PTT a...

Page 10: ...larly when placing it inside a pocket purse or other container with metal objects WARNING For Vehicles with an Air Bag Do not place your FX 400 in the area over an air bag or in the air bag deployment area Air bags inflate with great force If a FX 400 is placed in the air bag deployment area and the air bag inflates the FX 400 may be propelled with great force and cause serious injury to the occup...

Page 11: ... may cause damage that may not be covered by guarantee 9 CE CONFORMITY DECLARATION Brondi S p A with registered offi ce in Via B Gozzoli n 60 00142 Roma and operating premises in Via Guido Rossa 3 10024 Moncalieri TO declares that the FX 400 twin handset conforms to the following standards EN300296 2 v 1 1 1 2001 03 EN301489 5 v1 3 1 2002 08 EN60065 2002 It satisfi es the requirements of European ...

Page 12: ... 12 BRONDI S p A www brondi it info brondi it Version 1 16 May 2008 ...

Page 13: ... 13 FX 400 Twin PMR446 Private mobile radio Manual de Instrucción Español ...

Page 14: ...ción de bloqueo de tecla se activa Demostrar el nivel de volumen de parlante corriente Demostrar cuando la señal de llamada se enciende Displays when the vibrator function is activated Antena LCD Pantalla Demostrar la selección corriente de canal y otros símbolos de radio Botón PTT EMPUJAR A HABLAR Pulsar y sostener para transmitir Botón de CALL Pulsar para enviar tono de timbre a otra unidad de P...

Page 15: ...o con la polardad marcada en el lado de Compartimento de Batería como lo indicado en Figura 3 la flecha se indica y dirige hacia arriba c Reemplaze la Cubierta de Compartimento de Batería Veáse la Figura 4 Importante Lea estas Advertencias de Seguridad antes de que usted cargue las baterías Cuando coloca el FX 400 en el cargador use sólo las baterías recargables ofrecidas con el FX 400 No intente ...

Page 16: ...con el interruptor en el set de enchufe puesto a Apagado c Transfiera el enchufe principal Encendido Debe cargar el FX 400 con el adaptador principal ofrecido El uso de cualquier otro adaptador resultará inconformidad con EN60065 y invalidará alguna aprobación y garantía a Ponga las unidades de FX 400 en la horquilla de carga en la posición vertical con la fase hacia fuera Los indicadores LED de c...

Page 17: ...d por 10 14 horas Carga de batería en nivel bajo Cuando el nivel de batería llega al nivel mínmo en el modo de FX 400 la unidad emite dos tonos de pitidos y se apaga automáticamente Importante Cargue la unidad por 10 14 horas Vida de batería El FX 400 tiene la función de ahorro de potencia interior para asegurar la vida útil de baterías más larga Pero cuando usted no usa las unidades debe apagarla...

Page 18: ... botón PTT para confirmar la configuración de canal Nota Refiérase a la sección de Tabla de Canal del Manual de Usuario para la lista de frecuencia detallada 3 4 1 Configuración de subcanal CTCSS Cada canal también tiene 38 subcanales para permitirle arreglar grupo de usuarios dentro el mismo canal para comunicación más privada Si usted ha configurado el subcanal usted sólo puede comunicar con otr...

Page 19: ...de usar la función de monitor para checar las señales débiles en el canal corriente a Pulse los botones MENÚ y ABAJO al mismo tiempo RX se demuestra en la pantalla LCD Su FX 400 acogerá las señales en el canal corriente incluyendo el ruido del fondo posterior b Pulse el botón PTT para detener el monitereo de canal 3 5 Configuración de sensibilidad VOX Voz Activada En el modo VOX el FX 400 no trans...

Page 20: ...DA Usted oirá un tono de timbre por aproximadamente dos segundos TX aparece en la pantalla LCD Cualquier otras unidades dentro del ámbito de transmisión y puestas al mismo canal y subcanal si aplicable oirán el tono de timbre de llamada 3 9 Seleccionar un tono de timbre de llamada El FX 400 se equipa con 5 tipos diferentes de tonos de timbre de llamada a Pulse el botón MENÚ 8 veces la pantalla LCD...

Page 21: ...l código CTCSS deseado 1 38 e Pulse el botón MENÚ para cambiar el código DCS f Pulse el botón PTT para confirmar su configuración g Pulse el botón PTT para salir 4 Funciones Auxiliares 4 1 Bloqueo de tecla La función de bloqueo de tecla permite a usuarios invalidar los botones de ARRIBA ABAJO y MENÚ entonces las configuracions de FX 400 no pueden cambiar las configuraciones por casualidad a Para a...

Page 22: ...o quema en el caso de que el material conductivo como joyas llaves o collares de cuentas toca el terminal expuesto El material puede complerta un circuito eléctrico cortocircuito y se caliente sumamente Debe prestar atención adecuada a manejar batería cargada sobre todo cuando la coloca dentro de bosillo monedero y otros contenedores con objetos metálicos ADVERTENCIA Para Vehículos con una bolsa d...

Page 23: ...áreas donde normalmente se aconseja apagar el motro de su vehículo 8 Limpieza y Mantenimiento Para limpiar su PMR use un tejido sueve mojado por agua No use detergentes o solventes que podría causar daño que no es responsabilidad de la garantía 9 DECLARACIÓNDECONFORMIDAD CE La sociedad Brondi S p A con sede legal en Via B Gozzoli n 60 00142 Roma y unidad operativa en Via Guido Rossa 3 10024 Moncal...

Page 24: ... 24 BRONDI S p A www brondi it info brondi it Version 1 16 May 2008 ...

Page 25: ... 25 FX 400 Twin PMR446 Radio mobile privée Manuel d utilisation Français ...

Page 26: ... quand les boutons sont bloqués Montrer quand les boutons sont bloqués Afficher quen le signal appel est allumé Afficher quand la fonction de vibration est activée Antenne Ecran LCD Affiche le canal présent Sélection et autres symboles radio Bouton PTT POUSSER POUR PARLER Appuyez sur et maintenez pour transmettre Bouton APPELER Appuyez sur pour envoyer la tonalité de sonnerie aux autres unités PMR...

Page 27: ... rechargeables suivant l orientation comme ce que montre la Figure 3 la flèche indiquant le frond c Remettre le couvercle du compartiment batterie Voir la Figure 4 Important Lire cet avertissement de sécurité avant le chargement de vos batteries Lors de mettre la FX 400 en chargement utiliser seulement les batteries rechargeables fournies avec la FX 400 Ne pas essayer de recharger les batteries no...

Page 28: ...V AC 50Hz avec l allumage de prise de courant réglé à OFF c Allumer la prise de courant principale La FX 400 doit être chargée en utilisant l adapteur principal fourni L utilisation d autre adaptateur causera la non conformité avec EN60065 et invalidera toutes approbations garantie a Mettre les appareils FX 400 dans la fourche de combiné à une position toute droite et face à l extérieur Les indica...

Page 29: ...à 4 niveaux Charge de la batterie à niveau haut Charge de la batterie à niveau moyen Charge de la batterie à niveau bas A ce niveau Important Charger l appareil pour 10 14 heures Charge de la batterie à niveau très bas Quand le niveau de batterie atteint son niveau minimal au mode de FX 400 allumée l appareil émettra deux tonalités de bip et la puissance s éteindra automatiquement Important Charge...

Page 30: ...Appuyer sur le bouton UP ou DOWN pour sélectionner le canal de votre choix c Le canal change de 1 à 8 ou vice versa d Appuyer sur le bouton PTT pour confirmer le réglage du canal Note Consulter la section Tableau de canal de ce manuel d utilisateur pour la liste détaillée de la fréquence 3 4 1 Régler le sous canal CTCSS Chaque canal a également 38 sous canaux pour que vous puissiez régler un group...

Page 31: ...e Moniteur pour vérifier les signaux faibles sur le canal présent a Appuyer sur les boutons MENU et DOWN en même temps RX s affichera à l écran LCD Votre FX 400 prendra les signaux dans le canal présent y compris le bruit de fond b Appuyer sur le bouton PTT pour arrêter de surveiller le canal 3 5 Régler la sensibilité de VOX Voix activée En mode VOX la FX 400 transmettra un signal seulement quand ...

Page 32: ...ue vous voulez communiquer avec eux Appuyer sur le bouton CALL Vous entendrez une tonalité de sonnerie pour environ deux secondes TX s affiche à l écran LCD Tous les autres appareils dans la portée de transmission et réglés au même canal et sous canal si applicable entendent la tonalité de sonnerie d appel 3 9 Sélectionner une tonalité de sonnerie d appel La FX 400 est équipée de 5 types différent...

Page 33: ... le canal présent c Appuyer sur le bouton MENU pour changer le code CTCSS d Appuyer sur le bouton UP ou DOWN pour sélectionner le code CTCSS code de votre choix 1 38 e Appuyer sur le bouton MENU pour changer le code DCS f Appuyer sur le bouton PTT pour confirmer votre réglage g Appuyer sur le bouton PTT pour quitter 4 Caractères auxiliaires 4 1 Blocage de touche Le caractère de blocage de touche p...

Page 34: ... endommagée prend contact avec la peau il causerait une brûlure mineure Batteries Toutes les batteries peuvent provoquer le dommage corporel et ou la blessure du corps telles que les brûlures si les matériels conductifs tels que les bijoux les clés ou les chaînes garnies de perles touchent les terminaux explosés Le matériel pourrait compléter un circuit électrique court circuit et devient tout à f...

Page 35: ...ient les produits chimiques ou les particules tels que les graines la poussières ou les poudres métales et toute autre zone où vous êtes normallement conseillé d éteindre le moteur de votre voiture 8 Nettoyage et soin Pour nettoyer votre PMR utiliser un tissue souple mouillé de l eau Ne pas utiliser les agents de nettoyage ou le solvent ces derniers pourraient causer le dommage que la garantie ne ...

Page 36: ... 36 BRONDI S p A www brondi it info brondi it Version 1 16 May 2007 ...

Page 37: ... 37 FX 400 Twin PMR446 Private Mobile Radio Gebrauchsanweisung Deutsch ...

Page 38: ...ion Tastenverriegelung aktiviert wird Zeigt das gegenwärtige Lautstärkeniveau von Lautsprecher an Angezeigt wenn das Anrufsignal aktiviert wird Angezeigt wenn die Funktion Vibrator aktiviert wird Antenne LCD Screen Zeigt die gegenwärtige Auswahl des Kanals und andere Radiosymbole an PTT PUSH to TALK Taste Drücken und halten um zu übertragen ANRUFEN Taste Drücken um Rufzeichen zu anderen PMR Geräte...

Page 39: ...Siehe Figur 4 Wichtig Diese Sicherheitsanweisung lesen bevor Sie die Batterien aufladen Wenn Sie das FX 400 in die Aufladeeinheit legen benutzen Sie nur die aufladbaren Batterien die mit dem FX 400 mitgeliefert werden Nicht versuchen nicht aufladbare Batterien aufzuladen Sicherstellen dass die Batterieraumabdeckung sicher an der richtigen Stelle verriegelt ist wenn Sie die Batterien aufladen Gebra...

Page 40: ...den beleuchten e Es dauert ungefähr 10 Stunden um die Batterien völlig aufzuladen wenn sie vollständig abgelaufen werden Neue Batterien nehmen bis zu 14 Stunden auf um völlig aufzuladen Den runden Stecker des 9 0V DC 200mA Adapters in die Schnittstelle für Aufladen einsetzen Den Hauptadapter an einen 230V AC 50Hz Steckdose mit dem Schalter anschließen der auf OFF eingestellt wird Die Hauptsteckdos...

Page 41: ...eistung zu konservieren 3 Bedienung 3 1 Übertragungsbereich Der Gesprächsbereich hängt von der Umwelt und vom Gelände ab Er sollte bis zu ungefähr 8km in den breiten geöffneten Räumen ohne Hindernisse wie Hügel oder Gebäude am größten sein Nicht versuchen zwei PMR Geräte zu gebrauchen die kleiner als 1 5m 5feet auseinander sind Wenn du so machen können Sie Störung erleben Um Funkfrequenzaussetzung...

Page 42: ...ngestellt haben können Sie nur mit anderen PMR Benutzern zu kommunizieren die zum gleichen Kanal und Unterkanal umgeschaltet haben a Die Taste MENU zweimal drücken wird die Nummer von gegenwärtigem CTCSS Unterkanal auf dem LCD angezeigt b Die Taste UP oder DOWN drücken um einen der 38 CTCSS Unterkanäle auszuwählen c Die Taste PTT drücken um die Einstellung von Unterkanal zu bestätigen Um die Funkt...

Page 43: ...der andere Töne um Ihnen aktiviert wird Das Gerät wird weiter für 2 Sekunden übertragen selbst wenn Sie stoppen zu sprechen Das Niveau von VOX Empfindlichkeit wird durch eine Zahl auf dem LCD Bildschirm angezeigt Auf dem höchsten Niveau wird die Geräte weichere Geräusche einschließlich Hintergrundgeräusch aufnehmen auf dem niedrigsten Niveau wird es nut ziemlich laute Geräusche aufnehmen a Die Tas...

Page 44: ... 8mal drücken zeigt der LCD Bildschirm die blinkende Anrufikone an b Die Taste UP oder DOWN drücken um den gewünschten Anruf Klingelton auszuwählen Ein jeweiliger Anruf Klingelton wird beim Ändern von einem Ton zu anderen abgespielt c Die Taste PTT drücken um Ihre Einstellung zu bestätigen 3 10 Aktivieren des Vibratormodus a Die Taste MENÜ 9mal drücken blinkt 0I auf dem LCD Bildschirm b Die Taste ...

Page 45: ...aktivieren damit die Einstellungen von FX 400 nicht versehentlich geändert werden konnten a Um die Funktion Tastenverriegelung zu aktivieren drücken und halten Sie die Taste MENÜ bis auf dem LCD Bildschirm erscheint b Um die Funktion Tastenverriegelung zu deaktivieren drücken und halten Sie die Taste MENÜ bis auf dem LCD Bildschirm verschwindet Die Taste PTT und POWER bleiben funktionell selbst we...

Page 46: ...behandeln besonders wenn sie sie innerhalb einer Tasche Geldbeutel oder anderer Behälter mit Metall legen WARNUNG Für Fahrzeug mit einem Airbag Ihr PMR nicht in den Bereich über einem Aribag oder in den Aribag Einsatzbereich legen Aribags blasen mit großer Kraft auf Wenn ein PMR in den Aribag Einsatzbereich gelegt wird und der Aribag aufbläst kann das PMR mit großer Kraft angetrieben werden und er...

Page 47: ...d Reinigungsmittel oder Lösungsmittel nicht benutzen die Beschädigung verursachen können die möglicherweise nicht durch Garantie abgedeckt werden kann 9 CE ÜBEREINSTIMMUNGSERKLÄRUNG LdieFa BRONDI S p A AG consedelegale in via B Gozzolin 60 00142 Roma und produktionseinheit in 1 10024 Moncalieri TO Turin Via Guido Rossa 3 deklariert dass das Gerät FX 400 twin nachstehenden normvorschriften ent spri...

Page 48: ... 48 BRONDI S p A www brondi it info brondi it Version 1 16 May 2008 ...

Reviews: