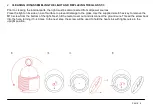
BROKIS Dome Nomad Installation Manual Download Page 3

CLEANING THE GLASS:

BROKIS upholds only the highest possible quality standards. Prior to shipping, the light undergoes several 
quality controls and stages of cleaning. Because transportation, storage, and the amount of time that passes 

between packing at our plant and subsequent unpacking by the client can affect the light in different ways, we 

strongly recommend cleaning it prior to assembly. 

The glass must first be rinsed in warm water, and a dish detergent may be used to remove all foreign particles, 

dust, and grease. Repeat the process if necessary and then dry the glass thoroughly with a paper towel.

Recommendation: Do not use mineral spirits, highly concentrated thinners, or other substances not intended for 

use on glass surfaces. Do not use any cleaning agents containing silicone, as they may leave a film and attract 

dust and smudges.

PRIOR TO SHIPPING, THE FUNCTIONALITY OF THE LIGHT AND ITS COMPONENTS ARE CHECKED THOROUGHLY. 
THE MANUFACTURER ASSUMES NO LIABILITY FOR THE MISHANDLING OF PRODUCTS.

DOME

Table light, Floor light

INSTALLATION 
MANUAL

BROKIS S.R.O.
ŠPANIELOVA 1315/25
163 00 PRAHA 6 - ŘEPY
CZECH REPUBLIC

ORG. ID 64940799
VAT ID CZ64940799
C 42174 MĚSTSKÝ SOUD
V PRAZE

TEL +420 567 211 517
[email protected]
[email protected]
WWW.BROKIS.CZ

PAGE 3

Cleaning information

Summary of Contents for Dome Nomad

Page 1: ...CM14132...

Page 2: ...king and assembling it The light must be charged before first use EXERCISE EXTRA CARE WHEN MOVING THE LIGHT THE LIGHT MUST BE SUPPORTED FROM BENEATH AT ALL TIMES AND MUST NEVER BE PICKED UP BY THE TOP...

Page 3: ...if necessary and then dry the glass thoroughly with a paper towel Recommendation Do not use mineral spirits highly concentrated thinners or other substances not intended for use on glass surfaces Do n...

Page 4: ...Place a finger on the side of the base to switch the light on and off or adjust the brightness SWITCHING THE LIGHT ON AND OFF DIMMING 1 PAGE 4...

Page 5: ...the supplied size 6 hex key to remove the M10 screw from the bottom of the light Next tilt the metal cover out and disconnect the ground wire Thread the screw back into the hole turning it 3 4 times I...

Page 6: ...e to the light use the supplied size 7 wrench to remove the M4 nuts around the circumference of the heat sink and then remove the stainless steel ring Do not let go of the screw CLEANING DISASSEMBLING...

Page 7: ...move it into the glass shade turn it sideways 90 degrees and then pull it out through the indentations in the glass After cleaning reassemble the light by following the steps in reverse order CLEANIN...

Page 8: ...ging cable on the light Charging is indicated by a blinking green diode which changes to solid green when charging is complete Time to full charge 6 5 hours Battery life from full charge 4 5 hours Rec...

Reviews: