Broadcom BCM94312HMGB User Manual Download Page 38

Europe—EU Declaration of Conformity and Restrictions 

Hereby, Broadcom Corp, declares that this equipment complies with the essential requirements and 
other relevant provisions of Directive 1999/5/EC.  

This equipment is marked with the 


0984 


symbol and can be used throughout the 

European community.  

This indicates compliance with the R&TTE Directive 1999/5/EC and meets the relevant parts of 
following technical specifications: 

EN 300 328 – Electromagnetic compatibility and Radio spectrum Matters (ERM); Wideband 
Transmission Systems; Data transmission equipment operating in the 2,4GHz ISM band and using 
spread spectrum modulation techniques; Harmonized EN covering essential requirements under 
article 3.2 of the R&TTE directive. 

EN 301 893 - Broadband Radio Access Networks (BRAN); 5 GHz high performance RLAN; 
Harmonized EN covering essential requirements of article 3.2 of the R&TTE Directive


EN 301 489-17 - Electromagnetic Compatibility and Radio Spectrum Matters (ERM); Electromagnetic 
Compatibility (EMC) standard for radio equipment and services; Part 17 Specific Conditions for 
Wideband Data and HIPERLAN Equipment. 

EN 60950 - Safety of Information Technology Equipment. 

EN 

62311

 – 

Assessment of electronic and electrical equipment related to human exposure restrictions

for electromagnetic fields (0Hz - 300 GHz).


Marking by the symbol  

  indicates that usage restrictions apply. 

France - 2.4GHz for Metropolitan France :  
  
In all Metropolitan départements, wireless LAN frequencies can be used under the following 
conditions, either for public or private use:  

· Indoor use: maximum power (EIRP*) of 100 mW for the entire 2400-2483.5 MHz frequency band 

· Outdoor use: maximum power (EIRP*) of 100 mW for the 2400-2454 MHz band and with maximum 
power (EIRP*) of 10 mW for the 2454-2483 MHz band 


Caution: Exposure to Radio Frequency Radiation. 

To comply with RF exposure compliance requirements, for mobile configurations, a separation distance 

of at least 20 cm must be maintained between the antenna of this device and all persons.


Summary of Contents for BCM94312HMGB

Page 1: ...tions Specifications Regulatory Information Company Copyright Statement Company Trademark Statement Microsoft and Windows are trademarks owned by Microsoft Corporation All other trademarks are the pro...

Page 2: ...networking needs grow WEP is a security protocol for wireless local area networks defined in IEEE Std 802 11 1999 Edition that encrypts data sent over radio waves The use of the WEP key is optional a...

Page 3: ...that are connected to each other to share files or common equipment such as a printer or an Internet connection A wireless LAN provides the same functionality of a wired network but it eliminates the...

Page 4: ...Introduction Back to top Back to Contents Ccopyright and Trademark Information file P User 20Manuals HP 20XP 20WLAN 20Card intro htm 3 of 3 1 30 03 10 11 16 PM...

Page 5: ...LAN to access the resources and tools of the wired LAN including Internet access e mail file transfers and printer sharing Characteristics Networked computers communicate with each other through a de...

Page 6: ...ocated within a certain range Configuring a Network Profile To connect to a wireless network a network profile for that network must be configured on the 802 11g enabled notebook If the 802 11g enable...

Page 7: ...res a WEP key check with your network administrator to see if a WEP key is required NOTE Both the network name and the network key are case sensitive Configuring a Profile for a Listed Network That Do...

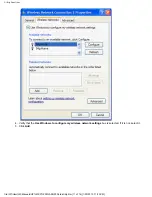
Page 8: ...ble click Network Connections 3 Right click Wireless Network Connection and then click Properties 2 Click the Wireless Networks tab 3 Under Available networks click the network name and then click Con...

Page 9: ...Completing the Setup 4 Click OK The network name and icon appear at the top of the list under Preferred networks file P User 20Manuals HP 20XP 20WLAN 20Card setup htm 5 of 15 1 30 03 10 11 18 PM...

Page 10: ...ble does not appear click Refresh If it still does not appear try to access a Web page to verify that an Internet connection exists Configuring a Profile for a Listed Network That Requires a WEP Key 1...

Page 11: ...ting the Setup 2 Click the Wireless Networks tab 3 Under Available networks click the network name and then click Configure file P User 20Manuals HP 20XP 20WLAN 20Card setup htm 7 of 15 1 30 03 10 11...

Page 12: ...Confirm network key box NOTE It is not necessary to select the Key format or the Key length before typing the network key These settings automatically change to the appropriate setting as the network...

Page 13: ...ot appear click Refresh If it still does not appear try to access a Web page to verify that an Internet connection exists Configuring a Profile for a Network That Is Not Listed and Does Not Require a...

Page 14: ...Completing the Setup 2 Click the Wireless Networks tab 3 Click Add file P User 20Manuals HP 20XP 20WLAN 20Card setup htm 10 of 15 1 30 03 10 11 18 PM...

Page 15: ...WLAN User Manual 4 Type the network name in the Network name SSID box 5 Click OK The network name and icon appear at the top of the list under Preferred networks file P User 20Manuals HP 20XP 20WLAN...

Page 16: ...ot appear click Refresh If it still does not appear try to access a Web page to verify that an Internet connection exists Configuring a Profile for a Network That Is Not Listed and Requires a WEP Key...

Page 17: ...Completing the Setup 2 Click the Wireless Networks tab 3 Click Add file P User 20Manuals HP 20XP 20WLAN 20Card setup htm 13 of 15 1 30 03 10 11 18 PM...

Page 18: ...k key in the Network key box and again in the Confirm network key box NOTE It is not necessary to select the Key format or the Key length before typing the network key These settings automatically cha...

Page 19: ...etworks tab The computer is connected to the selected network when a blue bubble appears on top of the icon for that network If the bubble does not appear click Refresh If it still does not appear try...

Page 20: ...tart then click Control Panel 2 Double click Network Connections 3 Click Wireless Network Connections and then click Change settings of this connection Click the Wireless Network tab to configure avai...

Page 21: ...e is sold Before operating this WLAN device verify that the locale selection is correct by following the steps described in Changing Settings above On the Advanced tab of HP WLAN 54g W450 Network Adap...

Page 22: ...mode In Power Save mode the radio is periodically powered down to conserve power When in Power Save mode packets are stored in the AP until the STA comes on Adding a New Network to the List of Prefer...

Page 23: ...en click Change settings of this connection 3 Click the Wireless Networks tab 4 Verify that the Use Windows to configure my wireless network settings box is selected If it is not select it 5 Under Pre...

Page 24: ...work must be added under Preferred networks See Running Utility Functions Select a desktop computer to serve as the host computer all other computers are called clients The host computer must be runni...

Page 25: ...en to complete setting up ICS Adding an Ad Hoc Network An ad hoc network for peer to peer communicating can either require a WEP key or not Instructions for adding and configuring an ad hoc network fo...

Page 26: ...Utility Functions 4 Click Add file P User 20Manuals HP 20XP 20WLAN 20Card utility htm 7 of 14 1 30 03 10 11 19 PM...

Page 27: ...s a computer to computer ad hoc network wireless access points are not used box 7 Clear the Data encryption WEP enabled and the The Key is provided for me automatically boxes if they are selected 8 Cl...

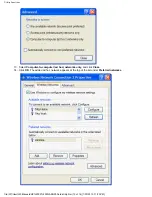
Page 28: ...Utility Functions 9 Click Advanced 10 Select Computer to computer ad hoc networks only and click Close file P User 20Manuals HP 20XP 20WLAN 20Card utility htm 9 of 14 1 30 03 10 11 19 PM...

Page 29: ...the Wireless Networks tab The computer is connected to the added network when a blue bubble appears on top of the icon for the ad hoc network Adding an Ad Hoc Network That Requires a WEP Key 1 Click S...

Page 30: ...ions 4 Verify that the Use Windows to configure my wireless network settings box is selected If it is not select it 5 Click Add file P User 20Manuals HP 20XP 20WLAN 20Card utility htm 11 of 14 1 30 03...

Page 31: ...key in the Network key box NOTE It is not necessary to select the Key format or the Key length before typing the network key These settings automatically change to the appropriate setting as the netw...

Page 32: ...uter to computer ad hoc networks only and click Close 14 Click OK The added ad hoc network appears at the top of the list under Preferred networks file P User 20Manuals HP 20XP 20WLAN 20Card utility h...

Page 33: ...he added network when a blue bubble appears on top of the icon for that network Disabling the Radio To disable the radio on the Company 54g enabled notebook right click the wireless network connection...

Page 34: ...at the Bluetooth USB Module is properly inserted inside your computer If you started at Step 1 Installing the Software The Found New Hardware Wizard detects and installs the device When the installati...

Page 35: ...vices Link Key An internally generated unique security key based on a Passkey the Bluetooth Device Address and an internally generated random number that is exchanged by paired devices as proof of ide...

Page 36: ...determined by tuning the equipment off and on the user is encouraged to try and correct the interference by one or more of the following measures Reorient or relocate the receiving antenna Increase t...

Page 37: ...To reduce potential radio interference to other users the antenna type and its gain should be so chosen that the equivalent isotropically radiated power EIRP is not more than that required for succes...

Page 38: ...489 17 Electromagnetic Compatibility and Radio Spectrum Matters ERM Electromagnetic Compatibility EMC standard for radio equipment and services Part 17 Specific Conditions for Wideband Data and HIPERL...

Page 39: ...Taiwan DGT warning statement Appendix ID CCXXxxLPyyyZz CCXXxxLPyyyZz...

Reviews: