


o
DVI line:
if your PC has an HDMI output, you can buy a simple HDMI/DVI conversion cable. If
your PC only has VGA output, you will need a USB/DVI-converter. In fact this is an external
video card which converts USB signals to DVI. (possible supplier:
www.manhattan-
products.com
“hi-speed USB2.0 to DVI converter”)
-
VP-PC INTERFACE
VP-SCANBOX:
1 CAT6-cable can be connected between the U-sender output of the VP-PC INTERFACE and the
RJ45 input of the VP-SCANBOX. This cable can reach a length up to 100m.
Software setup
-
Insert the CDROM: a window pops up
choose “installing
LED play software”
-
Select ENGLISH as installation language
-
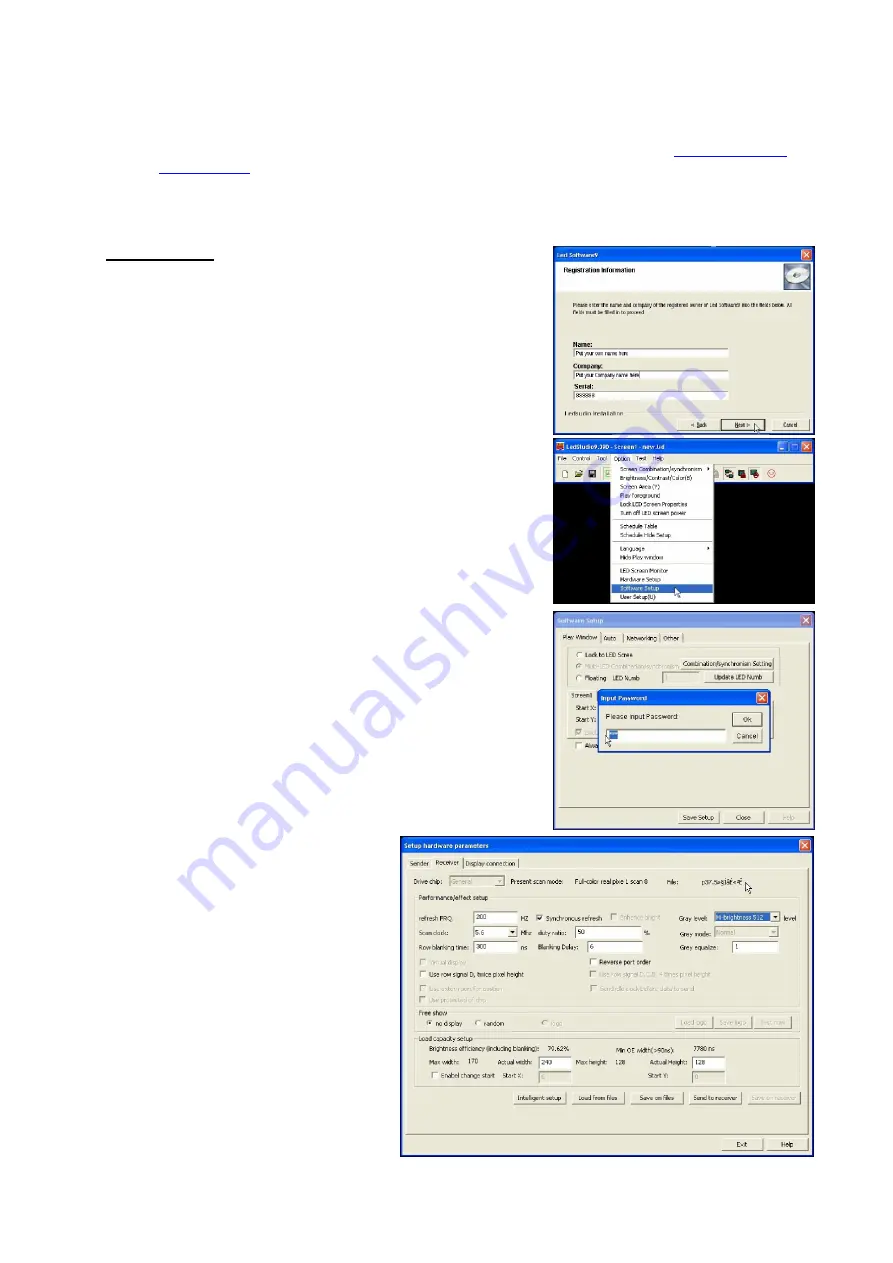
Registration information:
o
Name:
put your name
o
Company:
put the name of the venue or your company.
o
Serial:
just put key in
888888
-
Press the “next” button
software will be installed.
-
Start LED STUDIO program
-
Open the OPTION menu and select “Software setup”
a
new window opens.
-
Put the cursor (Windows arrow) somewhere in this new
window (but NOT in a data input filed!) and press
linsn
(you
will hear some noises while typing this word)
a password
window opens.
-
Please insert the password
168
and press the OK button.
-
In the new window (setup hardware
parameters): choose the option
“RECEIVER” on the top.
-
On the bottom press the button
“LOAD FROM FILES” and load the
file “
p37.5R.RCG
” (configuration file,
supplied with the screen)
on the
upper right of the window you will
see the name of the file appearing.
(see picture on the right)
-
Just below, please change the option
“gray level” to “Hi-brightness 512” (or
Hi-brightness 256”)
-
On the second part of the window


