12
13
1
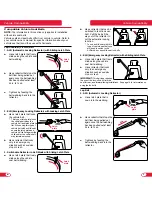
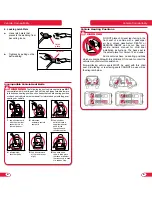
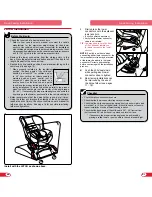
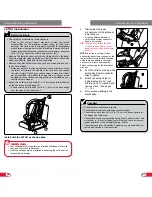
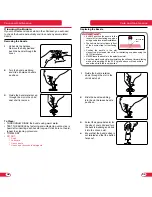
Unbuckle the harness.
Remove the belly pad and
push the buckle through the
cover.
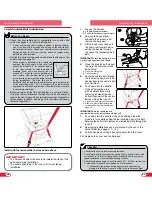
IMPORTANT:
• ALWAYS position the buckle in the
inner slot for rear-facing use when
using a vehicle seat belt installation.
• The vehicle belt must pass in front of
the buckle strap for rear-facing use.
• Position the buckle in the slot closest
to but not under the child for rear-facing use when using the
LATCH installation.
• NEVER leave the buckle in the adjustment slot.
• Use the outer buckle slot when installing the child seat forward-
facing with a child weighing 13.6 kg (30 lbs) and above or if the
buckle is under the child in the inner position.
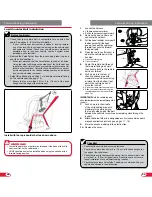
ADJUSTMENT
SLOT
2
Turn the buckle webbing
and slide it between buckle
positions.
3
Slide the buckle retainer into
the buckle slot, and ensure
the red release button faces
out.
Adjusting the Buckle Position
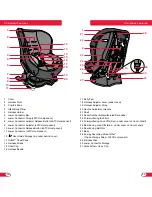
Child Seat Functions
Child Seat Functions
2
3
4
5
6
7
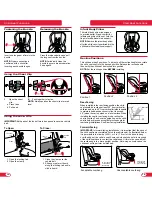
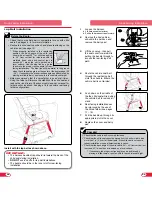
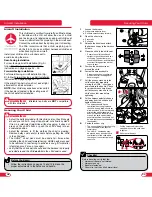
NOTE:
In
rear-facing
mode,
always position the harness straps
at or
below
your child’s shoulders.
See page 5.
IMPORTANT
: HUGS pads may
need to be removed to achieve a
snug fit in rear facing.
In
forward-facing
mode, always
position the harness straps at or
above
your child’s shoulders. See
page 5.
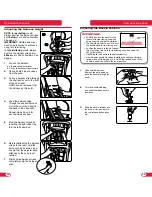
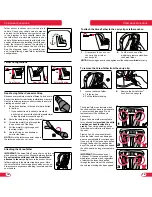
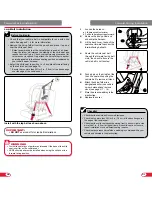
1
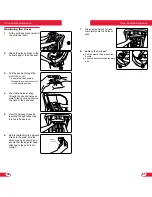
Loosen the harness.
a Lift harness adjuster lever
b Pull both harness straps forward
2
Unhook both harness straps
from the yoke.
3
Pull one harness strap through
the shell and cover to the front
of the child seat.
HUGS can be removed from
the harness as this point.
4
Feed the harness strap
through the desired harness
slot in the cover and shell to
the back of the child seat.
Repeat steps 3 and 4 for
second harness strap.
5
Nest the harness straps by
inserting the right strap loop
into the left strap loop.
6
Before reattaching the harness
straps to the yoke, hold the
harness yoke as shown, and
ensure that the adjuster strap
attached to the yoke is not
twisted.
7
Slide nested harness straps
completely onto the harness
yoke.
Adjusting the Harness Height
1b
1a
Adjuster
Strap
Summary of Contents for HIGHWAY 65
Page 44: ...84 ...


