1
5
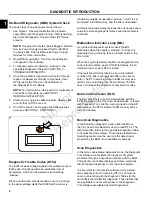
Install Service Power Supply Harness
1. Obtain Briggs & Stratton Service Power Supply
Harness (Part No. 847252) and service battery.
2. Verify that service battery voltage is above 12v.
CAUTION
Observe the following precautions to avoid ECM
damage.
•
Do not connect the harness directly to
a charging system or to a battery that is
connected to a charging system.
•
Do not connect the harness to a battery that is
connected to the engine charging system.
•
Although it may be used regardless of
whether the engine is running or not, do
not connect or disconnect the harness from
either the engine or battery while the engine is
running.
3. Install red wire alligator clip on Service Power Supply
Harness to battery positive (+) terminal.
4. Install black wire alligator clip on Service Power
Supply Harness to battery negative (-) terminal.
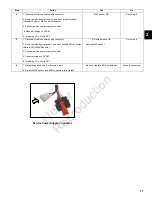
5. Connect Service Power Supply Harness to service
power supply connector on EFI wire harness. See A
of Figure 2.
2
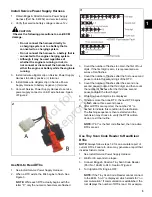
Use MIL to Read DTCs
1. See
Install Service Power Supply Harness.
2. When a DTC exists, the MIL begins to flash. See
NOTE:
While each DTC actually begins with the
letter “P,” only the numeric characters are flashed.
3
3. Count the number of flashes to obtain the first of four
digits. If the first digit is zero, it is represented as a
series of ten flashes.
4. Count the number of flashes after the first one second
pause to obtain the second digit of the DTC.
5. Count the number of flashes after the second one
second pause to obtain the third digit, and then count
the number of flashes after the third one second
pause to obtain the fourth digit.
6. Write down each digit as it is displayed.
7. If there is more than one DTC, the next DTC begins
to flash after a three second pause.
8. After all DTCs are reported, the number “61” is
flashed to indicate this condition to the technician.
The flashing sequence is then restarted and the
technician may choose to verify the DTCs written
down or exit the routine.
NOTE:
If “61” is the first code flashed, then no active
DTCs are set.
Use Tiny Scan Code Reader to Read/Clear
DTCs
NOTE:
Always follow steps 1-9 for an accurate report of
current DTCs. Failure to do so may generate a report that
includes historic codes.
1. See
Install Service Power Supply Harness.
2. Wait for 30 seconds to elapse.
3. Connect Briggs & Stratton Tiny Scan Code Reader
(Part No. 19626) to DLC. See B of Figure 2.
4. Turn Ignition ON, Engine OFF.
NOTE:
If the Tiny Scan Code Reader cannot connect
to the ECM, “no-C” is displayed, which stands for “no
communication.” If communication is established, the
tool displays the number of DTCs read. For example,
Not for
Reproduction
Summary of Contents for Vanguard EFI 380000
Page 2: ...N o t f o r R e p r o d u c t i o n ...
Page 6: ...N o t f o r R e p r o d u c t i o n ...
Page 12: ...1 8 N o t f o r R e p r o d u c t i o n ...
Page 64: ...2 60 N o t f o r R e p r o d u c t i o n ...
Page 68: ...3 64 MODEL 380000 EFI ELECTRICAL SCHEMATIC N o t f o r R e p r o d u c t i o n ...
Page 82: ...4 78 N o t f o r R e p r o d u c t i o n ...
Page 85: ...5 81 This page is intentionally left blank N o t f o r R e p r o d u c t i o n ...
Page 95: ...5 91 This page is intentionally left blank N o t f o r R e p r o d u c t i o n ...
Page 96: ...5 92 17 N o t f o r R e p r o d u c t i o n ...
Page 98: ...5 94 This page is intentionally left blank N o t f o r R e p r o d u c t i o n ...


