background image


20


2.2


Connect to NVR


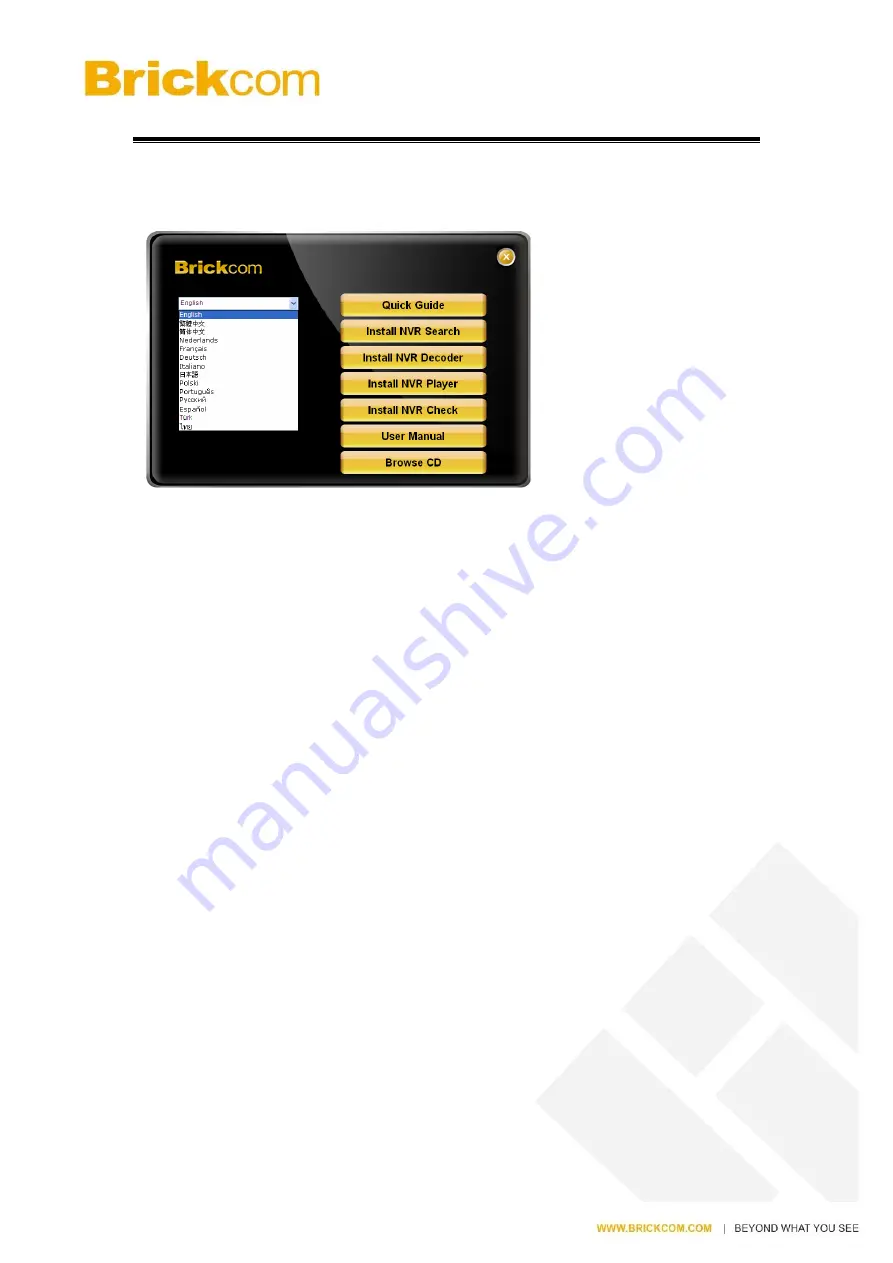
To begin, please insert the product CD-ROM in a PC to access the Quick Guide, User 

Manual and install the utilities. As user runs the product CD, the following menu is 

displayed. 


2.2.1


Quick Guide


Click “

Quick Guide

” to enter the folder and double click the file to open. Please read 

Quick Guide to quickly understand the process of NVR installation. 


2.2.2


Install NVR Search 

Click “

Install NVR Search

” to find NVR in the network. Please follow the instructions 

to install and EZ Search will run automatically.


When installing EZ Search, 

Shield Wizard window for NVR Search

 will pop up.   

Click “

Next

” to continue installation.


Read the license agreement and click “

I accept the terms of the license agreement

”. 

Click “

Next

” to continue installation.


Select a location of destination and select a folder where the setup can install files. 

The default location is

: C:\Program Files (x86)\NVR\EZ Search. 

Users can also install 

NVR Search in other folder by clicking “

Change

” and select a location as below. Click 

OK

” to save the setting.   


Summary of Contents for MNR-1104+

Page 1: ...tion in this document is subject to change without notice Copyright 2015 All rights reserved Product name Network Video Recorder Release Date 2016 05 Manual Revision V3 0 Web site www brickcom com Ema...

Page 2: ...ors Status 8 1 2 1 NR 1000 Series 8 1 2 2 NR 2000 Series 10 1 2 3 NR 4000 Series 11 1 2 4 NR 8000 RM Series 13 1 2 5 NR 16300 RM Series 15 1 3 Dual Display Solution HDMI VGA DVI I Connection 18 Chapte...

Page 3: ...accessories listed on the Package Contents of Quick Installation Guide are included Before installing the NVR please read the instructions in the Quick Installation Guide to avoid misuse and then fol...

Page 4: ...Rear View of NR 1100 Series 1 Power button 2 LED indicators HDD 3 USB 2 0 x1 Support auto video backup 4 USB 2 0 x1 5 Power connector 6 USB 3 0 x 2 7 DVI I 8 eSATA x 1 9 HDMI x 1 10 Gigabit LAN 11 US...

Page 5: ...f NR 2100 Series 1 Power button 2 LED indicators HDD 3 USB 2 0 x1 Support auto video backup 4 USB 2 0 x1 5 Power connector 6 USB 3 0 x 2 7 DVI I 8 eSATA x 1 9 HDMI x 1 10 Gigabit LAN 11 USB 2 0 x 2 12...

Page 6: ...ton 3 USB BACKUP button Auto video backup 4 USB 2 0 x 1 Support auto video backup 5 USB 2 0 x 1 6 HDD1 7 HDD2 8 HDD3 9 HDD4 10 Gigabit LAN x 2 11 USB 2 0 x 4 12 eSATA x 2 13 VGA output 14 HDMI output...

Page 7: ...HDD8 2 Power button 3 USB BACKUP button Auto video backup 4 USB 3 0 x 1 Support auto video backup 5 HDD1 6 HDD2 7 HDD3 8 HDD4 9 HDD5 10 HDD6 11 HDD7 12 HDD8 13 Gigabit LAN x 2 14 USB 2 0 x 4 15 eSATA...

Page 8: ...video backup 4 USB 3 0 x 1 Support auto video backup 5 HDD1 6 HDD2 7 HDD3 8 HDD4 9 HDD5 10 HDD6 11 HDD7 12 HDD8 13 HDD9 14 HDD10 15 HDD11 16 HDD12 17 HDD13 18 HDD14 19 HDD15 20 HDD16 21 Gigabit LAN x...

Page 9: ...SW Bypass Ignition 3 2 5 Removable HDD tray x 1 4 Gigabit LAN x 4 5 USB 2 0 x 4 6 Antenna port x4 7 DI DO port 8 HDMI x 1 9 DVI D x 1 Reserved 10 VGA x 1 11 12V DC power output 12 9 36 DC power input...

Page 10: ...s the power button in the 1st second and press the power button again in the 2nd second It will be easier to operate the reset to default with the assistance of watch or clock Note Once users press re...

Page 11: ...ond In other words please press the power button in the 1st second and press the power button again in the 2nd second It will be easier to operate the reset to default with the assistance of watch or...

Page 12: ...nge blinking The eSATA device is being accessed HDD1 HDD2 HDD3 HDD4 Off Hard disk drive device is not established Green Hard disk drive is ready to be accessed Green blinking Hard disk drive data is b...

Page 13: ...Mbps connection Orange 1000Mbps connection USB BACKUP will start and beep after 3 seconds user presses BACKUP button To turn off NVR user needs to press power button at least 2 seconds Note Once users...

Page 14: ...inking The eSATA device is being accessed HDD1 HDD2 HDD3 HDD4 HDD5 HDD6 HDD7 HDD8 Off Hard disk drive device is not established Green Hard disk drive is ready to be accessed Green blinking Hard disk d...

Page 15: ...nge 1000Mbps connection USB BACKUP will start and beep after 3 seconds user presses BACKUP button To turn off NVR user needs to press power button at least 2 seconds The LED in the HDD trays are reser...

Page 16: ...ission Orange blinking The eSATA device is being accessed HDD1 to HDD16 Off Hard disk drive device is not established Green Hard disk drive is ready to be accessed Green blinking Hard disk drive data...

Page 17: ...nge 1000Mbps connection USB BACKUP will start and beep after 3 seconds user presses BACKUP button To turn off NVR user needs to press power button at least 2 seconds The LED in the HDD trays are reser...

Page 18: ...to be removed Power Off Power Off Green Power On 3G Off 3G module is not ready to be accessed Green 3G module is ready to be accessed Wi Fi Off Wi Fi module is not ready to be accessed Green Wi Fi mod...

Page 19: ...e same time for video output NR 1100 Series NR 2100 Series provide HDMI and DVI I port for local display Users can connect both of HDMI and DVI I at the same time for video output Scenario A If both m...

Page 20: ...ecommended Note User is suggested to connect cameras and NVR with Gigabit switch Memory For channels under 16 DDR3 4G or above For channels over 16 DDR3 8G or above Graphics Adapter AGP or PCI Express...

Page 21: ...rch to find NVR in the network Please follow the instructions to install and EZ Search will run automatically When installing EZ Search Shield Wizard window for NVR Search will pop up Click Next to co...

Page 22: ...is installing NVR Search Please wait until the Wizard completes the installation The installation is complete Please click Launch application when done installing to execute NVR Search After finishing...

Page 23: ...Model name of connected NVR Users can click Search to search NVR Introduction of NVR Search NVR Search provides three kinds of toolbars for users 1 File You can click Exit to leave NVR Search and clo...

Page 24: ...ted to enter the login information of NVR before being allowed to change the setting When accessing the NVR setting users will be prompted to enter username and password For the first time use the def...

Page 25: ...ess of adding a NVR to a local area network Once connected to a LAN NVR will automatically appear on the internet You can rename UPnP Name on the NVR Click OK to finish the setting 2 Network Two model...

Page 26: ...25 3 Option Option provides several languages Once you click Connect or double click the selected NVR list IE browser will pop up automatically for the web based interface...

Page 27: ...k Specify an IP address If there is no DHCP server existing in network environments the static IP address will be given as 192 168 1 245 It should be adaptable in most networking environment and user...

Page 28: ...27...

Page 29: ...the instructions of the Overview of wizard to complete the system setup Once the five steps of Quick Configuration are complete you can click Start Liveview to start monitoring For further details of...

Reviews: