


WPS
WPS
Continuous Illumination
Firmware
Upgrade
Continuous Illumination
Privacy
Continuous Illumination
Privacy
Unlit
Hardware Reset
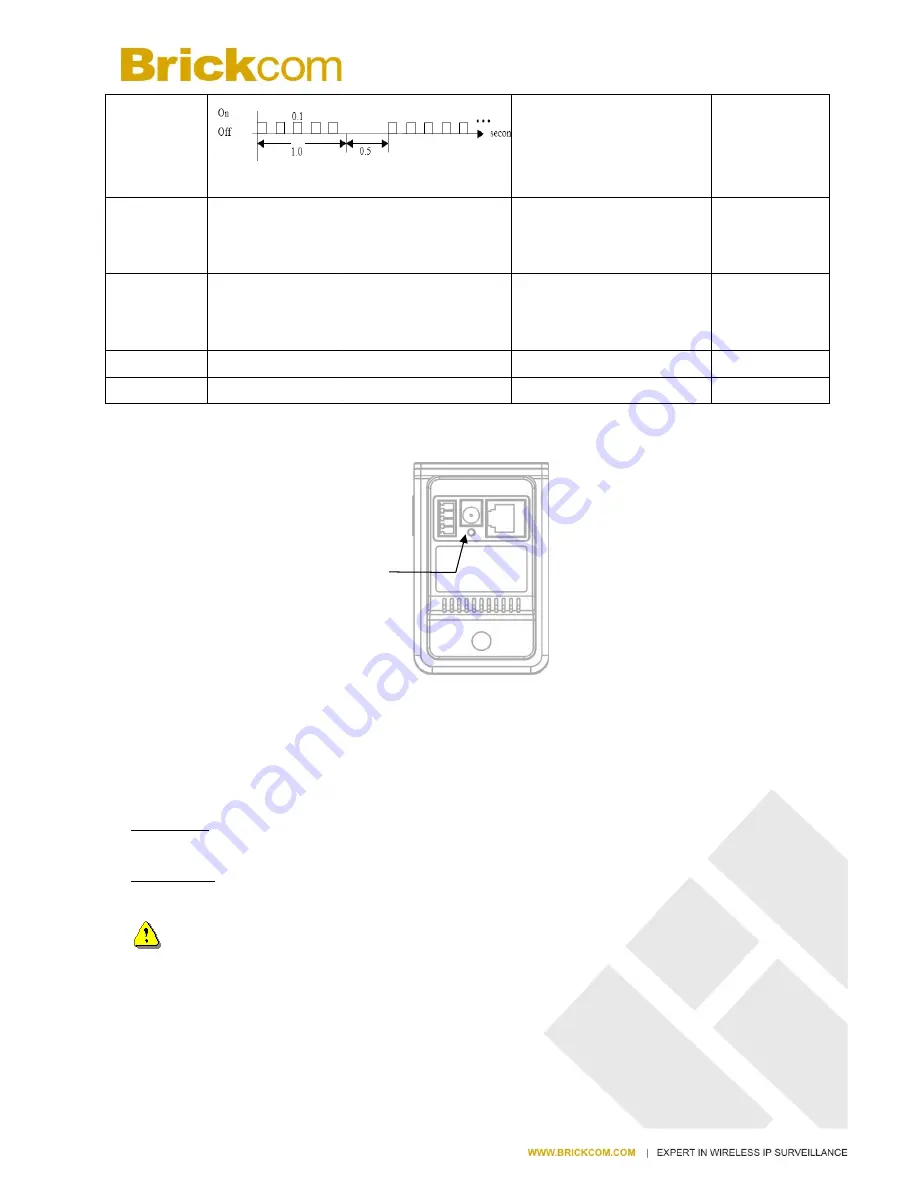
The Reset Button can be used to reboot the camera or restore it to factory default settings. If
the camera experiences a problem, rebooting the camera may correct the problem. If the
problem remains, please restore the camera to factory default settings and reinstall the
software.
To Reboot - Press and hold the Reset Button for one second using a paper clip or thin object.
Wait for the camera to reboot.
To Restore – Press and hold the Reset Button for
When successful restored, the LED will be blue during normal operation.
NOTE -
By restoring the camera, all settings will be restored to the factory default settings.
Micro-SD/SDHC Card Capacity
The network camera is compatible
Reset Button
- 6 -
Session overlap detected
Continuous Illumination
WPS success
Continuous Illumination
Firmware successfully
upgraded
Continuous Illumination
Privacy mask active
Privacy mask inactive
CB-500A Series
The Reset Button can be used to reboot the camera or restore it to factory default settings. If
the camera experiences a problem, rebooting the camera may correct the problem. If the
lease restore the camera to factory default settings and reinstall the
Press and hold the Reset Button for one second using a paper clip or thin object.
Wait for the camera to reboot.
Press and hold the Reset Button for ten seconds until the LED light turns off.
When successful restored, the LED will be blue during normal operation.
By restoring the camera, all settings will be restored to the factory default settings.
Card Capacity
compatible with Micro-SD/SDHC (Maximum 3
Reset Button
Session overlap detected
WCB-500A
/WCB-502A
Fourth (Blue)
WCB-500A
/WCB-502A
Fourth (Blue)
Firmware successfully
CB-500A
SERIES
Fourth (Blue)
Privacy mask active
Bottom(Red)
Privacy mask inactive
Bottom(Red)
The Reset Button can be used to reboot the camera or restore it to factory default settings. If
the camera experiences a problem, rebooting the camera may correct the problem. If the
lease restore the camera to factory default settings and reinstall the
Press and hold the Reset Button for one second using a paper clip or thin object.
ten seconds until the LED light turns off.
When successful restored, the LED will be blue during normal operation.
By restoring the camera, all settings will be restored to the factory default settings.
32GB) cards.


