


42
42
Turn Volume on/off.
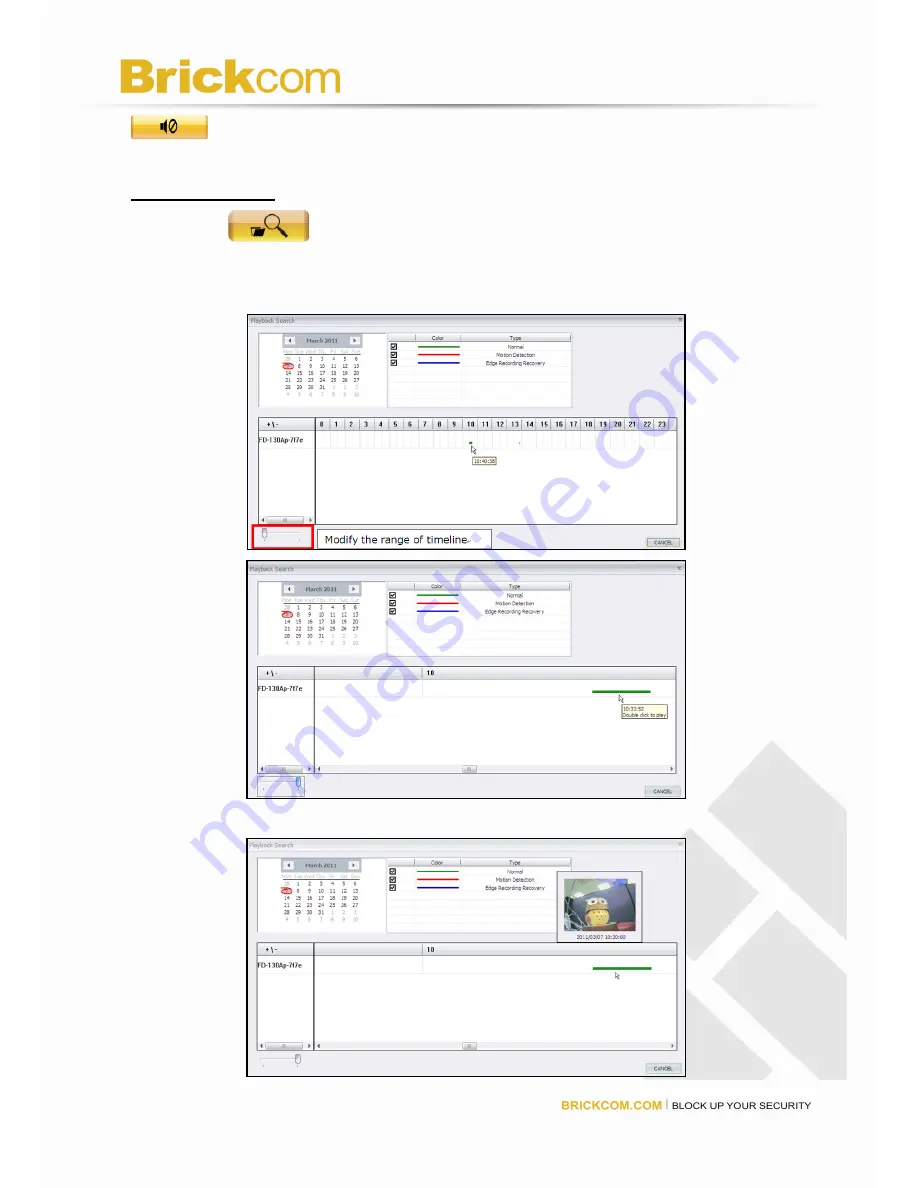
Search Image File
Click on the
<
Search Image File
> icon to search for recorded files by date.
Click the options to indicate normal and/or event video clips in the specific time frame.
The corresponding preview will display if the mouse move to timeline.
Double Click the blank area or modify left below bar to focus the period. Otherwise, it is


