background image

Operation and Safety Manual

Model VA2000 Automatic Food Slicer

Operation and Safety Manual

Model VA2000 Automatic Food Slicer

3.2 Cleaning

12. Loosen the large knurled knob at the back of the blade drive housing (behind the blade) 

while steadying the blade guard (11). Push the knob back in to press the blade guide 
out into your hand.

When the machine is dismantled for cleaning, the individual parts may be cleaned and 
sterilised by total immersion in warm water with addition of a non toxic detergent. A brush 
assists in the cleaning process. 
After the parts have been cleaned they should be rinsed in clean hot water. 
Wash down the body of the machine using a cloth immersed in warm water and detergent. 
Rinse the machine with a cloth immersed in clean hot water and wipe dry.
When dry, each part should be fi tted to the machine in the reverse order of dismantling. 

Cleaning the Blade

The blade should only be cleaned either before the main body of the machine is cleaned, or 
after it has been wiped dry from cleaning. 

Extreme care must be taken when cleaning the blade. You must wear appropriate hand 
protection, such as steel mesh safety gloves, for this procedure as it involves touching 
the blade. You risk serious injury if you do not wear protective gloves.

To clean the blade, proceed as follows:
1.    With the machine partially disassembled and the blade guard removed, plug the 

machine back into the power supply.

2.    Switch on the machine by pushing the green push button - Display is illuminated.
3.    If you have not already done so, close the thickness plate completely. Push the 

“Stacking” key.  The blade will start rotating.

4.    As the blade rotates, slowly wipe a cloth immersed in warm water and detergent across 

the face of the blade toward the thickness plate. Repeat on the back of the blade.

5.    Push the “Stacking” key again to stop the blade.
6.    Switch off the machine by pressing the red push button, and then remove the plug 

from the power socket. 

7.    CAREFULLY place a moist cloth between the blade edge and the fi xed blade guard ring. 

Turning the blade by hand, guide the cloth around the inside of the guard ring.

8.    CAREFULLY dry off the blade and blade guard ring before reassembling.

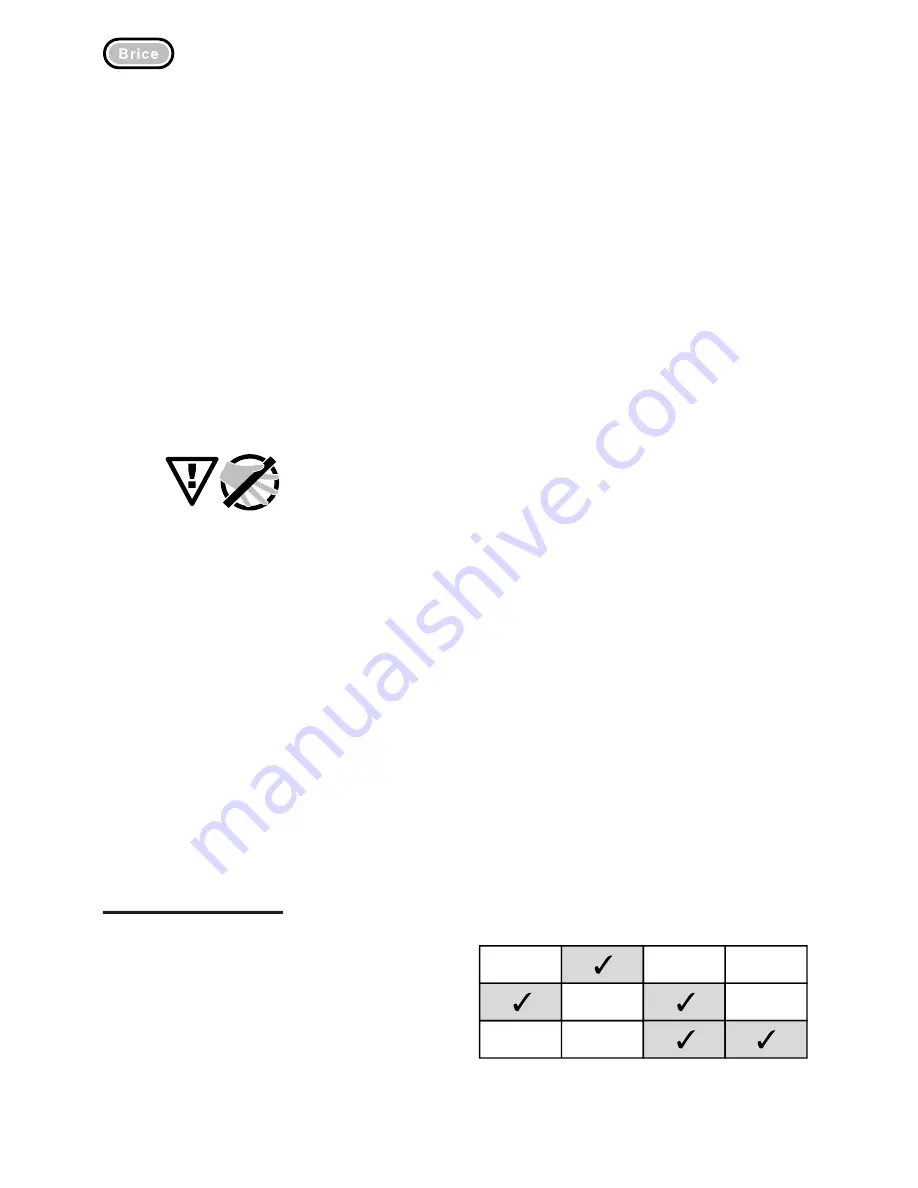
Cleaning Schedule

How frequently the slicer is cleaned will depend on how heavily the machine is used. 
However, we recommend that you thoroughly clean the machine at least once a day as a 
MINIMUM requirement to maintain hygene.

Wipe down slicing guide,

meat table & centre plate

Wipe down all exposed

surfaces (no disassembly)

Clean all surfaces including

blade (disassemble machine)

After

every use

Before

first use

Every

half day

After

last use

The cleaning schedule

Summary of Contents for VA2000

Page 1: ...Model VA2000 Programmable Automatic Slicer Operation and Safety Manual...

Page 2: ...r hand to hold food stuffs in place on the meat table 6 NEVER touch the slicer blade when it is rotating 7 KEEP hands arms hair and loose clothing CLEAR of all moving parts 8 Should the slicer jam TUR...

Page 3: ...uble free operation of the slicer Trouble shooting a quick reference chart to help you solve some of the problems you might encounter with the Model VA2000 Conventions and Symbols used in this Manual...

Page 4: ...rough fingers and hands just as easily as products to be sliced WHENEVER YOU CARRY OUT ANY PROCEDURE THAT PLACES YOUR HANDS ON OR NEAR THE SLICER BLADE YOU MUST WEAR SUITABLE PROTECTIVE HAND COVERINGS...

Page 5: ...der and Meat Comb to minimise slicing waste Complete self contained inbuilt sharpening device Chain driven blade and fan cooled motor Safety cutout switches for sharpener and blade cover Separate push...

Page 6: ...to move or lift the slicer without assistance Make sure that the surface that you intend placing the slicer on is solidly constructed to take the weight of the slicer flat level dry and smooth Ideally...

Page 7: ...minated Close the thickness plate completely The blade has to rotate in direction of arrow counter clockwise Stop the blade by pushing the red Stop button If the blade rotates in the wrong direction t...

Page 8: ...y to the operator Non food articles Food products with bones Deep frozen food products Pre operational checks Before using the machine check the following Is the stacker arm firmly located in its corr...

Page 9: ...sh the lever counter clockwise to upper position 3 Move the carriage by hand until it is engaged 4 Carriage can no longer be moved by hand now Adjusting movement by hand 1 Switch off the machine 2 Pul...

Page 10: ...o the food product 6 Adjust the thickness of slices with the thickness knob max 10 mm 7 Position the end piece holder so that the food product is pushed up against the thickness plate Adjusting the sp...

Page 11: ...thickness correctly adjusted start the slicing program as follows 1 Push the green main switch 2 Select the appropriate slicing program stacking or shingling using the two program buttons 3 The VA2000...

Page 12: ...ed in warm water and squeezed dry This removes any dust or other matter that may have been deposited over night 2 Before the start of each cutting operation and with the slicer switched off wipe down...

Page 13: ...gloves To clean the blade proceed as follows 1 With the machine partially disassembled and the blade guard removed plug the machine back into the power supply 2 Switch on the machine by pushing the gr...

Page 14: ...that require lubrication are either sealed in oil baths or have self lubricating bearings and no user maintenance is required However the exposed guide axles for the end piece holder and the carriage...

Page 15: ...e front and raise the end piece holder 5 Position the sharpening device on the carriage The claws at the head of the device have to grip over the front edge of the carriage and the claw on the device...

Page 16: ...ce Distance between deflector fingers and blade is too large Short term voltage drop Blade guard mounted badly Blade guard is dirty Deflector finger touches the blade Pins on the chain are bent Star k...

Page 17: ...Ltd This document may not be reproduced in whole or in part by any means without the prior express written permission of the copyright owner Brice and the BRICE logotype are trademarks of Brice Austr...

Reviews: