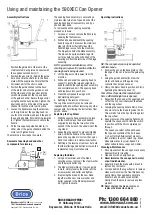
Assembly Instructions
1.
Position the guide bar at the rear of the
stainless steel base plate and secure with
the supplied nuts and bolts (1).
2. Position the gas strut (2) behind the guide
bar and secure the strut arm to the base
plate with the supplied nut. Note that the
narrowest part of the strut is down.
3. Position the guide channel on the back
of the motor unit onto the guide bar, and
fit the other end of the gas strut into the
small hole provided at the top and back
of the guide channel. Secure the gas strut
using the domed nut provided. Tighten the
knurled knob (3) on the side of the guide
channel to lock the motor unit in place.
4. Loosen the handle securing thumbscrew
on the right side of the opening head (as
you face the machine) and insert the end of
the opening handle, flat side facing inwards
(5). Tighten the thumbscrew to secure the
handle.
5. Fit the two supplied guide handles (A) to
either side of the guide channel behind the
motor unit. Tighten firmly.
The machine is now ready to operate.
Removal of opening head and other
components for cleaning
Using and maintaining the 590XEC Can Opener
The opening head assembly is secured by a
stainless steel pin at the top and back of the
opening head/cog drive assembly, and by a
knurled steel knob.
To remove the entire opening assembly,
proceed as follows:
1. For ease of access, remove the handle by
undoing the thumbscrew.
2. With one hand underneath the opening
head to support it, draw out the stain-less
steel pin (B) from the right side of the
handle hinge (as you face the machine).
The hinge also holds the blade assembly.
The pin can be quite awkward to get to,
so it may help to push on the head of the
securing pin from the left side of the hinge
assembly.
NB: To prevent the accidental loss of the
securing pin, replace it in position while the
opening head is being cleaned.
3. Lift the hinge assembly away from the
machine.
4. With one hand under the opening head to
support it, locate the large knurled steel
knob (A) behind the opening head assembly
and completely undo it. The opening head
will drop down into your hand.
5. Clean the components using a mild
dishwashing detergent.
6. Refitting is the reverse of removal
The cog drive assembly may be removed
independently, and without removing any other
components, by following the instructions from
point 4, above.
Replacing the Cog Wheel
1. With the opening head assembly in place
on the machine, use the keyed wrench
supplied by locating the two pins on the
wrench in the holes on the underside of the
cog wheel.
2. Supporting the wrench to prevent it falling
away, strike the handle of the wrench to
loosen the cog wheel. Unscrew the cog by
hand. It unscrews in a clockwise direction.
3. Refitting is the reverse of removal, but note
that the lettering and direction arrow on the
replacement cog must face down.
Replacing the Blade
1. Using a screwdriver, undo the blade
securing screw, remove it, the steel washer
and the elastic buffer ring.
2. The blade is reversible so, if only one side
is worn, simply reverse the blade, refit the
screw, washer and buffer and tighten.
3. If replacing the blade, fit the new blade,
together with a new screw, washer and
buffer supplied in the blade replacement
kit. Tighten to secure.
Operating instructions
NB: The can opener can only be operated
with two hands.
1. Position the can on the base plate so that
the edge of the can is below the guide stop
(A).
2. Using the guide handles (B), draw the
motor unit down until the guide stop
contacts the crimped can seal.
3. Clamp the motor head in position by firmly
tightening the clamping knob (C).
These three steps must be repeated each
time a different height can is opened.
4. Reposition the can under the opening head
so that the can seal is between the blade
and the cog wheel
5. Grasping the opening handle firmly, draw
it down to force the blade to pierce the tin.
This will also force the lip of the tin against
the cog wheel.
6. Keep pressure on the opening handle and
operate the speed switch. Hold the switch
in position until the lid is completely cut
through.
The speed you select will depend upon
the type and contents of the tin. Speed
1 is best for high fluid content products
that are likely to spill or splash (e.g. tinned
pineapple pieces in syrup). Speed 2 is
better suited to heavy soups and similar.
Cleaning & Maintenance
1. All components of the can opener are easily
disassembled for cleaning.
2. Clean daily with a damp sponge.
3. Never immerse the can opener in water
or put in dishwasher.
4. Regularly brush the blade with a brush to
remove any remnants.
5. To clean behind the cog wheel or to replace
when worn, unscrew the front blade cover,
gently clamp the cog wheel and rotate
handle in an anti-clockwise direction.
Gently brush the area to remove any food
product.
NB: Never sharpen the blade, reverse or
replace the blade when blunt.
BA028.590XEC 5/17
BRICE HEAD OFFICE:
11 Holloway Drive,
Bayswater, Victoria 3153 Australia
Ph: 1300 664 880
www.briceaust.com.au
email: [email protected]
Brice Australia Pty. Ltd.
ABN 71 413 589 669
100% Australian owned and operated
Copyright ©2017 Brice Australia Pty. Ltd.


