background image


7    


CBS6000 Quick Start Guide ©2022 

Step 1: 

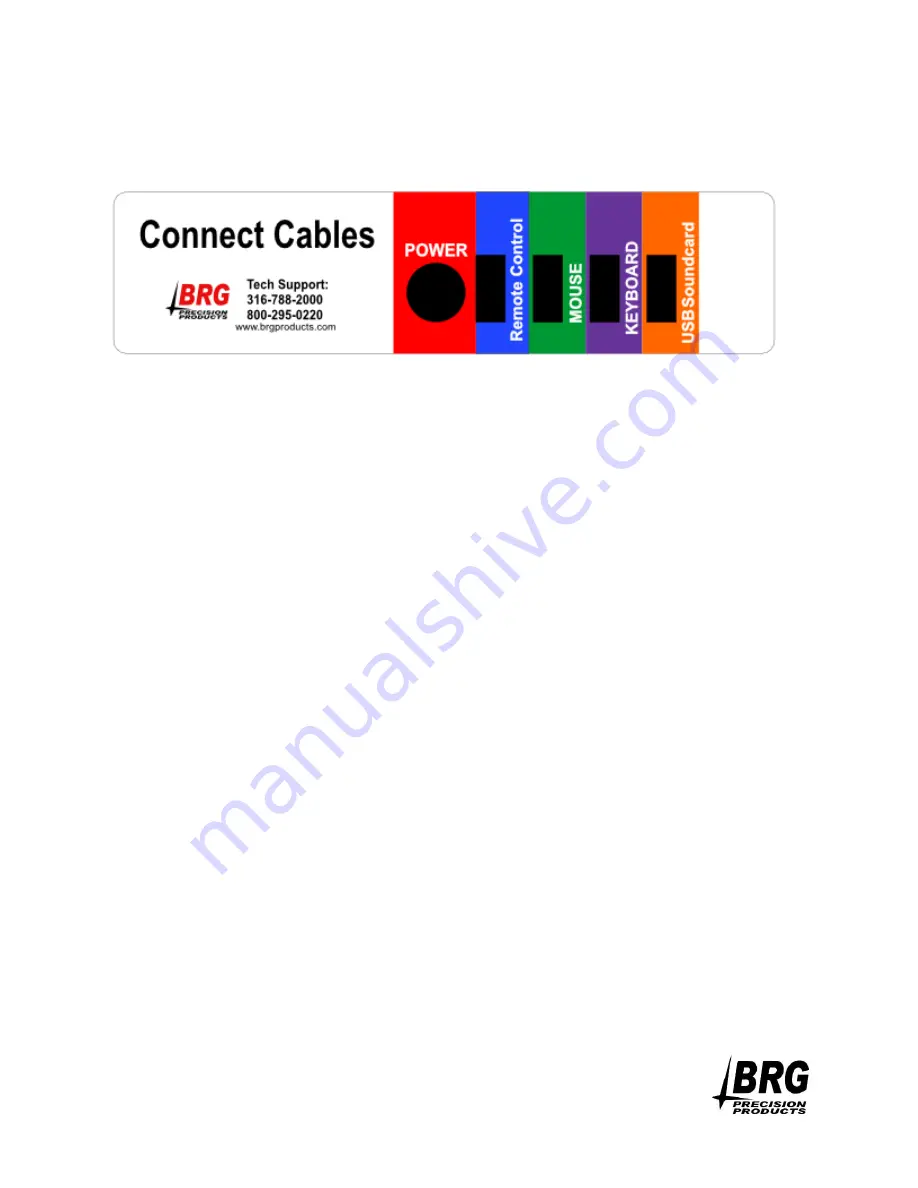
Connect all of the USB connections. The back of the computer has a color coded label 
that looks similar to this.


NOTE: Sticker may vary slightly 

Remote Control= RF Remote Receiver and Amplifier Relay 

MOUSE= Mouse 

KEYBOARD= Keyboard 

USB Soundcard= Soundcard  

Step 2: 

Connect the RCA “Y” Cable into the soundcard in the jack indicated by the yellow arrow. 


Step 3: 

Connect the green 1/8

th

 inch male stereo connector from the desktop speakers to the 

1/8

th


inch female jack on the “Y” Cable 


Step 4: 

Connect the power cables of the Computer, RF Remote Receiver and Amplifier Relay, 
and Desktop Speakers to the included power strip. Make sure the switch on the power 
strip is in the “ON” position. You should see a red light on the Relay, as well as power to 
the desktop speakers.  


Step 5: 

Turn on the computer.  

Summary of Contents for CBS6000

Page 1: ......

Page 2: ... sound card RCA Y cable RCA to XLR adapter DA1000 3200 watt amplifier with power cord Speakon adapter with pigtail Power strip RF Remote Receiver and Amplifier Relay with remote USB cable and power cord 250ft roll of four conductor speaker cable 4 x OS800 800 watt outdoor speakers Water resistant junction box with wire nuts If any piece is damaged or missing please call Carillon Technical Support ...

Page 3: ...3 CBS6000 Quick Start Guide 2022 ...

Page 4: ...llation company This is also beneficial as they will have the tools necessary to fish wire or test connections if needed Before installing the speakers it is important to run the included speaker wire to the installation locations Step 1 Mount the speakers in their desired locations Step 2 Next wire the Junction Box The Junction Box will have two terminal blocks labeled RED and BLACK You will conn...

Page 5: ...ck to inch of each wire exposing the core Use a small screwdriver or similar tool to open each terminal by pushing straight back on the corresponding white tab This will open the terminal and you can place the stripped end of the wire through ...

Page 6: ...WARNING DO NOT CONNECT THE COMPUTER TO A NETWORK OR THE INTERNET DO NOT INSTALL ANY SOFTWARE ON THE COMPUTER UNLESS INSTRUCTED BY BRG TECHNICAL SUPPORT DO NOT SET A PASSWORD FOR THE COMPUTER DO NOT PUT THE COMPUTER TO SLEEP THE CARILLON COMPUTER SHOULD RUN 24 7 AND WILL AUTOMATICALLY RESTART EACH MORNING TO PERFORM SELF CHECK FUNCTIONS AND CLEAR ANY FAULT ...

Page 7: ... RCA Y Cable into the soundcard in the jack indicated by the yellow arrow Step 3 Connect the green 1 8th inch male stereo connector from the desktop speakers to the 1 8th inch female jack on the Y Cable Step 4 Connect the power cables of the Computer RF Remote Receiver and Amplifier Relay and Desktop Speakers to the included power strip Make sure the switch on the power strip is in the ON position...

Page 8: ...lifier Connect the white RCA connector of the Y cable to the RCA to XLR adapter The Red RCA Cable is only used for certain applications Connect the purple Speakon connector to Channel 1 s output Step 2 Wire nut the red and black speaker wire from the junction box to the Speakon cable pig tail NOTE The black wire with the texture or without writing on the pig tail is the negative black ...

Page 9: ...hting it Then click play You will get a message below the play button that says Play Delayed While Powering on Amplifier You should hear the amplifier turn on The power light will switch to green The MUTE light will turn red for a few seconds and then shut off At this time the song should be playing Starting with the amplifier at its lowest setting slowly rotate the volume of Channel 1 until the o...

Reviews: