background image

9 / 20

NOTICE! Autoguiding requires an appropriate software (see below).

Autoguiding Software

The following software packages, among others, can be used for autoguiding with this camera:
PHD-Guiding, GuideDog, Metaguide, Guidemaster (free of charge) or AstroArt, MaxIm DL (fee pay-

able)
DOWNLOAD PHD-Guiding: 

https://openphdguiding.org

DOWNLOAD GuideDog: 

http://barkosoftware.com/GuideDog

10 Optimizing the camera settings for long

exposures

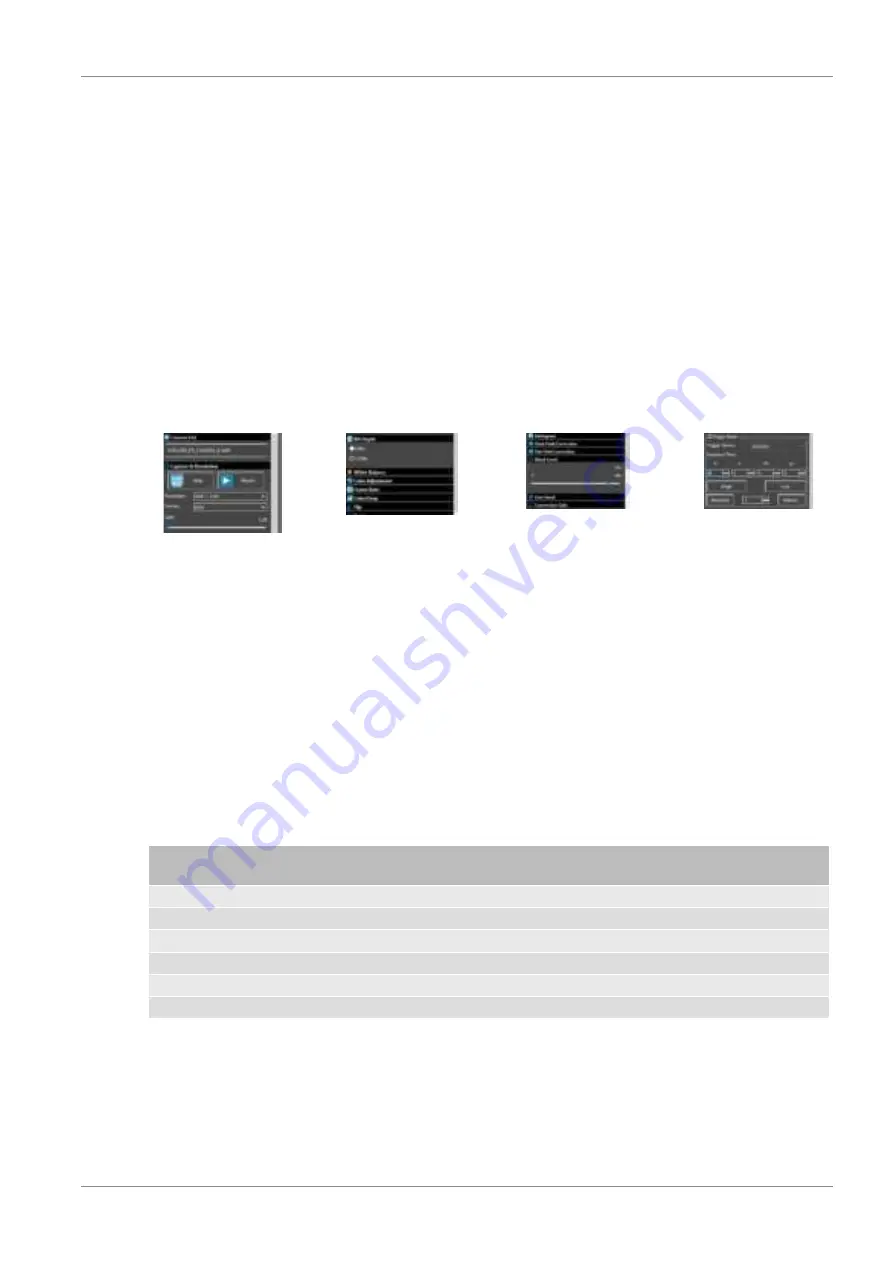
Image 2

Image 1

Image 3

Image 4

Illustration 5: Menu windows relevant for optimization in the supplied software

To ensure that the camera delivers the best possible image results for long exposures over 1 minute,

you can optimally adjust the setting values for gain and black level depending on the desired exposure

time. Refer to Table 1 for help. Proceed as follows for the setting:
1. Select the desired exposure time (e.g. 6 minutes). (Image 1)
2. Open the "Acquisition & Resolution" settings menu. Click on the field with the current value for the

"Gain" and enter 158. Confirm the entry with [ENTER]. The value 1.58 is set. (Image 2)

3. Select the image format and bit depth according to Table 1. (Image 2+3)
4. Open the "Black Level" setting menu. Move the slider until you reach the appropriate value (e.g.

440). (Image 4)

5. Start the capturing images.

NOTICE! These are recommended guide values determined under real test conditions. Individual

adjustments may be necessary and depend on external factors such as ambient temperature.

Exposure

time

Gain

Black level Format

Bit depth e/ADU

Read noise Full Well

6 minutes 1.58

440

RAW (fit)

12

2.03

1.81

8318.91

5 minutes 1.58

380

RAW (fit)

12

2.03

1.81

8318.91

4 minutes 1.58

303

RAW (fit)

12

2.03

1.81

8318.91

3 minutes 1.58

233

RAW (fit)

12

2.03

1.81

8318.91

2 minutes 1.58

172

RAW (fit)

12

2.03

1.81

8318.91

1 minute

1.58

112

RAW (fit)

12

2.03

1.81

8318.91

Table 1: 

Table 1

11 Cleaning and maintenance

• Before cleaning the device, disconnect it from the power supply (remove plug or remove batteries)!
• Only clean the device externally using a dry cloth. Do not use cleaning solution to prevent damage

to the electronic parts.

Summary of Contents for EXPLORE SCIENTIFIC

Page 1: ...Digital camera Digitalkamera 4K Planetary DeepSky Astro Camera EN Instruction manual DE Bedienungsanleitung...

Page 2: ...ant le code QR ou le lien correspondant NL Bezoek onze internetpagina via de volgende QR code of weblink voor meer informatie over dit product of de beschikbare vertalingen van deze gebruiksaanwijzing...

Page 3: ...English 4 Deutsch 11...

Page 4: ...with the following article numbers 0510530 Manual version 0122 Manual designation Manual_0510530_4K Planetary DeepSky Camera_en de_EXPSC_v012022a Always provide information when requesting service 3...

Page 5: ...o not disassemble the device In the event of a defect please contact your dealer They will con tact the Service Center and can arrange the return of this device for repair if necessary Check this devi...

Page 6: ...mera body 2 Mounting thread T2 M42x0 75mm 3 Camera connection 4 Ventilation slits 5 Function indicator light 6 USB 3 0 port 7 ST4 port 8 Plug in adaptor 1 9 Connection thread 10 USB 3 0 connection cab...

Page 7: ...urely mounted 4 Connect the camera to an available USB port on your computer using the supplied USB cable 5 Start the EXPLORE Capture software after successful installation 6 Select the connected came...

Page 8: ...cable 7 USB port on PC notebook 8 ST4 connecting cable 9 ST4 port on the mount 10 Recording device e g single lens reflex cam era or another deep sky camera 1 Not included in the scope of delivery 1...

Page 9: ...ld with the current value for the Gain and enter 158 Confirm the entry with ENTER The value 1 58 is set Image 2 3 Select the image format and bit depth according to Table 1 Image 2 3 4 Open the Black...

Page 10: ...ner 13 EC declaration of conformity A Declaration of conformity in accordance with the applicable directives and correspond ing standards has been prepared by Bresser GmbH The full text of the EC decl...

Page 11: ...iese Dokumentation ist g ltig f r die Produkte mit den nachfolgend aufgef hrten Artikelnummern 0510530 Anleitungsversion 0122 Bezeichnung dieser Anleitung Manual_0510530_4K Planetary DeepSky Camera_en...

Page 12: ...cherheitsinformationen Bauen Sie das Ger t nicht auseinander Wenden Sie sich im Falle eines Defekts an Ihren Fach h ndler Er nimmt mit dem Service Center Kontakt auf und kann das Ger t ggf zwecks Repa...

Page 13: ...Kamera Body 2 Aufnahmegewinde T2 M42x0 75mm 3 Kamera Anschlusspanel 4 L ftungsschlitze 5 Funktionsleuchte 6 USB 3 0 Port 7 ST4 Port 8 Steckadapter 1 9 Anschlussgewinde 10 USB 3 0 Anschlusskabel 11 ST...

Page 14: ...mit dem im Lieferumfang enthaltenen USB Kabel an einem freien USB Port Ihres Computers anschlie en 5 Die EXPLORE Capture Software nach erfolgreicher Installation starten 6 Im Men der EXPLORE Capture S...

Page 15: ...PC Notebook 8 ST4 Verbindungskabel 9 ST4 Port an der Montierung 10 Aufnahmeger t z B Spiegelreflexkamera oder weitere Deep Sky Kamera 1 nicht im Lieferumfang enthalten 1 F r die Montage eines Aufnahme...

Page 16: ...ichtungszeit z B 6 Minuten aus Bild 1 2 ffnen Sie das Einstellmen Aufnahme Aufl sung Klicken Sie auf das Feld mit dem aktuellen Wert f r die Verst rkung und geben Sie 158 ein Best tigen Sie die Eingab...

Page 17: ...ienstleister oder Umweltamt Werfen Sie Elektroger te nicht in den Hausm ll Gem der Europ ischen Richtlinie 2012 19 EG ber Elektro und Elektronik Altger te und deren Umsetzung in nationales Recht m sse...

Page 18: ......

Page 19: ...fr T l phone 00 800 6343 7000 BRESSER France SARL Service apr s vente P le d Activit s de Nicopolis 314 Avenue des Ch nes Verts 83170 Brignoles France Prix d un appel local depuis la France ou Belgiq...

Page 20: ...Bresser GmbH Gutenbergstra e 2 46414 Rhede Germany www bresser de BresserEurope...

Reviews: