9
POWER UP THE CONSOLE
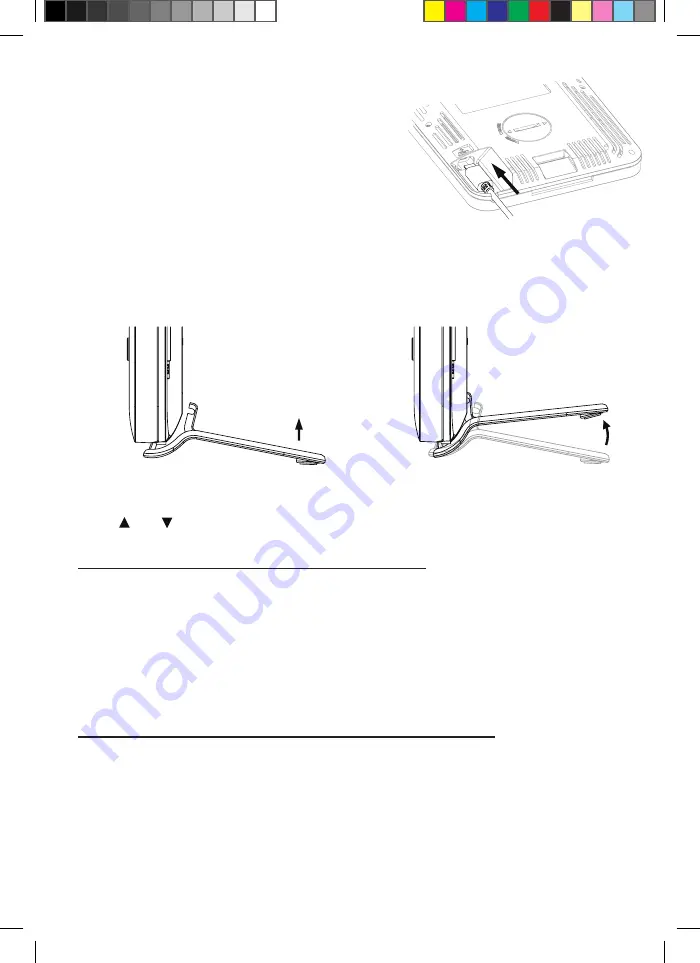
1 Plug the power adapter USB plug to power
up the main unit
2 Once the main unit power up, all the
segments of the LCD will be shown
3 The console will automatically start AP mode
USB socket
NOTE:
If no display appears on the LCD after you plug the adaptor, press
[ RESET ]
key by using a pointed object
TABLE STAND INSTALLATION
The unit is designed for desktop or wall mount for easy viewing follow the steps below to hook the table
stand on the botton of the console
Step 1
Step 2
SET LCD DISPLAY VIEWING ANGLE
Press
[ ]
or
[ ]
key in normal mode to adjust LCD viewing angle to fit table stand or wall mount
situation
PAIRING WIRELESS 3-IN-1 WEATHER SENSOR & CONSOLE
After insert of batteries, the console will automatically search and connect the wireless 3-in-1 sensor (the
sensor antenna icon blinking)
Once the connection is successful, antenna icon and readings for outdoor temperature & humidity and wind
speed will appear on the LCD
CHANGING BATTERIES AND MANUAL PAIRING OF SENSOR
Whenever you changed the batteries of the wireless 3-in-1 sensor, pairing must be done manually
1 Change all the batteries to new ones in the sensor
2 Press
[ SENSOR ]
key on the console
3 Press
[ RESET ]
key on the wireless 3-in-1 sensor
PAIRING ADDITIONAL WIRELESS SENSOR(S) & CONSOLE (OPTIONAL)
This console can support up to 7 additional wireless sensor(s) You can press
[SENSOR ]
key to search
the on display channel's sensor manually Once your sensor paired up, the sensor signal strength indicator
and weather reading will appear on your console display
NOTE:
-The additional wireless sensor(s) is not inc
luded
-
This console can support different type of additional wireless sensor, e.g. soil moisture and pool sensor.
Check with your retailer for more detail
Manual_7002535_WS-Wind-Sensor-3in1_en-de_BRESSER_v072019a.indb 9
04.09.2019 12:27:02


