12
EN
Wireless remote control 868.3 MHz
Wireless remote control 868.3 MHz
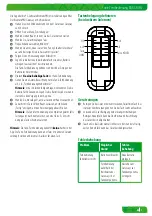
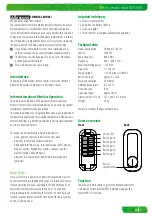
The 10 buttons on the wireless remote control are defined by default
as button pairs. They serve to switch a component on or off, or to
open and close shutters, for example. In so doing, the right button -
depending on the linked component - may for example have an
“off / down“ function, and the left button an “on / up“ function.
For information on which components can be controlled by the wireless
remote control, please visit www.brematic.com/en/service. For
additional information on components, please refer to the instructions
for use of the respective BrematicPRO wireless component.
When linked with the Home Automation System BrematicPRO via
the BrematicPRO Gateway, you can also use the app/BrematicPRO PC
Software to assign each button with an individual function.
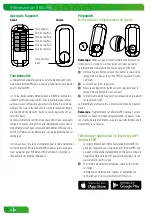
Preparation
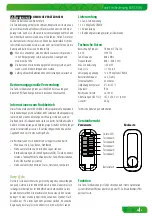
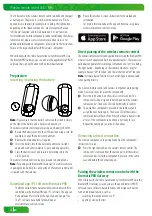
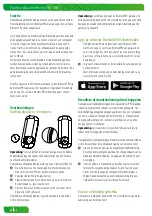
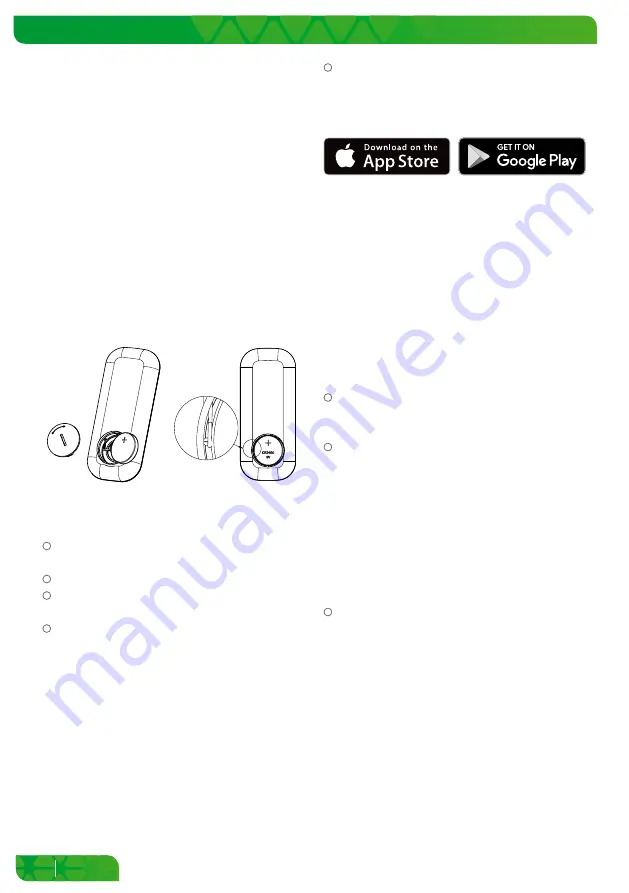
Inserting / replacing the battery
op
en
close
CR2450
3V
Note:
Please ensure that the battery contact on the side fits closely
on the side of the battery and is not pressed down by it.
The wireless remote control operates using a 3 V battery (CR2450).
Rotate the battery cover into the OPEN position using a coin, for
example, to open the battery compartment.
Remove the drained battery if required.
Insert the battery into the battery compartment at a slight
angle and with correct polarity (+ pole pointing upwards).
Close the battery cover and secure it by rotating it into the
CLOSE position.
The wireless remote control is ready to use and in pairing mode.
Note:
For pairing with BrematicPRO Gateway: The remote control is
in pairing mode. Do not press any button on the remote control until
it is paired with the Gateway.
Download app / PC software BrematicPRO
The Brennenstuhl Home Automation Systems BrematicPRO is
controlled via the BrematicPRO app / PC software. The app can
be downloaded for free from the App Store and Google Play.
The PC software is available for download at
www.brematic.com/en/service.
Please follow the on-screen instructions for download and
installation.
For more information about the app and how to use it, please
visit www.brematic.com/en/service.
Direct pairing of the wireless remote control
The wireless remote control can be paired directly with the BrematicPRO
wireless switch adapter and flush-mounted actuators. The respective
paired button pairs are for switching a component on or off. In so doing,
the right button - depending on the linked component - may for
example have an “off“ function , and the left button an “on“ function.
Note:
Software-based functions (such as timing) are not available
when pairing directly.
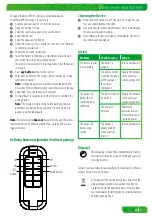
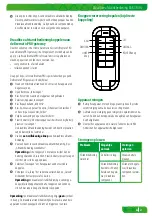
The wireless remote control and wireless component are in pairing
mode (see instructions for use of the component).
Press the left button A on the wireless remote control. The
component will be assigned to button pair A on the wireless
remote control. The device LED will flash briefly to confirm.
To pair further components, proceed in the same way and
assign the next button pairs. The device LED of the wireless
remote control will flash thrice if there has been a transmission
error or if the component to be linked is not ready for use.
Repeat the pairing process as described above.
Removing a direct connection
The wireless component is in pairing mode (see the component's
instructions for use).
Press the right button A on the wireless remote control. The
component is removed from the button pair A of the wireless
remote control. For further components, proceed in the same
way and delete the next button pairs.
Pairing the wireless remote control with the
BrematicPRO Gateway
When linked with the Home Automation System BrematicPRO via the
BrematicPRO Gateway, you can also use the app / BrematicPRO PC
Software to use software-based functions and assign each button
with an individual function, such as
• switching the component on or off
• opening / closing shutters
Summary of Contents for 1294550
Page 22: ...22 ...


