


Subject to change without notice. Copyright @ 2013. Sunrise Medical.
User Guide – Rolling Walkers. Rev. A
Page 6 of 11
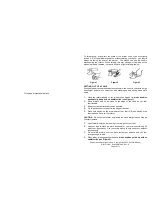
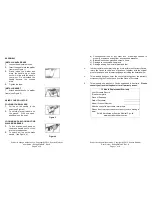
ASSEMBLY
INSTALL HANDLE BARS
1.
Loosen the adjustment knob.
2.
Insert the handle into the walker
frame (see Figure 1)
3.
Stand inside the walker and
move the handle up or down
until it is in line with the bend in
your wrist.
Do not extend the
handle
beyond
the
knurled
area.
4.
Tighten the knob.
INSTALL BASKET
1.
Attach basket hooks to walker
frame (see Figure 2)
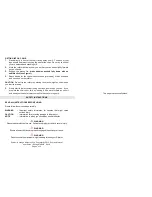
USING YOUR ROLLATOR
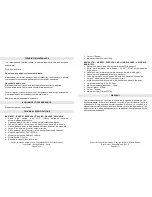
FOLDING YOUR WALKER
1.
Pull up on the handle in the
seat. (see Figure 3)
2.
To unfold, place all wheels on
the ground.
With one hand,
push down on the seat.
Figure 3
LOCKING AND UNLOCKING YOUR
WALKER’S BRAKES
3.
To lock brakes, push down on
the brake handle until it “clicks”
into the locked position.
4.
To unlock, pull up on the brake
handle. (see Figure 4),
Figure 4
Subject to change without notice. Copyright @ 2013. Sunrise Medical.
User Guide – Rolling Walkers. Rev. A
Page 11 of 11
a) Consequential loss or any other loss or damage caused to
property or persons arising from any cause whatsoever;
b) Breakables such as glass and ceramic items
c)
Damage to consumable items; and
d) Damage arising from normal wear and tear
4.
In order to claim under warranty you must, within the Warranty Period,
return the Goods to the place of purchase, together with the original
proof of purchase, and this warranty page including the details below.
5.
This warranty does not cover the cost of claiming under the warranty
or transporting the Goods to and from the Place of Purchase.
6.
This warranty only applies to Goods purchased in Australia.
Please
consult your local selling dealer for all warranty issues.
12 Month Replacement Warranty
Your Purchase Record
(Please complete)
Place of Purchase:
Date of Purchase:
Model / Product Number:
Attach a copy of the purchase receipt here.
Please don’t return purchase record until you are making a
claim.
Sold & distributed by Sunrise Medical Pty Ltd.
www.sunrisemedical.com.au