
3
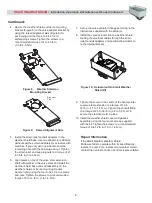
Small Weather Shield
-
Installation, Operation & Maintenance Manual Continued
Special Tools Needed:
• 8 mm (5/16 in.) open-end wrench
• 6 mm (1/4 in.) flat-blade screwdriver
• No. 1 Phillips screwdriver
• No. 2 Phillips screwdriver
21 mm and 22 mm open end wrench
(or two adjustable wrenches)
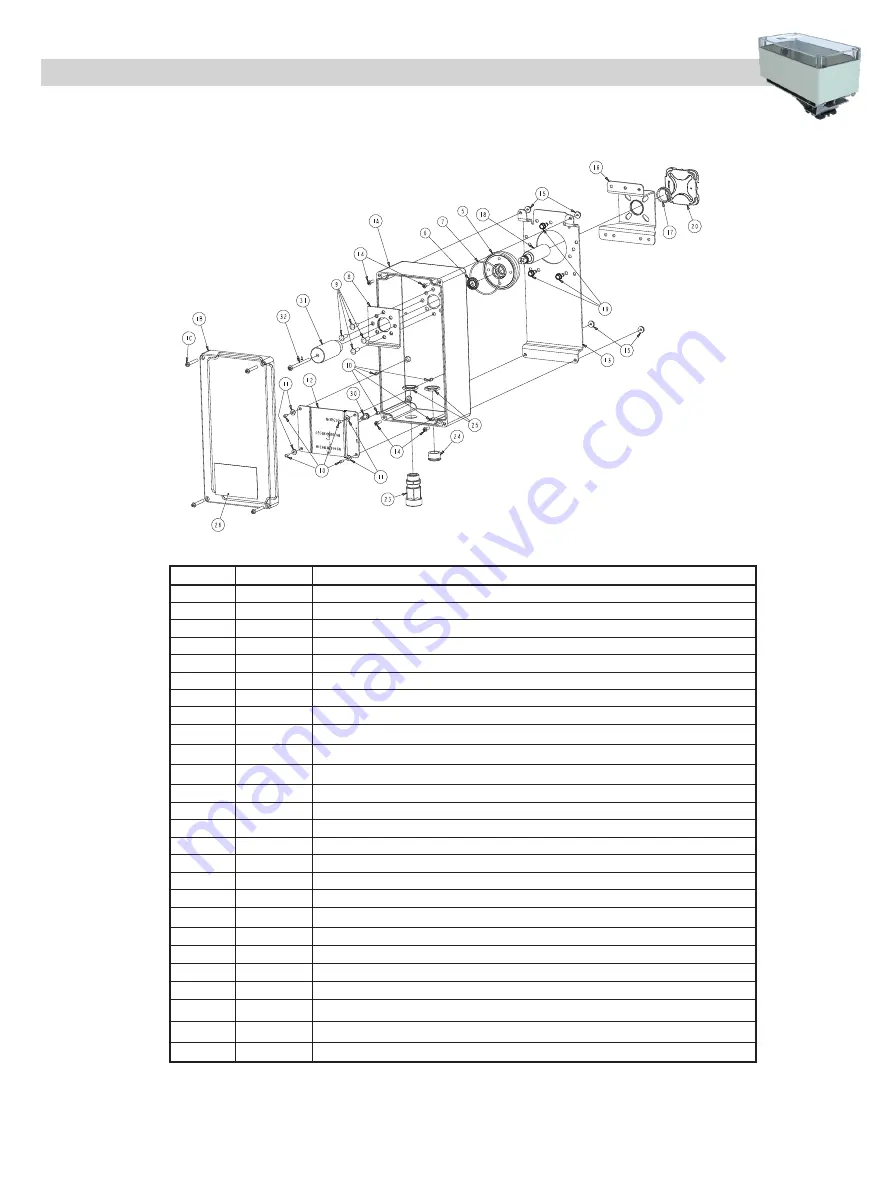
Parts Included:
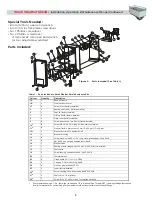
Table 1: Parts Included in Small Weather Shield Enclosure Kits
Callout
Quantity
Description
1A
1
Base, enclosure
1B
1
Clear enclosure cover
1C
4
Screw, cover (factory-installed)
5
1
Bearing, seal carrier (factory-installed)
6
1
Seal, lip (factory-installed)
7
1
O-Ring, RoHS (factory-installed)
8
1
Plate, inner (factory-installed)
9
4
Screw, button head Torx, RoHS (factory-installed)
10
2
4
Screw, M3 x 0.5 x 8 mm long, Phillips, oval countersink
11
2
4
Washer, flat, M4, plain steel, 4.3 mm ID x 9.0 mm OD x 0.8 mm
12
2
1
Bracket, Anti-rotation, weather shield
13
1
Bracket, mounting
14
4
Screw, machine, #6-32 x 1/2 in. long, cross-recessed pan head, RoHS
15
4
Nut, #6-32 hex, flanged, serrated tooth, RoHS
16
1
Bracket, valve
17
1
Bearing, plastic, flanged, split, 20 mm ID, RoHS (factory-installed)
18
1
Shaft, valve
19
3
Screw, tapping, hex washer head, type F, RoHS
Figure 2: Parts Included (See Table 1)
20
1
Thermal barrier
23
2
Gland, cable, PG11 to 1/2 in. NPSL
24
1
Cap plug, PG11 with O-Ring, RoHS
25
2
Nut, hex, single chamfer, PG11
26
1
Label (factory-installed)
30
2
1
Screw, tapping, hex washer head, type SW, RoHS
31
2
1
Shaft, valve, 1 in. diameter
32
2
1
Screw, M4 x 0.7 x 60 mm long, Torx.slotted pan head
1. We recommend using a 1/2 in. liquid-tight conduit and 1/2 in. National Pipe Thread (NPT) liquid-tight fittings (purchased
locally) to terminate the control wiring to the weather shield enclosure strain relief conduit fittings.