


57
Replace the lamp
When the projection lamp of the projector
reaches its end of life,the Lamp replacement
icon appears on the screen, please replace the
lamp immediately.
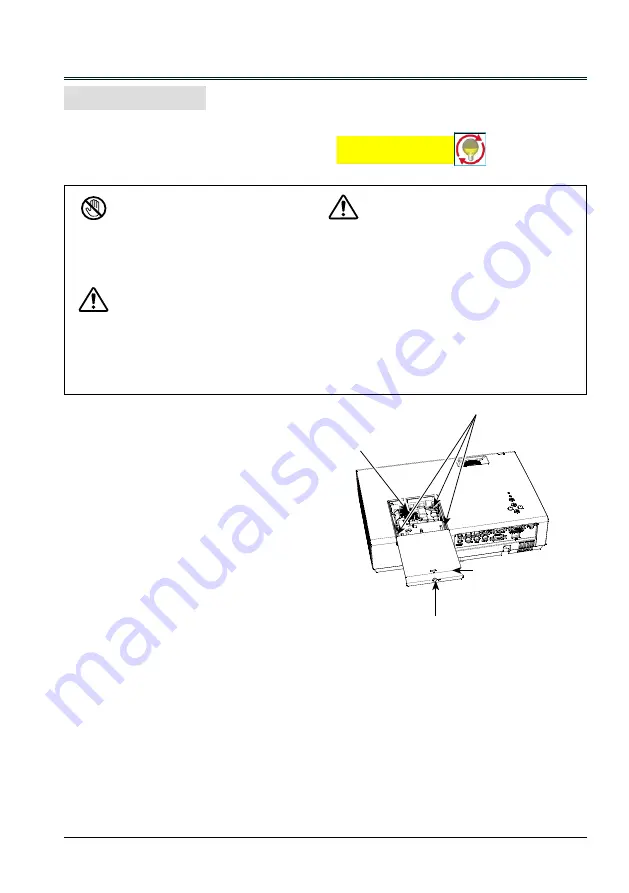
Lamp cover
Screw
Screw
Handle
Maintenance and cleaning
Lamp replacement icon
݁സ४
Lamp replace
As temperature inside the projector is high,
you should cool the projector for at least 45
minutes before you open the lamp cover.
When the lamp isn’t illuminated, it may indicate that the lamp has been damaged.
When you replace the lamp in a projector installed on the ceiling, you should stand beside
the lamp cover but not under it; for the broken glass may fall down to hurt you. To do that,
remove the lamp cover gently to avoid being hurt by the dropped glass. If glass drops into
your eyes or mouth, you should see the doctor immediately.
For the sake of safety, only use the lamp of
the same model. Never drop the lamp onto the
ground nor touch the glass bulb! The glass can
shatter and hurt.
Note
To replace the lamp, follow the steps below:
1. Power off the projector and unplug the
power cord. Then let the project cool for at
least 45 minutes.
2. Loosen the screws on the lamp cover to
remove the cover.
3. Make sure the lamp is well protected and
remove three screws. Hold the handle to
take out the lamp.
4. Install a new lamp with the same model and
tighten the three screws. Make sure the
installation is correct. Put lamp cover in
place and then tighten the screw.
5. Plug the AC power cord and power on the
projector.


