User Interface
MimioDisplay 3 Installation and User Guide 11
User Interface
Plug-in the Interactive Touchscreen, power up the device, press standby button and
interact with the device using the either the bezel buttons, remote control or touchscreen.
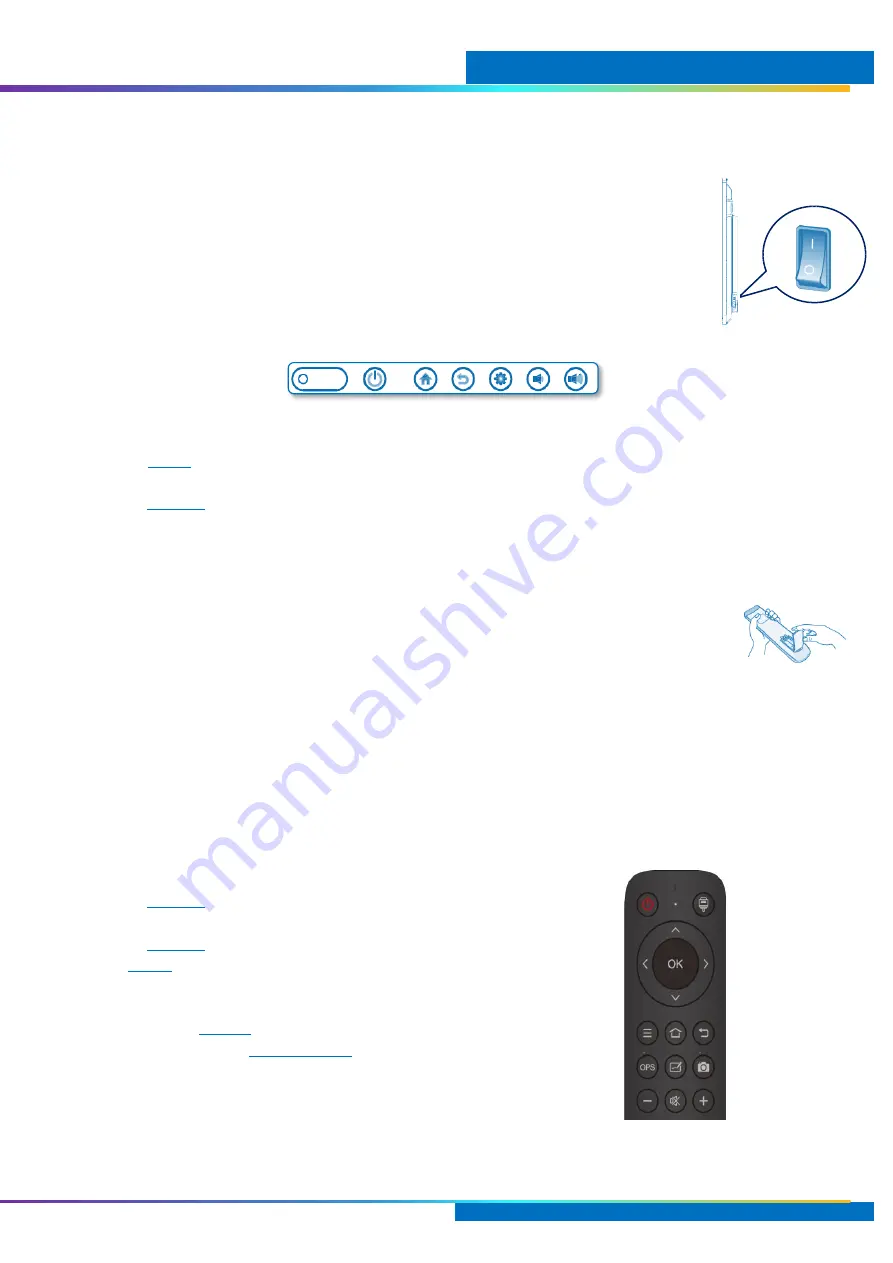
Power Button
Power-up device by the switching on the switch to right side behind the display. .
Bezel Buttons
The Interactive Touchscreen can be interacted using the following front bezel buttons.
①
Indicator Light, IR receiver and Ambient Light Sensor
②
Standby On/Off
③
④
Return and Touch Unlock (see Touch Lock on page 29)
⑤
⑥
Volume Down
⑦
Volume Up
Remote Control
1.
Remove the cover on the back of the remote control.
2.
Insert two “AAA” batteries, ensuring the “+” symbol on the battery matches the “+”
on the remote.
3.
Replace cover by aligning and snapping the latch shut.
Warning:
•
When the IR receiver on the Interactive Touchscreen is subject to direct sunlight or bright light, the
remote control may not work. In such event move the screen or operate the remote control closer.
•
Low battery voltage will affect the distance of the remote control. Replace low batteries with new ones,
depleted batteries may corrode and damage the remote control.
•
Never mix types of battery, or new a battery with a used one. Always replace in a pair.
•
Please dispose of waste batteries according to applicable environmental regulations. Do not expose
batteries to any hot environment, like direct sunlight, over a fire, etc.
①
Stand-by Power On/Off
②
③
Navigation keys
④
⑤
⑥
Return and Touch Unlock
⑦
Change source to OPS (internal PC)
⑧
Open Infinite
⑨
⑩
Volume Down
⑪
Mute Volume
⑫
Volume Up
①
②
③
④
⑤
⑥
⑦
①
②
③
④
⑤
⑥
⑦
⑧
⑨
⑪
⑩
⑫


