82
Using insert effects
Copying insert effect settings
(Effect Patch Copy)
The BR-1600CD’s function for copying patches proves
extremely useful when you want to create a number of effect
patches with slightly different settings.
1.
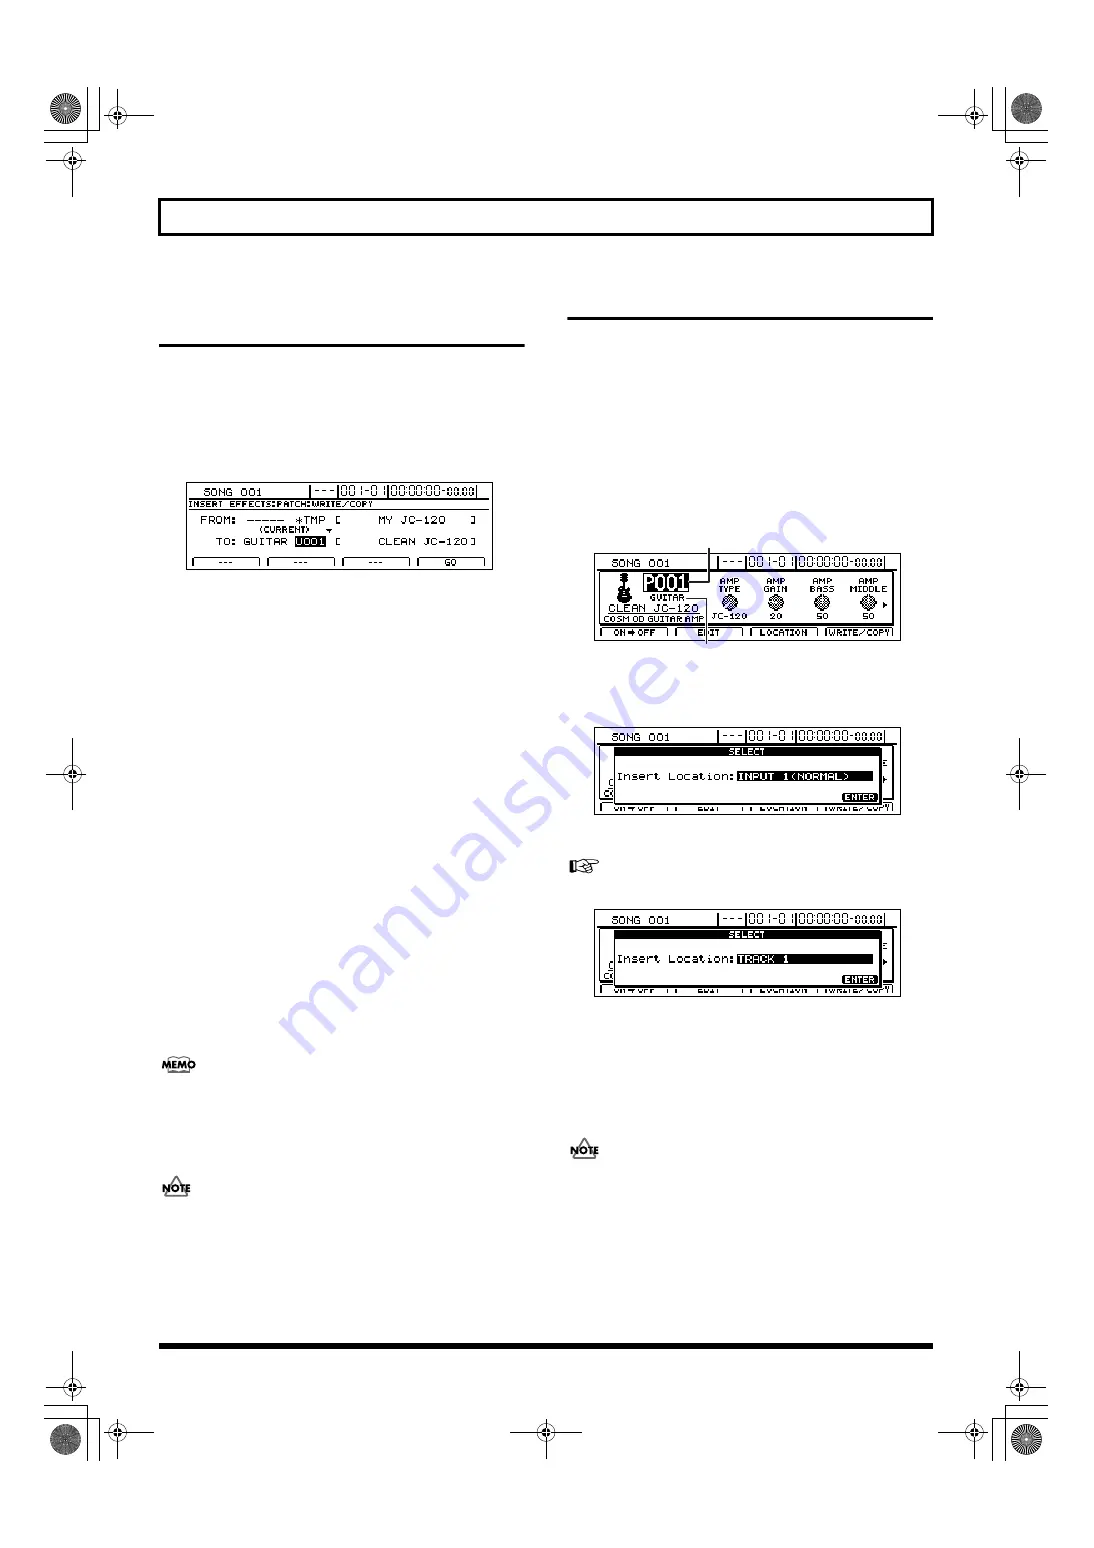
Press [F4] (WRITE/COPY) on the Effects Edit screen.
The Effects Patch Write/Copy screen will appear.
fig.31-06d
2.
Move the cursor to the “FROM:” field and select the
effect patch to be copied using the TIME/VALUE dial.
FROM:
This field selects the effect patch to be copied. Although
“*TMP(CURRENT)” may be displayed in this field when
you call up the Effects Patch Write/Copy screen after
modifying patch settings, this may be freely changed.
Note that you can also move the cursor to the bank field
and turn the TIME/VALUE dial to select a source bank.
3.
Move the cursor to the “TO:” field and select a
destination patch using the TIME/VALUE dial.
TO:
This field selects the patch to be overwritten by copying.
Whenever you call up the Effects Patch Write/Copy
screen, the cursor will be automatically positioned here.
Note that you can also move the cursor to the bank field
and turn the TIME/VALUE dial to select a new
destination bank.
4.
Press [F4] (GO).
The effect patch will be copied. When finished, the
message “Complete!” will appear and the display will
automatically return to the Effects Patch screen.
If you selected a different destination bank than that set by
pressing the INPUT SELECT button, this new bank selection
will be maintained after copying has been completed.
5.
Press [EXIT/NO] several times to return to the top screen.
It is important to remember that the destination patch
will be completely overwritten by the patch specified
with “FROM:”. Care should be taken to ensure that
important patches are not accidentally overwritten in
this way.
Changing insert effect connections
Whenever you create a new song, the insert effects will be
initially inserted into the input channels, and this is done to
ensure that performances can be monitored and recorded
with the effects applied. You can, however, modify this
connection pattern if so required. By changing the insert
effect connections as described below, you can set up the BR-
1600CD for use in various different situations.
1.
Press [EFFECTS].
The Effects Patch screen will appear.
fig.31-01d
2.
Press [F3] (LOCATION).
The Effects Location screen will appear.
fig.31-10d
3.
Change the connection using the TIME/VALUE dial.
Refer to “About insert effect connections.”
fig.31-11d
4.
Press [ENTER/YES] to close the message.
5.
Press [EXIT/NO] several times to return to the top
screen.
6.
If you wish to store the modified connections, save the
current song (p. 72).
If you load another song or turn off the BR-1600CD
without saving the current song, your changes will be
lost.
Patch number
Bank
BR-1600_R_e.book 82 ページ 2007年12月6日 木曜日 午前9時52分
Summary of Contents for Digital Recording Studio BR-1600 CD
Page 41: ...41 Section 1 Advanced Use Section 1 Advanced Use BR 1600_R_e book 41...
Page 73: ...73 Section 2 Using Effects Section 2 Using Effects BR 1600_R_e book 73...
Page 145: ...145 Section 3 Using Rhythm Section 3 Using Rhythm BR 1600_R_e book 145...
Page 203: ...203 Section 4 Using the CD R RW Drive Section 4 Using the CD R RW Drive BR 1600_R_e book 203...
Page 220: ...220 MEMO BR 1600_R_e book 220...
Page 221: ...221 Section 5 Using MIDI Section 5 Using MIDI BR 1600_R_e book 221...
Page 239: ...239 Section 6 Using USB Section 6 Using USB BR 1600_R_e book 239...
Page 272: ...272 MEMO BR 1600_R_e book 272...
Page 273: ...273 Appendices Appendices BR 1600_R_e book 273...
Page 309: ...309 MEMO BR 1600_R_e book 309...


