72
Organizing your songs
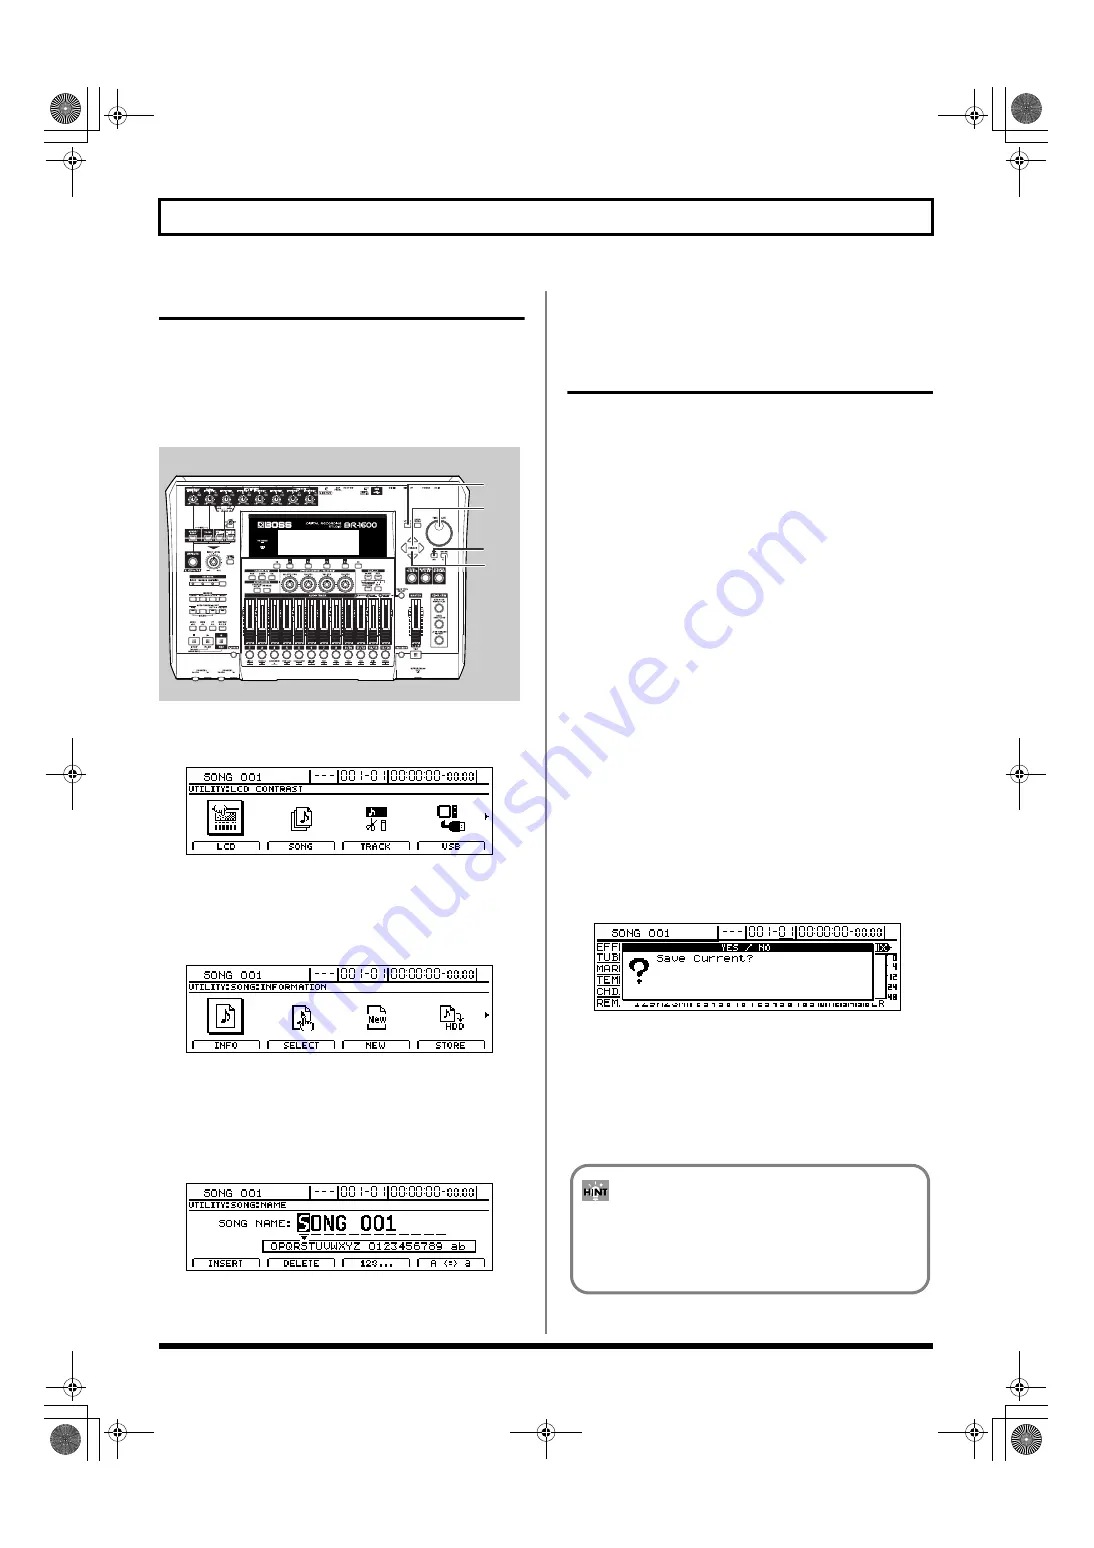
Naming a song (Song Name)
When you create a new song, the BR-1600CD will automatically
name it “SONG 001” or something similar. If all songs are named in
this way, however, it will be difficult to tell them apart. It is
recommended that you name your songs appropriately so that they
can be conveniently managed later on.
fig.16-05
1.
Press [UTILITY].
The Utility Menu screen will appear.
fig.12-12d
2.
Move the cursor to the SONG icon and press [ENTER/YES].
Alternatively, you can press [F2] (SONG) if the SONG
icon is currently displayed.
The Song Menu screen will appear.
fig.16-03d
3.
Move the cursor to the NAME icon and press [ENTER/
YES].
Alternatively, you can press [F1] (NAME) if the NAME
icon is currently displayed.
The Song Name screen will appear.
fig.16-25d
4.
Move the cursor to the character you want to change
and select a new character using the TIME/VALUE dial.
5.
Press [EXIT/NO] several times to return to the top
screen.
Saving your song (Song Save)
Note, however, that the BR-1600CD stores the following
when songs are saved.
●
Audio data
●
Mixer settings
●
The Insert Effects’ song patch (i.e., S001 through S050*)
* S001 through S100 in the case of the Guitar Bank
* S001 through S010 in the case of the Multi Channel Bank
●
The Vocal Tool Box’s song patch (i.e., S01 through S10)
●
The Mastering Tool Kit’s song patch (i.e., S01 through S19)
●
The Speaker Modeling’s song patch (i.e., S01 through S33)
●
Rhythm Arrangement settings (i.e., S001 through S010)
●
Loop Phrase sequence (i.e., S001 through S050)
●
Bass pattern (i.e., S000 through S999)
●
Drum pattern (i.e., S000 through S999)
●
Loop Effect settings (i.e., S001 through S050)
●
3 Band EQ and Compressor settings
●
Tuner settings
●
Utility settings (with the exception of LCD contrast,
phantom, sub mixer and Digital In Assign)
1.
With the top screen displayed, hold down [STOP] and
press [REC].
The message “Save Current?” will appear.
fig.16-30d
2.
Press [ENTER/YES]. (If you do not want to save, press
[EXIT/NO].)
The message “Storing Current...” will appear on the
screen and saving of the song will begin. When saving
has been completed, the message “Complete!” will
appear.
2,3
5
4
1
In addition to the above method, songs can also be
saved from the Utility screen. Please refer to “Saving
your song from the Utility screen” (Basic Operation;
p. 57).
BR-1600_R_e.book 72 ページ 2007年12月6日 木曜日 午前9時52分
Summary of Contents for Digital Recording Studio BR-1600 CD
Page 41: ...41 Section 1 Advanced Use Section 1 Advanced Use BR 1600_R_e book 41...
Page 73: ...73 Section 2 Using Effects Section 2 Using Effects BR 1600_R_e book 73...
Page 145: ...145 Section 3 Using Rhythm Section 3 Using Rhythm BR 1600_R_e book 145...
Page 203: ...203 Section 4 Using the CD R RW Drive Section 4 Using the CD R RW Drive BR 1600_R_e book 203...
Page 220: ...220 MEMO BR 1600_R_e book 220...
Page 221: ...221 Section 5 Using MIDI Section 5 Using MIDI BR 1600_R_e book 221...
Page 239: ...239 Section 6 Using USB Section 6 Using USB BR 1600_R_e book 239...
Page 272: ...272 MEMO BR 1600_R_e book 272...
Page 273: ...273 Appendices Appendices BR 1600_R_e book 273...
Page 309: ...309 MEMO BR 1600_R_e book 309...


