background image

20 - English

Starting Up the System

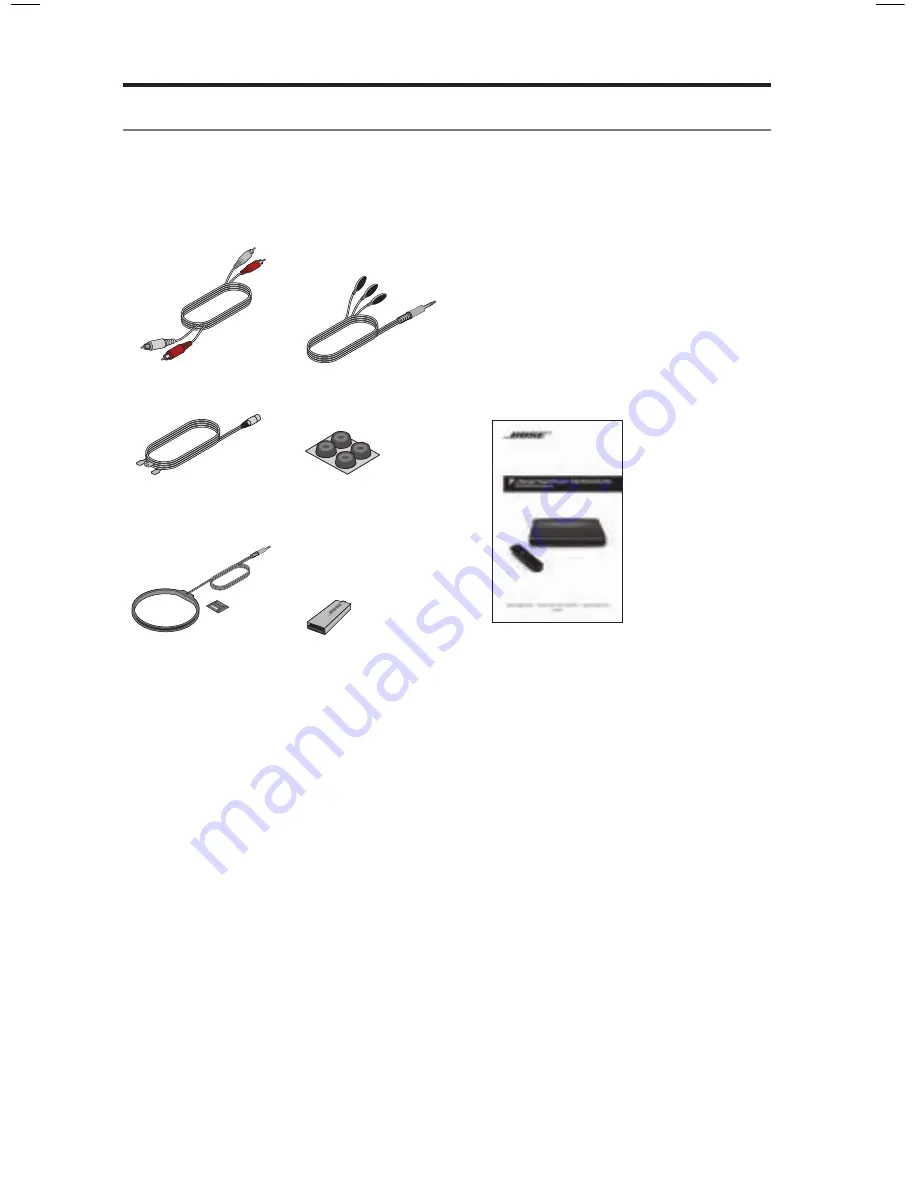
Other Box 4 items

The remaining items in Box 4 may or may not be required to set up your  

Lifestyle

® 

SoundTouch

 system. For more information on using these accessories 

or adding other devices to your system at another time, refer to the Operating 

guide.

Stereo audio cable

IR emitter cable

FM antenna

Rubber feet for  

Acoustimass module

AM antenna

USB drive (for updating 

system software only)


Operating guide

Summary of Contents for Lifestyle SoundTouch 535

Page 1: ...Set Up Guide Gu a de instalaci n Guide de configuration 135 series IV Lifestyle...

Page 2: ...ance and system performance Long term exposure to loud music may cause hearing damage It is best to avoid extreme volume when using headphones especially for extended periods Notes The product label i...

Page 3: ...riate collection facility for recycling Proper disposal and recycling helps protect natural resources human health and the environment For more information on disposal and recycling of this product co...

Page 4: ...Symbol DTS and the Symbol together are registered trademarks and DTS Digital Surround is a trademark of DTS Inc DTS Inc All Rights Reserved The terms HDMI and HDMI High Definition Multimedia Interfac...

Page 5: ...Speakers Speaker box 13 Starting Up the System Interactive box 17 Installing the remote control s batteries 17 Powering on the system 18 Completing setup with UNIFY 19 Other Box 4 items 20 Care and Ma...

Page 6: ...nsole Acoustimass module SoundTouch wireless adapter and a universal remote control SoundTouch With SoundTouch you can stream Internet radio music services and your music library If you have Wi Fi at...

Page 7: ...ker box 4 Interactive box Power cord box used with boxes 1 and 2 Starting with Box 1 unpack each box and set up its contents before unpacking the next one Note If part of the system is damaged do not...

Page 8: ...n a flat stable surface near your TV Control console Note Until your system is completely installed keep the control console positioned for easy access to its rear connector panel From the power cord...

Page 9: ...If an HDMI cable is already connected to an HDMI connector on your TV you can disconnect the other end and use this cable Note If you plan on viewing 3D content use the supplied HIGH SPEED HDMI cable...

Page 10: ...plug facing up Note Do not connect the audio input cable to a Bose link connector Audio OUT 5 Insert the power supply output cord into the Power connector Power Power supply output cord AC power cord...

Page 11: ...the following steps 1 Place the Acoustimass module on the floor at the same end of the room as the TV near a live AC mains power outlet Acoustimass module CAUTION DO NOT stand the Acoustimass module o...

Page 12: ...edia Center connector on the Acoustimass module with the flat surface and arrow facing the front of the module Media center 4 Remove a power cord from the power cord box 5 Insert one end of the power...

Page 13: ...Reflecting series II speakers 4 Left right front or rear speakers 1 Horizontal center channel speaker Left front L White Center front C Brown Right front R Light blue Left rear LR Light green Right re...

Page 14: ...1 m of the TV if possible If placing the speakers in an enclosed bookcase place them at the front edge of the shelf Keep speakers at least 6 in 15 cm away from any CRT picture tube TV 3 Place the rea...

Page 15: ...sert the speaker cables into the Acoustimass module connectors Match each cable plug to each connector by color 6 Locate the speaker position markings on the ends of the speaker cables Speaker positio...

Page 16: ...rom any TV to avoid magnetic interference with the TV image Move it farther away if you still notice interference CAUTION Do not put electronic media such as video or audio tapes on or next to the Aco...

Page 17: ...es to the control console until instructed by UNIFY Make sure the speakers and Acoustimass module are in their final positions Installing the remote control s batteries 1 Slide open the battery compar...

Page 18: ...it is off to keep energy consumption low so it may take several seconds to start The system is ready to use when the status indicator on the console changes from blinking to solid green Status indicat...

Page 19: ...Select your language Run the ADAPTiQ audio calibration system Connect the SoundTouch wireless adapter to your system and your Wi Fi network using a smartphone or tablet Note If you are unable to comp...

Page 20: ...your Lifestyle SoundTouch system For more information on using these accessories or adding other devices to your system at another time refer to the Operating guide Stereo audio cable IR emitter cable...

Page 21: ...uring the setup process such as an unrecognized device remote or a connection error go to the UNIFY menu and correct or change part of your system setup See Changing Your System Setup in your system s...

Page 22: ...o launch the app 2 Select EXPLORE SETTINGS Systems ADD SYSTEM to add another system 3 Select IT IS ALREADY CONNECTED Download and install the SoundTouch app If this is your first time setting up a Sou...

Page 23: ...English 23...

Page 24: ...2015 Bose Corporation The Mountain Framingham MA 01701 9168 USA AM744574 R v 00...

Reviews: