background image

-12-

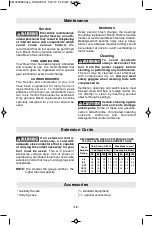
* Auxiliary Handle
* Carrying case

(*= standard equipment)
(**= optional accessories)

Accessories

Service

Preventive  maintenance
performed  by  unauth-

orized per so n  nel may result in misplacing
of  internal  wires  and  components  which
could  cause  serious  hazard.

We

recommend that all tool service be performed
by a Bosch Factory Service Center or Autho -
rized Bosch Service Station.

TOOL LUBRICATION

Your Bosch tool has been properly lubricated
and  is  ready  to  use.  It  is  recommended  that
tools  with  gears  be  regreased  with  a  special
gear lubricant at every brush change.

CARBON BRUSHES

The  brushes  and  commutator  in  your  tool
have  been  engineered  for  many  hours  of
dependable  service.  To  maintain  peak
efficiency of the motor, we recommend every
two to six months the brush es be examined.
Only  genuine  Bosch  replace ment  brushes
specially  designed  for  your  tool  should  be
used.

BEARINGS

Every  second  brush  change,  the  bearings
should be replaced at Bosch Factory Service
Center  or   Au thorized  Bosch  Service  Station.
Bearings which become noisy (due to heavy
load or very abrasive material cut ting) should
be  replaced  at  once  to  avoid  overheating  or
motor failure.

Cleaning

To  avoid  accidents

always  dis connect  the

tool  from  the  power  supply  before
cleaning  or  performing  any  main tenance.

The  tool  may  be  cleaned  most  effectively
with  compressed  dry  air. 

Always  wear

safety  gog gles  when  cleaning  tools  with
compressed air.

Ventilation  openings  and  switch  levers  must
be  kept  clean  and  free  of  foreign  matter.  Do
not  at tempt  to  clean  by  inserting  pointed
objects through openings.

Certain  cleaning  agents
and  sol vents  damage

plastic  parts.

Some  of  these  are:  gasoline,

carbon  tetrachlo ride,  chlo rinated  cleaning
solvents,  ammonia  and  house  hold
detergents that contain ammonia.

Maintenance

If  an  extension  cord  is
necessary,  a  cord  with

adequate  size  conductors  that  is  capable
of carrying the current necessary for your
tool  must  be  used.

This  will  prevent

excessive  voltage  drop,  loss  of  power  or
overheating. Grounded tools must use 3-wire
extension cords that have 3-prong plugs and
receptacles.

NOTE: 

The  smaller  the  gauge  number,  the
higher the cord capacity.

RECOMMENDED SIZES OF EXTENSION CORDS

120 VOLT ALTERNATING CURRENT TOOLS

Tool’s 

Ampere 

Rating

Cord Size in A.W.G.

Wire Sizes in mm

2

Cord Length in Feet

Cord Length in Meters

25

50

100

150

15

30

60

120

3-6

6-8

8-10

10-12

12-16

18
18
18
16
14

16
16
16
16
12

16
14
14
14

14
12
12
12

0.75
0.75
0.75

1.0

0.75

1.0
1.0
2.5

1.5
2.5
2.5
4.0

2.5
4.0
4.0


Extension Cords

2610048693.qxp_RH432VCQ  10/4/17  9:18 AM  Page 12

Summary of Contents for RH432VCQ

Page 1: ...de fonctionnement sécurité Instrucciones de funcionamiento y seguridad 1 877 BOSCH99 1 877 267 2499 www boschtools com Call Toll Free for Consumer Information Service Locations Pour obtenir des informations et les adresses de nos centres de service après vente appelez ce numéro gratuit Llame gratis para obtener información para el consumidor y ubicaciones de servicio RH432VCQ 2610048693 qxp_RH432V...

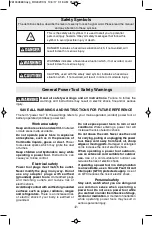
Page 2: ... a damp location is unavoidable use a Ground Fault Circuit Interrupter GFCI protected supply Use of an GFCI reduces the risk of electric shock Personal safety Stay alert watch what you are doing and use common sense when operating a power tool Do not use a power tool while you are tired or under the influence of drugs alcohol or medication A moment of inattention while operating power tools may re...

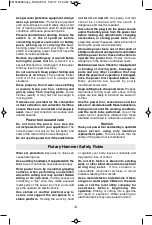
Page 3: ...he power tool Power tools are dangerous in the hands of untrained users Maintain power tools Check for misalignment or binding of moving parts breakage of parts and any other condition that may affect the power tool s operation If damaged have the power tool repaired before use Many accidents are caused by poorly maintained power tools Keep cutting tools sharp and clean Properly maintained cutting...

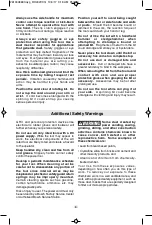
Page 4: ...protective gloves when grasping the bit or accessory Accessories may be hot after prolonged use Do not run the tool while carrying it at your side A spinning bit could become entangled with clothing and injury may result Additional Safety Warnings GFCI and personal protection devices like electrician s rubber gloves and footwear will further enhance your personal safety Do not use AC only rated to...

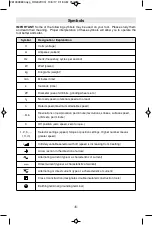
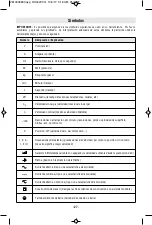
Page 5: ...ttainable speed min Revolutions or reciprocation per minute revolutions strokes surface speed orbits etc per minute 0 Off position zero speed zero torque 1 2 3 I II III Selector settings speed torque or position settings Higher number means greater speed 0 Infinitely variable selector with off speed is increasing from 0 setting Arrow action in the direction of arrow Alternating current type or a c...

Page 6: ...ction This symbol designates that this tool is listed by Underwriters Laboratories This symbol designates that this tool is listed by Underwriters Laboratories to United States and Canadian Standards This symbol designates that this tool is listed by the Canadian Standards Association This symbol designates that this tool is listed by the Canadian Standards Association to United States and Canadia...

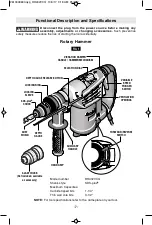
Page 7: ...cities Carbide tipped bits 1 1 4 Thin wall core bits 3 1 2 Rotary Hammer LOCKING RING DUST SHIELD LOCKING SLEEVE AUXILIARY HANDLE HAND GRIP DEPTH GAUGE SELECTION DIAL VARIABLE SPEED TRIGGER SWITCH VIBRATION DAMPER HANDLE HAMMER MECHANISM DEPTH GAUGE RELEASE BUTTON VENTILATION OPENINGS FORWARD REVERSE SWITCH 3 JAW CHUCK Not included available as accessory SDS plus CHUCK FIG 1 NOTE For tool specific...

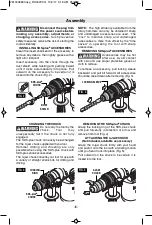
Page 8: ...cloth to remove To remove an accessory pull locking sleeve backward and pull bit forward All accessories should be wiped clean after removing Fig 3 CHANGING THE CHUCK Do not carry the tool by the chuck Tool may unexpectedly fall if the chuck is not fully engaged The SDS plus chuck can easily be exchanged for the 3 jaw chuck supplied with you tool Hammer drilling and chiseling are only possible whe...

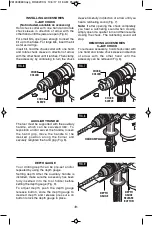
Page 9: ...ion of arrow with the other hand until the jaws are open Fig 6 For small bits open jaws enough to insert the bit up to the flutes For large bits insert the bit as far as it will go Insert bit hold the chuck collar with one hand and rotate chuck sleeve in direction of arrow with the other hand until it latches Then clamp the accessory by continuing to turn the chuck sleeve forcefully in direction o...

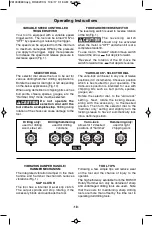
Page 10: ...ades gouges etc the Hammer Only mode must be selected Do not operate the selection dial until the tool come to a complete stop Shifting during rotation of the chuck can cause damage to the tool VARIO LOCK SELECTOR DIAL The vario lock can be set in any one of twelve positions 30 increments Choose a position which is best suited for your operation The Vario Lock position is intended for use with chi...

Page 11: ...nd continue running the drill as the bit is withdrawn Materials such as glass porcelain ceramics tiles plastics etc should be drilled at low speeds with specially designed drill bits and lubricants DRILLING WOOD OR PLASTIC If backing block is not used ease up on the pressure just before the bit breaks through the wood to avoid splintering Complete the hole from the opposite side immediately after ...

Page 12: ...ts always disconnect the tool from the power supply before cleaning or performing any maintenance The tool may be cleaned most effectively with compressed dry air Always wear safety goggles when cleaning tools with compressed air Ventilation openings and switch levers must be kept clean and free of foreign matter Do not attempt to clean by inserting pointed objects through openings Certain cleanin...

Page 13: ...sque de choc électrique augmente Ne maltraitez pas le cordon Ne vous en servez jamais pour transporter l outil électroportatif pour le tirer ou pour le débrancher Éloignez le cordon de la chaleur des huiles des arêtes coupantes ou des pièces mobiles Les cordons abîmés ou emmêlés augmentent les risques de choc électrique Si vous utilisez un outil électroportatif à l extérieur employez une rallonge ...

Page 14: ...s en mouvement Les vêtements amples les bijoux ou les cheveux longs risquent d être happés par les pièces en mouvement Si l outil est muni de dispositifs permettant le raccordement d un système d aspiration et de collecte des poussières assurez vous que ces dispositifs sont raccordés et utilisés correctement L utilisation d un dépoussiéreur peut réduire les dangers associés à l accumulation de pou...

Page 15: ...ussés ou endommagés Les forets émoussés ou endommagés ont tendance à gripper dans l ouvrage En retirant le foret de l outil évitez tout contact avec la peau et utilisez des gants protecteurs appropriés en saisissant le foret ou l accessoire Les accessoires peuvent être chauds après une utilisation prolongée Ne laissez pas l outil en marche tout en le portant à votre côté Le foret en rotation peut ...

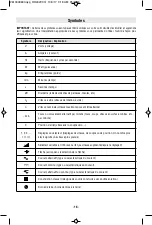
Page 16: ...mum pouvant être atteinte min Tours ou mouvement alternatif par minute tours coups vitesse en surface orbites etc par minute 0 Position d arrêt vitesse zéro couple zéro 1 2 3 I II III Réglages du sélecteur Réglages de vitesse de couple ou de position Un nombre plus élevé signifie une vitesse plus grande 0 Sélecteur variable à l infini avec arrêt La vitesse augmente depuis le réglage 0 Flèche actio...

Page 17: ...ur porter des lunettes de sécurité Ce symbole signifie que cet outil est approuvé par Underwriters Laboratories Ce symbole signifie que cet outil est approuvé par Underwriters Laboratories selon les normes des États Unis et du Canada Ce symbole signifie que cet outil est approuvé par l Association canadienne de normalisation Ce symbole signifie que cet outil est approuvé par l Association canadien...

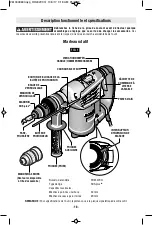
Page 18: ... au carbure 32 mm Mèches creuses à paroi mince 89 mm BAGUE DE VERROUILLAGE PARE POUSSIÈRE MANCHON DE VERROUILLAGE POIGNEE AUXILIAIRE POIGNEE PRISE BUTÉE DE PROFONDEUR CADRAN SELECTEUR GÂCHETTE DE COMMANDE À VITESSE VARIABLE VIBRATION DAMPER HANDLE HAMMER MECHANISM BOUTON DE BLOCAGE DE LA BUTÉE DE PROFONDEUR PRISES D AIR INTERRUPTEUR D INVERSION DE MARCHE MANDRIN À 3 MORS Non fourni disponible à ti...

Page 19: ... déposer Pour retirer un accessoire tirez et tenez le manchon de verrouillage vers l arrière et tirez le embout vers l avant Essuyez tous les accessoires pour les nettoyer après les avoir enlevés Fig 3 REMPLACEMENT DU MANDRIN Ne portez pas l outil par le mandrin car il risque de tomber de manière inattendue si le mandrin n est pas enclenché à fond On peut facilement remplacer le mandrin SDS plus p...

Page 20: ...n et de l autre tournez le manchon du mandrin dans le sens de la flèche jusqu à ce que vous puissiez enlever l accessoire Fig 6 FIG 6 FIG 7 BAGUE DU MANDRIN MANCHON DU MANDRIN BAGUE DU MANDRIN MANCHON DU MANDRIN POIGNEE AUXILIAIRE La poignée auxiliaire qui pivote sur 360 doit être utilisée pour supporter l outil Pour repositionner et ou faire pivoter la poignée desserrez la manette déplacez la poi...

Page 21: ... Lorsque vous utilisez des mèches de démolition ou de dégrossissage telles que burins vrilles gouges etc vous devez sélectionner le mode Marteau seulement N actionnez pas le cadran sélecteur avant que l outil ne se soit arrêté complètement Le mouvement durant la rotation du mandrin peut endommager l outil CADRAN SELECTEUR VARIO LOCK Le dispositif peut être réglé à deuzième positions différentes 30...

Page 22: ... tels que le verre la porcelaine la céramique la tuile le plastique etc devraient être percés à basse vitesse avec les forets appropriés et de l huile PERÇAGE DANS LE BOIS OU LE PLASTIQUE Si un bloc d appui n est pas utilisé relâchez la pression immédiatement avant que le foret ne traverse le bois afin d éviter l éclatement du bois Terminez le trou du côté opposé immédiatement après que la pointe ...

Page 23: ...u une panne de moteur Nettoyage Pour éviter les accidents il faut toujours débrancher l outil avant de le nettoyer ou de l entretenir Le meilleur moyen de nettoyer l outil est d utiliser de l air comprimé sec Il faut toujours porter des lunettes de protection quand on utilise de l air comprimé Les ouïes de ventilation et les leviers de l interrupteur doivent rester propres et exempts de corps étra...

Page 24: ... a la lluvia o a condiciones mojadas La entrada de agua en una herramienta mecánica aumentará el riesgo de que se produzcan sacudidas eléctricas No maltrate el cordón de energía No use nunca el cordón para transportar la herramienta mecánica tirar de ella o desenchufarla Mantenga el cordón alejado del calor el aceite los bordes afilados o las piezas móviles Los cordones dañados o enganchados aumen...

Page 25: ...atrapados en las piezas móviles Si se proporcionan dispositivos para la conexión de instalaciones de extracción y recolección de polvo asegúrese de que dichas instalaciones estén conectadas y se usen correctamente El uso de dispositivos de recolección de polvo puede reducir los peligros relacionados con el polvo Uso y cuidado de las herramientas mecánicas No fuerce la herramienta mecánica Use la h...

Page 26: ...ya detenido por completo No utilice brocas ni accesorios desafilados o dañados Las brocas o accesorios desafilados o dañados pueden atascarse frecuentemente en la pieza de trabajo causando una reacción de par motor Al sacar la broca de la herramienta evite el contacto con la piel y use guantes de protección adecuados al agarrar la broca o el accesorio Los accesorios pueden estar calientes después ...

Page 27: ...voluciones o alternación por minuto revoluciones golpes velocidad de superficie órbitas etc por minuto 0 Posición off velocidad cero par motor cero 1 2 3 I II III Graduaciones del selector graduaciones de velocidad par motor o posición Un número más alto significa mayor velocidad 0 Selector infinitamente variable con apagado la velocidad aumenta desde la graduación de 0 Flecha Acción en la direcci...

Page 28: ...ión de los ojos Este símbolo indica que esta herramienta está catalogada por Underwriters Laboratories Este símbolo indica que Underwriters Laboratories ha catalogado esta herramienta indicando que cumple con las normas estadounidenses y canadienses Este símbolo indica que esta herramienta está catalogada por la Canadian Standards Association Este símbolo indica que la Canadian Standards Associati...

Page 29: ...ared delgada 89 mm ANILLO DE FIJACIÓN PROTECTOR ANTIPOLVO MANGUITO DE FIJACIÓN MANGO AUXILIAR EMPUNADURA CALIBRE DE PROFUNDIDAD DIAL SELECTOR INTERRUPTOR GATILLO DE VELOCIDAD VARIABLE MANGO CON AMORTIGUADOR DE LAS VIBRACIONES MECANISMO DE PERCUSIÓN BOTÓN DE LIBERACION DEL CALIBRE DE PROFUNDIDAD ABERTURAS DE VENTILACIÓN INTERRUPTOR DE AVANCE INVERSIÓN MANDRIL DE 3 MORDAZAS No incluida disponible co...

Page 30: ...esorios Para quitar un accesorio tire hacia atrás del mango de fijación sujételo y tire de la broca hacia adelante Todos los accesorios deben limpiarse después de quitarlos Fig 3 CAMBIO DEL MANDRIL No transporte la herramienta agarrándola por el mandril La herramienta podría caerse inesperadamente si el mandril no está completamente acoplado El mandril SDS plus se puede intercambiar fácilmente por...

Page 31: ...e el collarín del mandril con una mano y gire el manguito del mandril en el sentido de la flecha con la otra mano hasta que se pueda quitar el accesorio Fig 6 FIG 6 FIG 7 COLLARÍN DEL MANDRIL COLLARÍN DEL MANDRIL MANGUITO DEL MANDRIL MANGUITO DEL MANDRIL MANGO AUXILIAR La herramienta se debe sujetar con el mango auxiliar el cual se puede girar 360 Para reposicionar y o hacer girar el mango afloje ...

Page 32: ...ión que usted desea realizar La posición de fijación variable está diseñada para utilizarse con brocas de desbastar tales como brocas de punta rompedora brocas de pala brocas de media caña etc Gire el dial selector hasta la posición de fijación variable A continuación gire el manguito de fijación junto con el accesorio hasta la posición deseada Luego gire el dial selector hasta la posición de mart...

Page 33: ... brocas para taladro y lubricantes diseñados especialmente TALADRADO DE MADERA O PLASTICO Si no se utiliza un bloque de refuerzo disminuya la presión justo antes de que la broca atraviese completamente la madera para evitar el astillado Termine el agujero desde la parte posterior inmediatamente después de que la punta atraviese la pieza de trabajo Si la broca se atasca invierta la operación de tal...

Page 34: ...te siempre la herramienta de la fuente de energía antes de la limpieza o de la realización de cualquier mantenimiento La herramienta se puede limpiar más eficazmente con aire comprimido seco Use gafas de seguridad siempre que limpie herramientas con aire comprimido Las aberturas de ventilación y las palancas de interruptor deben mantenerse limpias y libres de materias extrañas No intente limpiar i...

Page 35: ... 35 Notes Remarques Notas 2610048693 qxp_RH432VCQ 10 4 17 9 18 AM Page 35 ...

Page 36: ...OMME DURÉE À UN AN À COMPTER DE LA DATE D ACHAT CERTAINS ÉTATS AMÉRICAINS CERTAINES PROVINCES CANADIENNES N ADMETTANT PAS LE PRINCIPE DE LA LIMITATION DE LA DURÉE DES GARANTIES IMPLICITES IL EST POSSIBLE QUE LES LIMITATIONS CI DESSUS NE S APPLIQUENT PAS À VOTRE CAS EN AUCUN CAS LE VENDEUR NE SAURAIT ÊTRE TENU POUR RESPONSABLE DES INCIDENTS OU DOMMAGES INDIRECTS INCLUANT MAIS NE SE LIMITANT PAS AUX...

Reviews: