


1 609 929 M27 | (7.8.07)
Bosch Power Tools
18
| English
Assembly
Battery Charging
A battery that is new or has not been used for a
longer period does not develop its full capacity
until after approx. 5 charging/discharging cycles.
To remove the battery
8
, press the battery un-
locking button
9
and pull the battery out of the
power tool toward the rear.
Do not exert any
force.
The battery is equipped with a NTC temperature
control which allows charging only within a tem-
perature range of between 0 °C and 45 °C. A long
battery service life is achieved in this manner.
A significantly reduced working period after
charging indicates that the battery is used and
must be replaced.
Observe the notes for disposal.
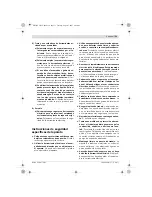
Auxiliary Handle
f
Before any work on the machine (e. g., main-
tenance, tool change, etc.) as well as during
transport and storage, set the rotational di-
rection switch to the centre position.
Unin-
tentional actuation of the On/Off switch can
lead to injuries.
f
Operate your machine only with the auxiliary
handle 12.
The auxiliary handle
12
can be set to any position
for a secure and low-fatigue working posture.
Turn the wing bolt for adjustment of the auxiliary
handle
11
in anticlockwise direction and set the aux-
iliary handle
12
to the required position. Then tight-
en the wing bolt
11
again in clockwise direction.
Adjusting the Drilling Depth (see figure A)
The required drilling depth
X
can be set with the
depth stop
13
.
Press the button for the depth stop adjustment
10
and insert the depth stop into the auxiliary
handle
12
.
Pull out the depth stop until the distance be-
tween the tip of the drill bit and the tip of the
depth stop correspond with the desired drilling
depth
X
.
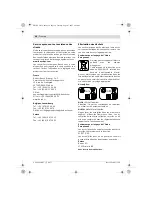
Changing the Tool (see figure B)
f
Before any work on the machine (e. g., main-
tenance, tool change, etc.) as well as during
transport and storage, set the rotational di-
rection switch to the centre position.
Unin-
tentional actuation of the On/Off switch can
lead to injuries.
Hold the rear sleeve
3
of the keyless chuck
1
tight
and turn the front sleeve
2
in rotation direction
n
, until the tool can be inserted. Insert the tool.
Hold the rear sleeve
3
of the keyless chuck
1
tight
and firmly turn the front sleeve
2
in rotation di-
rection
o
by hand until the locking action is no
longer heard. This automatically locks the drill
chuck.
The locking is released again to remove the tool
when the front sleeve
2
is turned in the opposite
direction.
Screwdriver Tools (see figure C)
When working with screwdriver bits
14
, a univer-
sal bit holder
15
should always be used. Use only
screwdriver bits that fit the screw head.
For driving screws, always position the “Drill-
ing/Impact Drilling” selector switch
4
to the
“Drilling” symbol.
Replacing the Drill Chuck
f
Before any work on the machine (e. g., main-
tenance, tool change, etc.) as well as during
transport and storage, set the rotational di-
rection switch to the centre position.
Unin-
tentional actuation of the On/Off switch can
lead to injuries.
For machines without spindle lock, the drill
chuck must be replaced through an authorized
after-sales service agent for Bosch power tools.
The drill chuck must be tightened with a
tightening torque of approx. 30–35 Nm.
OBJ_BUCH-14-002.book Page 18 Tuesday, August 7, 2007 9:42 AM