10
Operation
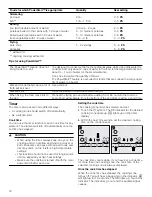
Turning the cooktop on and off
The main switch is used to turn the cooktop on and off.
To switch on: touch the
#
symbol. A signal sounds. The
display light above the main switch and the
‹
indicators
light up. The cooking zones are ready for use.
To switch off: Touch the
#
symbol until the display light
above the main switch and the displays go out. All
cooking zones are switched off. The residual heat
indicator remains lit up until the cooking zones are
sufficiently cooled off.
Notes
▯
The cooktop turns off automatically if all cooking
zones have been switched off for more than
20 seconds.
▯
The settings remain stored for 4 seconds after the
cooktop has been switched off. If you switch it back on
in this time, the cooktop starts up with the previous
settings.
Setting the cooktop
This section will show you how to set the elements. The
table contains details on the heat settings for a variety of
dishes.
Setting a cooking zone
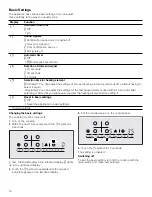
Set the desired heat setting on the control panel.
Heat setting 1 = lowest power
Heat setting 9 = highest power
Every heat setting has an intermediate setting. This is
marked in the control panel with the
û
symbol.
Selecting the heat level
The cooking zone must be turned on.
1.
Touch the
$
symbol to select the cooking zone.
‹
lights up in the heat setting display,
¬
lights up
under the heat setting display.
2.
Set the required heat setting on the control panel.
Changing the heat level
Select the cooking zone and set the required heat setting
on the control panel.
Turning off the cooking zone
Use the
$
symbol to select the cooking zone. Set the
control panel from to 0. After approximately 10 seconds,
the residual heat indicator appears.
Notes
▯
The last selected cooking zone remains activated. You
can set the cooking zone without selecting it again.
▯
Cooking zone temperature is regulated by the heat
switching on and off. The heating can switch on and
off even at high power.
Note:
The heat is turned on and off to regulate the
temperature of the element; this means that the red glow
below the element is not always visible. When you select
a low heat setting, the element turns off for longer
intervals, while at a higher setting these intervals are very
short. Even at the highest level, the element turns on and
off.
Settings table
The following table provides some examples. Cooking
times may vary depending on the type of food, its weight
and quality. Deviations are therefore possible.
Set the element to heat setting 9 for bringing to the boil
or initial frying, then switch back to appropriate setting
(not for melting).
9
CAUTION
During cooking, stews or liquid meals such as
soups, sauces or drinks can heat up too quickly
unnoticed and overflow or spatter. For this reason
we recommend that you stir continuously, gradually
heating the food at a suitable power level.
Power levels
Melting
chocolate
1 - 2
butter
1 - 2
Heating
frozen vegetables (e.g. spinach)
2. - 3.


