background image

en

        Tested for you in our cooking studio

26

Gentle hot air heating function

Gentle hot air is an intelligent heating function that 

allows you to gently cook meat, fish and baked items. 

The appliance optimally controls the supply of energy to 

the cooking compartment. The food is cooked in 

phases using residual heat. This means that it remains 

more succulent and browns less. Depending on the 

method of preparation and the type of food, it is 

possible to save energy. If you open the appliance door 

before the food has finished cooking or if you preheat 

the appliance, you may not be able to achieve this 

result.
Only use genuine accessories for your appliance. 

These have been tailored to the cooking compartment 

and the heating functions of your appliance. Remove 

any accessories that are not being used from the 

cooking compartment.
Place the food into the empty cooking compartment 

before the oven is heated up. Select a temperature of 

between 120 °C and 230 °C.Always keep the 

appliance door closed when cooking. Only cook on one 

level when using this function.
The Gentle hot air heating function is used to measure 

both the energy consumption in air recirculation mode 

and the energy efficiency class.

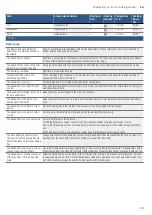
Baking on one level

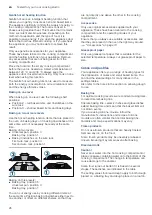
When baking on one level, use the following shelf 

positions:

Position 2 – tall baked items and tins/dishes on the 

wire rack

Position 3 – shallow baked items and baking trays

Baking on two or more levels

Use the hot air heating function. Items that are placed in 

the oven on baking trays or in baking tins/dishes at the 

same time will not necessarily be ready at the same 

time.

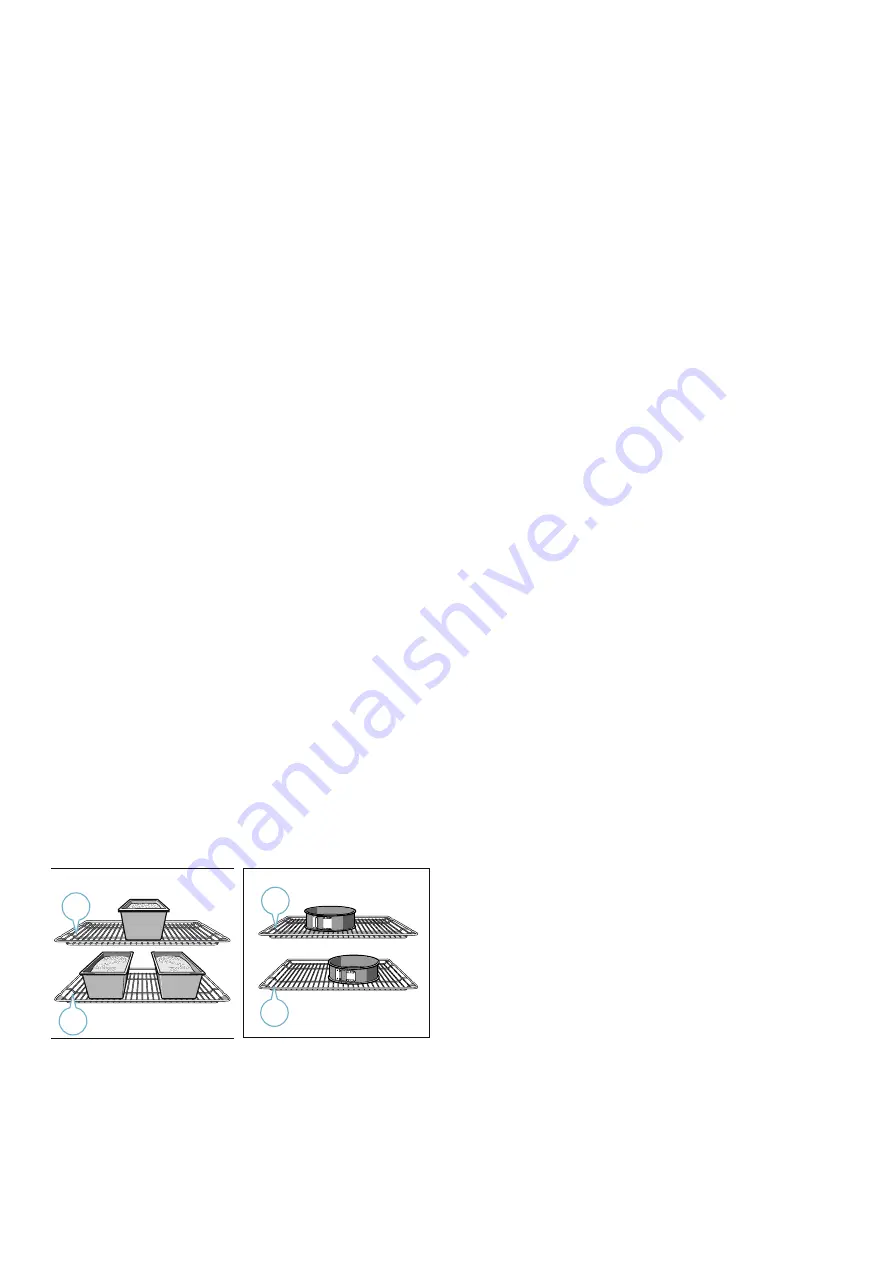
Baking on two levels:

Universal pan, position 3

Baking tray, position 1

Baking tins/dishes on the wire rack

First wire rack, position 3

Second wire rack, position 1

Baking on three levels:

Baking tray, position 5

Universal pan, position 3

Baking tray, position 1

You can cut energy use by cooking different items at 

the same time. Position baking tins/dishes either next to 

one another or offset on different shelves so that they 

are not directly one above the other in the cooking 

compartment.

Accessories

Only use original accessories supplied with your 

appliance. These have been tailored to the cooking 

compartment and the operating modes of your 

appliance.
Ensure that you always use suitable accessories and 

that they are placed in the oven the right way around. 

~

 "Accessories" on page 13

Greaseproof paper

Only use greaseproof paper that is suitable for the 

selected temperature. Always cut greaseproof paper to 

size.

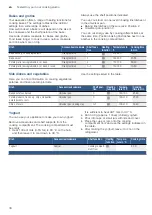
Cakes and pastries

Your appliance offers you a range of heating types for 

the preparation of cakes and small baked items. You 

can find the ideal settings for many dishes in the 

settings tables.
Also refer to the notes in the section on allowing dough 

to rise.

Baking tins

For optimal cooking results, we recommend using dark-

coloured metal baking tins.
Tinplate baking tins, ceramic dishes and glass dishes 

extend baking time and mean that the baked item will 

not brown evenly.
If you are using silicone moulds, follow the 

manufacturer's instructions and recipes. Silicone 

moulds are often smaller than normal baking tins. 

Quantity and recipe specifications may vary.

Frozen products

Do not use frozen products that are heavily frosted. 

Remove any ice on the food.
Some frozen products may be unevenly pre-baked. 

Uneven browning may remain even after baking.

Bread and rolls

Caution!

Never pour water into the hot cooking compartment or 

place cookware containing water onto the bottom of the 

cooking compartment. The change in temperature can 

cause damage to the enamel.

Some food turns out better if it is baked in several 

stages. These dishes are indicated in the table.
The setting values for bread dough apply to both dough 

placed on a baking tray and dough placed in a loaf tin.

Summary of Contents for HXA060B20Q

Page 1: ...3FHJTUFS RXU QHZ GHYLFH RQ 0 RVFK QRZ DQG JHW IUHH EHQHILWV CPTDI IPNF DPN XFMDPNF en Instruction manual Free standing cooker Free standing cooker HXA060B20Q ...

Page 2: ......

Page 3: ...utions for use 16 Ä Gas burners 17 Advance cleaning of burner cup and cap 17 Igniting the gas burners 17 Table Cooking 17 1 Operating the appliance 18 Switching the appliance on and off 18 Setting the type of heating and temperature 18 D Cleaning 19 Cleaning agents 19 Keeping the appliance clean 21 p Rails 21 Detaching and refitting the rails 21 q Appliance door 22 Detaching and attaching the oven...

Page 4: ...ion of heat moisture and products of combustion in the room in which it is installed Ensure that the kitchen is well ventilated especially when the appliance is in use keep natural ventilation holes open or install a mechanical ventilation device mechanical extractor hood Prolonged intensive use of the appliance may call for additional ventilation for example opening of a window or more effective ...

Page 5: ...wer cables Electricity and gas lines must not come into contact with the rear of the appliance Risk of fire Never place flammable objects on the burners or store them in the cooking compartment Never open the appliance door if there is smoke inside Switch off the appliance Pull out the mains plug or switch off the appliance at the circuit breaker in the fuse box Shut off the gas supply Warning Ris...

Page 6: ... base The appliance must be fixed to the base Risk of injury If you leave the appliance door open people may bump into it resulting in injury The appliance door must be kept closed both while the appliance is in operation and when it has finished Warning Risk of tipping Warning In order to prevent tipping of the appliance this stabilizing means must be installed Refer to the instructions for insta...

Page 7: ...erature change can cause damage to the enamel Moisture in the cooking compartment Over an extended period of time moisture in the cooking compartment may lead to corrosion Allow the cooking compartment to dry after use Do not keep moist food in the closed cooking compartment for extended periods of time Do not store food in the cooking compartment Cooling with the appliance door open Following ope...

Page 8: ...the other The cooking compartment stays warm This reduces the baking time for the second cake You can place two cake tins next to each other in the cooking compartment For longer cooking times you can switch the appliance off 10 minutes before the end of the cooking time and use the residual heat to finish cooking Saving energy with the gas hob Always use a saucepan which is the correct size for y...

Page 9: ...f you do not know what the gas pressure in your distributing pipes is contact your local gas company The gas regulator must be connected maintained and adjusted by specialists from your local gas company Faults in the gas installation smell of gas If you notice a smell of gas or faults in the gas installation you must immediately shut off the gas supply and or close the gas cylinder valve immediat...

Page 10: ...ctly on the kitchen floor and in line with the specified dimensions The appliance must not be set up on any other object The distance between the top edge of the oven and the bottom edge of the extractor hood must meet the requirements of the extractor hood manufacturer Ensure that the appliance is not moved again after set up The distance from the high output burner or wok burner to the fronts of...

Page 11: ...information The design depends on the respective appliance model Cooking area Here is an overview of the control panel The design depends on the respective appliance model Explanations 1 Hob cover 2 Steam outlet Caution When the oven is in operation hot steam escapes here 3 Hob 4 Control panel 5 Cooling fan 6 Oven door 7 Plinth drawer Optional available for some appliances Depending on the applian...

Page 12: ...ion button This button activates the electronic ignition system When you press the button all igniters ignite at the same time Cooking compartment Various functions in the cooking compartment make your appliance easier to use For example the cooking compartment is well lit and a cooling fan prevents the appliance from overheating Opening the appliance door If you open the appliance door when the a...

Page 13: ... Only use original accessories They are specially adapted for your appliance You can buy accessories from the after sales service from specialist retailers or online Note The accessories may deform when they become hot This does not affect their function Once they have cooled down again they regain their original shape Wire rack For ovenware cake tins and ovenproof dishes For roasts grilled items ...

Page 14: ...r more details Note Not all optional accessories are suitable for every appliance When purchasing always quote the exact product number E no of your appliance Customer service on page 25 Optional accessories Wire rack For cookware cake tins and ovenproof dishes and for roasts and grilled food Baking tray For tray bakes and small baked items Universal pan For moist cakes baked items frozen food and...

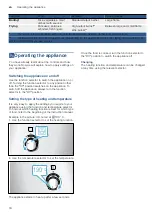
Page 15: ...such as polystyrene pellets in the cooking compartment and remove the adhesive tape that is in or on the appliance Before heating the appliance wipe the smooth surfaces in the cooking compartment with a soft wet cloth Keep the kitchen ventilated while the appliance is heating Make the settings indicated You can find out how to set the type of heating and the temperature in the next section Operati...

Page 16: ... flame must not touch the sides of the pan Do not use damaged pans which do not sit evenly on the hob Pans may tip over Only use pans with a thick flat base Do not cook without using a lid and make sure the lid is properly fitted This wastes energy Always place the ovenware centrally over the burner Otherwise there is a risk that it may tip over Place the pans on the pan supports never directly on...

Page 17: ...lame is lit If it is not repeat the process from step 2 7 To end the cooking process turn the hotplate control clockwise to the û Off position The hotplate control should not be actuated for longer than 15 seconds If the burner does not ignite within 15 seconds wait at least 1 minute before repeating the procedure The gas burner does not ignite If there is a power cut or if the ignition plugs are ...

Page 18: ...r to the beginning of the instruction manual Example in the picture 3D hot air at 190 C 1 Use the function selector to set the heating function 2 Use the temperature selector to set the temperature The appliance starts to heat up after a few seconds Once the food is cooked turn the function selector to the Off position to switch the appliance off Changing The heating function and temperature can b...

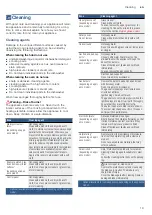
Page 19: ... cleaning Optional available for some appliances depending on the appliance model Upper glass cover depending on appli ance model Glass cleaner Clean with a soft cloth You can remove the upper glass cover for cleaning To find out how to do this please refer to the section Upper glass cover Rotary knobs Do not remove Hot soapy water Clean with a dish cloth and dry with a soft cloth Hob surround Hot...

Page 20: ... the cooking compartment is cold Please use the self cleaning function to clean self cleaning surfaces To find out how to do this please refer to the section Self cleaning Caution Never use oven cleaner on self clean ing surfaces Glass cover for the oven light Hot soapy water Clean with a dish cloth Shelf Hot soapy water Clean with a dish cloth or a brush You can remove the shelves for cleaning To...

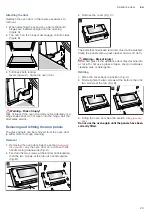
Page 21: ...moist cakes Use suitable ovenware for roasting e g a roasting dish pRails RailsWith good care and cleaning your appliance will retain its appearance and remain fully functional for a long time to come This will tell you how to remove the shelves and clean them Detaching and refitting the rails The rails can be removed for cleaning The oven must have cooled down Unhooking the rails 1 Hold the shelf...

Page 22: ...ppliance door and clean it Detaching and attaching the oven door For cleaning purposes and to remove the door panels you can detach the oven door The oven door hinges each have a locking lever When the locking levers are closed figure A the oven door is secured in place It cannot be detached When the locking levers are open in order to detach the oven door figure B the hinges are locked They canno...

Page 23: ...oval 1 Removing the oven door See the section Removing the oven door Lay the oven door on a cloth with the handle facing downwards Fig A 2 First turn the two screws at the bottom anticlockwise then the two screws at the top also anticlockwise Fig B 3 Remove the cover Fig C The parts that have been removed must not be washed Clean the panels with a glass cleaner and a soft cloth Warning Risk of inj...

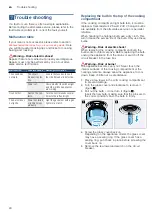
Page 24: ...plug the appliance from the mains or switch off the circuit breaker in the fuse box Warning Risk of burns The appliance becomes very hot Never touch the interior surfaces of the cooking compartment or the heating elements Always allow the appliance to cool down Keep children at a safe distance 1 Place a tea towel in the cold cooking compartment to prevent damage 2 Turn the glass cover anti clockwi...

Page 25: ...heat to its surroundings during operation Due to the significant differences in temperature between the appliance interior and the external parts of the appliance condensation may build up on the door the control panel or the front panels of adjacent kitchen cabinets This is a normal physical phenomenon Condensation can be reduced by preheating the oven or opening the door carefully General inform...

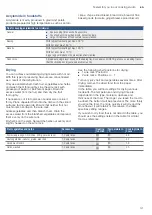
Page 26: ... position 5 Universal pan position 3 Baking tray position 1 You can cut energy use by cooking different items at the same time Position baking tins dishes either next to one another or offset on different shelves so that they are not directly one above the other in the cooking compartment Accessories Only use original accessories supplied with your appliance These have been tailored to the cooking...

Page 27: ... with dry topping Universal pan 3 160 180 25 35 Shortcrust tart with dry topping 2 levels Universal pan baking tray 3 1 160 170 35 45 Shortcrust tart with moist topping Universal pan 3 160 180 60 90 Yeast cake with dry topping Universal pan 3 150 170 25 35 Yeast cake with dry topping 2 levels Universal pan baking tray 3 1 150 170 20 30 Yeast cake with moist topping Universal pan 2 160 180 30 50 Ye...

Page 28: ...0 60 Bread 1000 g in a loaf tin or free form Universal pan or loaf tin 2 6 200 220 35 50 Bread 1500 g in a loaf tin or free form Universal pan or loaf tin 2 6 180 200 60 70 Flatbread Universal pan 3 240 250 25 30 Bread rolls sweet fresh Universal pan 3 160 170 20 30 Bread rolls sweet fresh 2 levels Universal pan baking tray 3 1 160 180 15 25 Bread rolls fresh Universal pan 3 190 210 20 30 Toast wi...

Page 29: ...dark on top and too light underneath Bake the cake one level lower in the oven the next time Select a lower temperature and extend the baking time The baked item is too dark in a tin or loaf tin Place the baking tray in the middle of the accessory not directly against the back wall The baked item is too dark in colour overall Select a lower temperature next time and extend the baking time if neces...

Page 30: ...tment The cooking compartment must be empty 1 Heat 1 litre of milk 3 5 fat to 90 C on the hob and then leave it to cool down to 40 C It is sufficient to heat UHT milk to 40 C 2 Stir in 30 g approx 1 tbsp chilled yoghurt 3 Pour into cups or small jars with lids and cover 4 Place the cups or jars onto the cooking compartment floor and use the settings indicated in the table 5 After making the yoghur...

Page 31: ...e the dried food from the paper immediately In the table you will find settings for drying various foodstuffs The temperature and drying time are dependent on the type moisture ripeness and thickness of the food The longer you leave the food to be dried the better it will be preserved The more thinly you slice the food the more quickly it will dry and the more flavour it will retain For this reaso...

Page 32: ... are intended as a guide only Defrosting For defrosting frozen fruit vegetables and baked items Poultry meat and fish should ideally be defrosted in the refrigerator Not suitable for cream cakes or cream gateaux Use the following shelf positions when defrosting 1 wire rack Position 2 2 wire racks Positions 3 1 Tip Food that has been frozen flat or in portions defrosts more quickly than food items ...

Page 33: ...ote the information in the tables about preheating The setting values are valid without rapid heating up For baking use the lower of the indicated temperatures first Baking 2 1 Dish Accessories cookware Shelf posi tion Heating function Temperature in C Cooking time in min Viennese whirls Universal pan 3 140 150 25 35 Viennese whirls 2 levels Universal pan baking tray 3 1 140 150 30 45 Viennese whi...

Page 34: ...6 ...

Page 35: ...6 ...

Page 36: ...QQMJBODFT 4FSWJDF UHH DQG HDV UHJLVWUDWLRQ DOVR RQ PRELOH SKRQHV XXX CPTDI IPNF DPN XFMDPNF PPLJOH GPS IFMQ PV MM GJOE JU IFSF SHUW DGYLFH IRU RXU RVFK KRPH DSSOLDQFHV QHHG KHOS ZLWK SUREOHPV RU D UHSDLU IURP RVFK H SHUWV LQG RXW HYHU WKLQJ DERXW WKH PDQ ZD V RVFK FDQ VXSSRUW RX XXX CPTDI IPNF DPN TFSWJDF POUBDU EBUB PG BMM DPVOUSJFT BSF MJTUFE JO UIF BUUBDIFE TFSWJDF EJSFDUPSZ 3PCFSU PTDI BVTHFSÉ...

Reviews: