12
How to operate your oven
You have the option of adjusting your oven to a range of
different settings. You can control the oven using the electronic
clock.
Oven lighting
Switching on the oven light
Turn the function selector to an operating mode.
The oven light also switches on when the oven door is opened.
Switching off the oven light
Turn the function selector to the off position.
Close the oven door.
Operating modes
The following operating modes are available.
Operating the oven
Switching on the oven
Note:
Always keep the appliance door closed when it is in
operation.
1.
Turn the function selector to the desired operating mode.
2.
Turn the temperature selector to set the desired temperature.
The oven switches on.
The indicator lamp is lit when the oven is heating up. It goes out
during pauses in heating.
Note:
The indicator lamp also lights up when the function
selector is in the off position and a temperature is set. The oven
only begins to heat up when an operating mode is set.
Switching off the oven
1.
Turn the function selector to the
Û
position.
2.
Turn the temperature selector to the
Û
position.
The oven switches off.
Setting the time-setting options
Your oven has various time-setting options. You can use the
0
button to call up the menu and switch between the individual
functions. All the time symbols are lit when you can make
settings. The brackets [ ] show you which time-setting option
you have currently selected. A time-setting option which has
already been set can be changed directly with the
@
or
A
button when the relevant time symbol is in brackets.
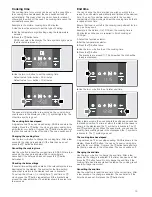
Timer
You can use the timer as a kitchen timer. It runs independently
of the oven. The timer has its own signal. In this way, you can
tell whether it is the timer or a cooking time which has elapsed.
1.
Press the
0
button once.
The time symbols light up in the display and the brackets are
around
U
.
2.
Use the
@
or
A
button to set the timer duration.
Default value for
@
button = 10 minutes
Default value for
A
button = 5 minutes
After a few seconds, the time setting is adopted. The timer
starts. The [
U
] symbol lights up in the display and the timer
duration counts down. The other time symbols go out.
The timer duration has elapsed
A signal sounds. 00:00 is shown in the display. Use the
0
button to switch off the timer.
Changing the timer duration
Use the
@
or
A
button to change the timer duration. After a few
seconds, the change is adopted.
Cancelling the timer duration
Use the
A
button to reset the timer duration to 00:00. The
change will be adopted after a few seconds. The timer is
switched off.
Checking the time settings
If several time-setting options are set, the relevant symbols are
illuminated on the display. The symbol for the time-setting
option that is visible in the display is shown in brackets.
To call up the
U
timer,
r
cooking time,
p
end time or
0
clock, press the
0
button repeatedly until the brackets are
around the relevant symbol. The display shows the value for a
few seconds.
Operating mode
Use
%
Top/bottom heat-
ing*
For sponge cakes in tins, bakes, lean
joints of beef, veal and game.
$
Bottom heating
For bain-marie applications such as
crema catalana, or for preserving.
Also improvement setting if the base
is not fully baked through
*
Grill
For individual portions or small quanti-
ties of steaks, sausages, fish and
toast.
(
Full-surface grill
For several steaks, sausages, fish and
pieces of toast.
* Type of heating used to determine the energy efficiency class
in accordance with EN50304.
7
Hot air grill
For poultry and larger pieces of meat.
2
Top/bottom heat-
ing and hot air
For cakes with very moist toppings.
<
Hot air
For cakes, pizza and items baked on
two levels, for roasting and drying.
B
Defrost setting
For defrosting meat, poultry, fish and
pastries.
Operating mode
Use
* Type of heating used to determine the energy efficiency class
in accordance with EN50304.
Summary of Contents for HSB737355Z
Page 1: ... en Instruction manual Free standing cooker HSB737355Z ...
Page 2: ......
Page 19: ......


