background image

8

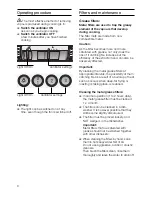
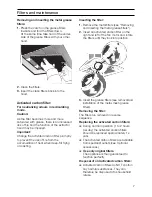
Replacing the light bulbs

1.

Switch off the extractor hood and pull
out the mains plug or switch off the 
electricity supply at the fuse box.

2.

Remove the grease filters (see Filters and
Maintenance).

3.

Press down the bulb cover and 
disconnect from the light strip.

4.

Replace the bulb (standard filament bulb,
max 40 W, E14 bulb holder).

5.

Attach the lamp cover again.

6.

Re-insert the grease filters.

7.

Plug the appliance into the mains or
switch it on at the fuse box.

Cleaning and care

Isolate the extractor hood by pulling out
the mains plug or switching off the fuse.

Do not clean the extractor hood with

abrasive sponges or with cleaning agents
which contain sand, soda, acid or chlorine!

Clean the extractor hood with a hot soap
solution or a mild window cleaner.

Do not scrape off dried-on dirt but wipe
off with a damp cloth.

When cleaning the grease filters, remove
grease deposits from accessible parts of
the housing. This prevents the risk of fire
and ensures that the extractor hood
continues operating at maximum 
efficiency.

Clean the switch with a soft, damp cloth

(mild detergent solution) only.
Do not use stainless steel polish on the 
switch.

Stainless steel surfaces:

Use a mild non-abrasive stainless steel
cleaner.

Clean the surface in the same direction
as it has been ground and polished.

We recommend our stainless steel 
cleaner no. 461731.
See enclosed service booklet for order
address.

Aluminium, coated and plastic surfaces:

Do not use dry cloths.

Use a mild window cleaning agent.

Do not use aggressive, acidic or caustic
cleaners.

Observe the warranty regulations in the
enclosed service booklet.

Summary of Contents for DWW061350B Installation Instructions

Page 1: ...Operating and installation instructions ...

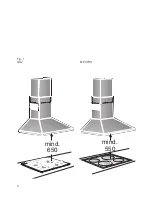
Page 2: ...2 mind 650 mind 550 Abb 1 ELECTRO Fig 1 GAZ ...

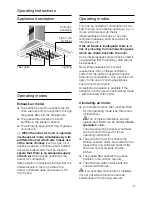
Page 3: ...f poisoning from combustion gases which are drawn back into the room An air intake exhaust air wall box by itself is no guarantee that the limiting value will not be exceeded Note When assessing the overall requirement the combined ventilation system for the entire household must be taken into consideration This rule does not apply to the use of cooking appliances such as hobs and ovens Unrestrict...

Page 4: ...dingly you may find descriptions of individual features that do not apply to your specific appliance This extractor hood complies with all relevant safety regulations Repairs should be carried out by qualified technicians only Improper repairs may put the user at considerable risk Before using your appliance for the first time please read these Instructions for Use carefully They contain important...

Page 5: ...ed fat or oil can easily catch fire If you are cooking with fat or oil e g chips etc never leave the cooker unattended Never allow children to play with the appliance Do not let adults or children operate the appliance unsupervised if they are mentally or physically unable to use the appliance safely and correctly if they don t have the knowledge and experience to use the appliance safely and corr...

Page 6: ...t be cleaned 1 x a month The filters can be cleaned in a dish washer It is however possible that they will become slightly discoloured The filter must be placed loosely and NOT wedged in the dishwasher Important Metal filters that are saturated with grease should not be washed together with other dishes etc When cleaning the filters by hand soak them in hot soapy water first of all Do not use aggr...

Page 7: ... the metal filters see Removing and inserting the metal grease filters 2 Insert an activated carbon filter on the right and left of the fan motor and rotate the filters until they lock into position 1 2 Filters and maintenance 2 Clean the filters 3 Insert the clean filters back into the hood Activated carbon filter For neutralizing odours in recirculating mode Caution As the filter becomes more an...

Page 8: ...ctor hood with a hot soap solution or a mild window cleaner Do not scrape off dried on dirt but wipe off with a damp cloth When cleaning the grease filters remove grease deposits from accessible parts of the housing This prevents the risk of fire and ensures that the extractor hood continues operating at maximum efficiency Clean the switch with a soft damp cloth mild detergent solution only Do not...

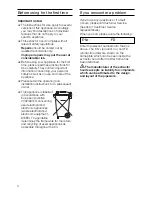
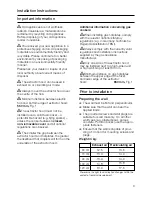
Page 9: ...uire at your local authority about current means of disposal The extractor hood can be used in exhaust air or circulating air mode Always mount the extractor hood over the centre of the hob Minimum distance between electric hob and bottom edge of extractor hood 550 mm Fig 1 The extractor hood must not be installed over a solid fuel cooker a potential fire hazard e g flying sparks unless the cooker...

Page 10: ...te supply of fresh air which will be needed by the burner for combustion Safe operation is possible provided that the underpressure in the room where the burner is installed does not exceed 4 Pa 0 04 mbar This can be achieved if combustion air can flow through non lockable openings e g in doors windows and via the air intake exhaust air wall box or by other technical measures such as reciprocal in...

Page 11: ...m level and there will be an increase in noise The manufacturer of the extractor hoods accepts no liability for complaints which can be attributed to the design and layout of the pipework If pipes have different diameters Insert sealing strip For exhaust air mode ensure that there is an adequate supply of fresh air Round pipes Internal diameter Flat ducts Cross section l 100 mm 179 cm2 l 120 mm 11...

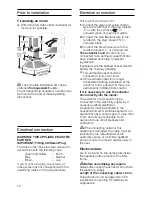
Page 12: ...ry to wire the extractor hood directly into the mains The extractor hood should only be connected to the electricity supply by a properly qualified electrician A separator must be installed in the household circuit A suitable separator is a switch that has a contact gap of more than 3 mm and interrupts all poles Such devices include circuit breakers and contactors If the connecting cable for this ...

Page 13: ...tric hob and 650 mm for a gas hob The bottom edge of the template equates to the lower edge of the extractor hood 4 Drill 5 holes dia 8 mm for the extractor hood and 4 holes dia 8 mm for the brackets for fixing the flue ducts and insert wall plugs flush with the wall Note Take into account any special accessories that are going to be fitted 5 Screw on the 2 brackets for fixing the upper and lower ...

Page 14: ...recommend that you wear gloves when installing 13 Position the lower flue duct on the extractor hood and screw the extractor hood to the flue duct from below with 2 long screws To prevent scratching the upper duct when pushing on the lower duct cover the edge of the lower duct with the installation template or other protective material Then screw the flue duct to the sides of the fixing bracket wi...

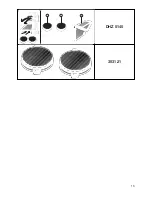
Page 15: ...15 353121 1 2 1 DHZ 5145 ...

Page 16: ...9000 432 192 Printed in Germany 0209 Es E Mail bosch infoteam bshg com Online Shop www bosch eshop com ...

Reviews: