background image

en 

Home Connect 

8

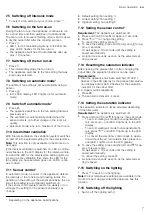
7.17 Setting the brightness

Press and hold  ​⁠ or  ​⁠.

Note: 

Colour temperature settings are available in the

Home Connect app provided the appliance has this
function.

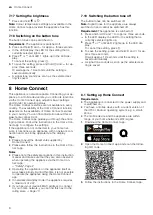
7.18 Switching on the button tone

The button tones can be switched on.

Requirement:

 The appliance is switched off.

1.

Press and hold  ​⁠ and  ​⁠ for approx. three seconds.

a

In the LED display, the LED for the setting that is
currently selected lights up.

2.

Press  ​⁠ or  ​⁠ until LED 1 lights up in the LED dis-
play.
To cancel the setting, press  ​⁠.

3.

To save the setting, press and hold  ​⁠ and  ​⁠ for ap-
prox. three seconds.
Or wait approx. 10 seconds until the setting is
saved automatically.

a

A signal tone sounds as soon as the selected set-
ting is saved.

7.19 Switching the button tone off

The button tones can be switched off.

Note: 

Signal tones for the appliance are always

switched on and cannot be switched off.

Requirement:

 The appliance is switched off.

1.

Press and hold  ​⁠ and  ​⁠ for approx. three seconds.

a

In the LED display, the LED for the setting that is
currently selected lights up.

2.

Press  ​⁠ or  ​⁠ until LED 2 lights up in the LED dis-
play.
To cancel the setting, press  ​⁠.

3.

To save the setting, press and hold  ​⁠ and  ​⁠ for ap-
prox. three seconds.
Or wait approx. 10 seconds until the setting is
saved automatically.

a

A signal tone sounds as soon as the selected set-
ting is saved.

8  Home Connect

This appliance is network-capable. Connecting your ap-
pliance to a mobile device lets you control its functions
via the Home Connect app, adjust its basic settings
and monitor its operating status.
The Home Connect services are not available in every
country. The availability of the Home Connect function
depends on the availability of Home Connect services
in your country. You can find information about this at:
www.home-connect.com.
The Home Connect app guides you through the entire
login process. Follow the instructions in the Home Con-
nect app to configure the settings.
If the appliance is not connected to your home net-
work, it functions as an appliance with no network con-
nection and can still be operated via the display.

Tips

¡

Please consult the documents supplied by
Home Connect.

¡

Please also follow the instructions in the Home Con-
nect app.

Notes

¡

Please note the safety precautions in this instruction
manual and make sure that they are also observed
when operating the appliance via the Home Con-
nect app. 
→ 

"Safety", Page 2

¡

Operating the appliance on the appliance itself al-
ways takes priority. During this time it is not possible
to operate the appliance using the Home Connect
app.

¡

In networked standby mode, the appliance requires
a maximum of 2 W.

¡

If you need your device's MAC address to connect
to your home network, you can find this next to the
rating plate. → 

Page 13

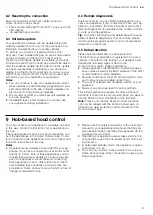
8.1 Setting up Home Connect

Requirements

¡

The appliance is connected to the power supply and
is switched on.

¡

You have a mobile device with a current version of
the iOS or Android operating system, e.g. a smart-
phone.

¡

The mobile device and the appliance are within
range of your home network's Wi-Fi signal.

1.

Download the Home Connect app.

2.

Open the Home Connect app and scan the follow-
ing QR code.

3.

Follow the instructions in the Home Connect app.

Summary of Contents for DRR16AQ20

Page 1: ...Register your new device on MyBosch now and get free benefits bosch home com welcome Ceiling mounted ventilation sys tem DRR16AQ20 en User manual and installation instructions ...

Page 2: ...to an altitude of max 2000 m above sea level Do not use the appliance With an external timer 1 3 Restriction on user group This appliance may be used by children aged 8 or over and by people who have reduced physical sensory or mental abilities or inad equate experience and or knowledge provided that they are supervised or have been instructed on how to use the appliance safely and have understood...

Page 3: ...ke any changes to the electrical or mechanical assembly The filter cover may swing out Open the filter cover slowly Take hold of the filter cover after opening until it no longer swings out Close the filter cover slowly Risk of injury when opening and closing the hinges Keep your hands away from the hinges The light emitted by LED lights is very dazzling and can damage the eyes risk group 1 Do not...

Page 4: ...in may damage the ap pliance The air extraction duct must be installed with a gradient of at least 1 from the appliance If you put incorrect stress on the design elements they may break off Do not pull design elements Do not place objects on the design elements or hang objects from them Leaking batteries may damage the remote control Remove the batteries if you are not using the re mote control Sa...

Page 5: ...d conveyed back into the room To bind odours in circulating air mode you must install an odour filter The dif ferent options for operating the appli ance in circulating air mode can be found in our catalogue Alternatively ask your dealer The required accessor ies are available from specialist retail ers from customer service or from the Online Shop ...

Page 6: ...vent ilation 7 Home Connect 8 Infrared receiver 1 Depending on the appliance specifications 6 Before using for the first time Configure the settings for initial start up Clean the ap pliance and accessories 7 Basic operation 7 1 Switching on the appliance Requirement Align the remote control as precisely as possible to the infrared receiver for the LED display Press to switch on the appliance a Th...

Page 7: ...ontrol system reacts too weakly or too strongly the setting for the sensor sensitivity may change Default setting Fan setting 3 Lowest setting Fan setting 1 Highest setting Fan setting 5 7 12 Setting the sensor control1 Requirement The appliance is switched off 1 Press and hold and for approx 3 seconds 2 Press or to change the setting To cancel the setting press 3 To save the setting press and hol...

Page 8: ... basic settings and monitor its operating status The Home Connect services are not available in every country The availability of the Home Connect function depends on the availability of Home Connect services in your country You can find information about this at www home connect com The Home Connect app guides you through the entire login process Follow the instructions in the Home Con nect app t...

Page 9: ...d to the Internet your appliance will transmit the following types of data to the Home Connect server initial registration Unique appliance identification consisting of appli ance codes as well as the MAC address of the Wi Fi communication module installed Security certificate of the Wi Fi communication mod ule to ensure a secure data connection The current software and hardware version of your ap...

Page 10: ...ayer of the stainless steel cleaning product with a soft cloth Tip You can obtain stainless steel cleaning products from after sales service or the online shop 10 3 Cleaning painted surfaces 1 Observe the information regarding the cleaning agents Cleaning products Page 10 2 Clean using a sponge cloth and hot soapy water in the direction of the finish 3 Dry with a soft cloth 10 4 Cleaning aluminium...

Page 11: ...s Page 10 2 Place the grease filters loosely into the dishwasher Do not clean heavily soiled grease filters with utensils Use special grease solvent for stubborn dirt You can obtain grease solvents from after sales service or the online shop 3 Start the dishwasher Select a temperature of no more than 70 C 4 Allow the grease filters to drain 10 10 Cleaning grease filters manually The grease filters...

Page 12: ...atteries Do not use different battery types together Do not use new and used batteries together Do not use rechargeable batteries Leaking batteries may damage the remote control Remove the batteries if you are not using the re mote control Safely dispose of empty or defective batteries in an environmentally friendly manner 1 Remove the cover 2 Remove the empty batteries 3 Insert the new batteries ...

Page 13: ...ED display The odour filters are saturated Change the odour filter Page 12 12 Customer Service Function relevant genuine spare parts according to the corresponding Ecodesign Order can be obtained from Customer Service for a period of at least 10 years from the date on which your appliance was placed on the market within the European Economic Area Note Under the terms of the manufacturer s warranty...

Page 14: ...quip ment WEEE The guideline determines the frame work for the return and recycling of used appliances as applicable throughout the EU 14 2 Disposing of batteries Batteries should be recycled in an environmentally friendly manner Do not dispose of the batteries in the household rubbish Dispose of batteries in an environmentally friendly manner According to the European Guideline 2006 66 EC defecti...

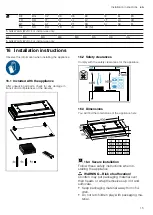
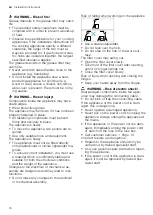
Page 15: ...iance After unpacking all parts check for any damage in transit and completeness of the delivery 16 2 Safety clearances Comply with the safety clearances for the appliance 16 3 Dimensions You will find the dimensions of the appliance here 16 4 Secure installation Follow these safety instructions when in stalling the appliance WARNING Risk of suffocation Children may put packaging material over the...

Page 16: ...rrect installation you must use a material which is sufficiently stable and suitable for both the structural conditions and the weight of the appliance Changes to the electrical or mechanical as sembly are dangerous and may lead to mal functions Do not make any changes to the electrical or mechanical assembly Risk of falling when working on the appliance Use a stable stepladder Do not lean over th...

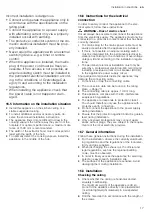
Page 17: ...er cable must be easily accessible after the appliance is installed If this is not possible an all pole isolating switch must be integrated into the permanent electrical in stallation according to the conditions of overvoltage category III and according to the installation regula tions The permanent electrical installation must only be wired by a professional electrician We recommend installing a ...

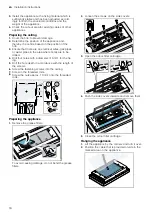
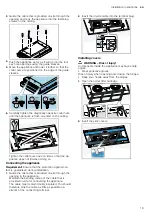
Page 18: ... where holes are to be drilled 4 Drill four holes with a diameter of 6 mm for the fix ing 5 Drill the hole depth in accordance with the length of the screws 6 Screw the fastening screws into the ceiling 7 Screw in the threaded rods 8 Screw the nuts approx 10 mm onto the threaded rods 4 13 Preparing the appliance 1 Remove the grease filters To avoid causing damage do not bend the grease filters 2 L...

Page 19: ... when doing so Connecting the appliance Requirement Ensure that the protection against con tact is guaranteed during installation 1 Guide the cable that is provided on site through the opening in the appliance Maintain the bending radius of the cable that is provided on site for connecting the appliance The cable must remain doubly insulated You should therefore strip the cable as little as possib...

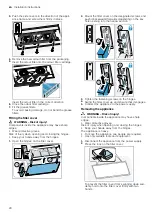
Page 20: ...e hinges on the filter cover 25 2 Mount the filter cover on the designated screws and push it backwards forwards depending on the key hole opening into the narrow section 3 Tighten the fastening screws on the hinges 4 Swing the filter cover up and ensure that it engages 5 Connect the appliance to the power supply Removing the appliance WARNING Risk of injury Components inside the appliance may hav...

Page 21: ... cover 7 Remove the grease filters To avoid causing damage do not bend the grease filters 8 Open the odour filter cartridge 9 Remove the odour filter 10 Loosen the screws on the side covers 20 11 Remove the side covers 12 Close the odour filter cartridge 13 Loosen the cable that is provided on site from the terminal clamp L N 14 Carefully loosen the diagonally opposite screws 13 15 Disconnect the ...

Page 22: ......

Page 23: ......

Page 24: ...ing for help You ll find it here Expert advice for your Bosch home appliances help with problems or a repair from Bosch experts Find out everything about the many ways Bosch can support you www bosch home com service Contact data of all countries are listed in the attached service directory 9001521544 9001521544 020705 en BSH Hausgeräte GmbH Carl Wery Straße 34 81739 München GERMANY www bosch home...

Reviews: