


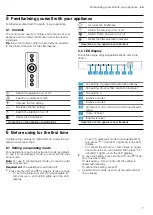


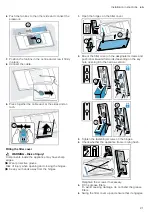


Familiarising yourself with your appliance
en
7
5
Familiarising yourself with your appliance
Familiarise yourself with the parts of your appliance.
5.1 Controls
The controls are used to configure all functions of your
appliance and to obtain information about the operat-
ing status.
Tip:
Align the remote control as precisely as possible
to the infrared receiver for the LED display.
Switch the appliance on or off
Switch on automatic mode
1
Increase the fan setting
Decrease the fan setting
Switch the lighting on or off
Reduce the brightness
1
Depending on the appliance specifications
Increase the brightness
Switch the fan run-on on or off
Switch Home Connect on or off
Reset the filter saturation indicator
1
Depending on the appliance specifications
5.2 LED display
Die LED-Anzeige zeigt eingestellte Werte und Funk-
tionen.
8
1
2
3
4
5
6
7
1
Fan setting 1/grease filter saturation display
2
Fan setting 2/odour filter saturation indicator
3
Fan setting 3
4
Intensive mode 1
5
Intensive mode 2
6
Automatic mode
1
/fan run-on time/interval vent-
ilation
7
Home Connect
8
Infrared receiver
1
Depending on the appliance specifications
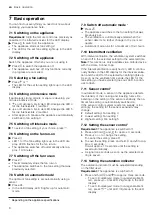
6
Before using for the first time
Configure the settings for initial start-up. Clean the ap-
pliance and accessories.
6.1 Setting an operating mode
Your appliance is set to air extraction mode by default.
To use it in circulating-air mode, you must set the oper-
ating mode.
Note:
For use in circulating-air mode, you require addi-
tional Accessories.
Requirement:
The appliance is switched off.
1.
Press and hold and for approx. three seconds.
‒
To set circulating-air mode (non-regenerable fil-
ter), press / until LED 2 lights up in the LED
display.
‒
To set circulating-air mode (non-regenerable fil-
ter), press / until LED 3 lights up in the LED
display.
‒
To convert the electronic control back to opera-
tion without the air recirculation filter, press /
until LED 1 lights up on the LED display.
2.
To save the setting, press and hold and for ap-
prox. three seconds.
Or wait approx. 10 seconds until the setting is
saved automatically.
To cancel the setting, press .
a
A signal tone sounds as soon as the selected set-
ting is saved.
Summary of Contents for DRC97AQ50
Page 23: ......