background image

D

EN

35

Fitting - installing:

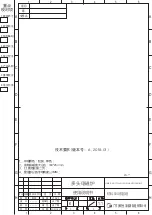
• The cut out sizes are:

Reference 

810 x 490 mm 

Installation instructions

The installation comes under the exclusive res-
ponsibility of specialists. 
The installer is held to respect the legislation 
and the standards enforce in his home country.

How to stick the gasket:

The gasket supplied with the hob avoids all infil-
tration of liquids in the cabinet.
His installation has to be done carefully, in con-
formity of the following drawing.

Stick the gasket (2) two millimeters from the 
external edge of the glass, after removing the 
protection sheet (3).

2 mm

•  Ensure  that  there  is  a  distance  of  50  mm

between the hob and the wall or sides.

•  The hobs are classified as “Y” class for heat

protection. Ideally the hob should be instal-
led with plenty of space on either side. There
may be a wall at the rear and tall units or a
wall at one side. On the other side, however,
no unit or divider must stand higher than the
hob.

•  The piece of furniture or the support in which

the hob is to be fitted, as well as the edges
of furniture, the laminate coatings and the
glue used to fix them, must be able to resist
temperatures of up to 100 °C.

•  The mural rods of edge must be heat-resi

-

sting.

•  Not to install the hob to the top of a not ven

-

tilated oven or a dishwasher.

•  To  guarantee  under  the  bottom  of  the  hob

casing a space of 20 mm to ensure a good
air circulation of the electronic device.

•  If a drawer is placed under the work, avoid to

put into this drawer flammable objects

(for example: sprays) or not heat-resistant


objects.

•  Materials  which  are  often  used  to  make

worktops expand on contact with water. To
protect the cut out edge, apply a coat of
varnish or special sealant. Particular care

must be given to applying the adhesive joint

supplied with the hob to prevent any leakage
into the supporting furniture. This gasket
guaranties a correct seal when used in con-

junction with smooth work top surfaces.

•  The safety gap between the hob and the coo

-

ker hood placed above must respect the indi-
cations of the hood manufacturer. In case of
absence of instructions respect a distance
minimum of 760 mm.

•Theconnectioncordshouldbesubjected,af

-

ter building, with no mechanical constraint,


such for example of the fact of the drawer.

WARNING: Use only hob guards designed by 
the manufacturer of the cooking appliance or 
indicated  by  the  manufacturer  of  the 
appliance  in  the  instructions  for  use  as 
suitable  or  hob  guards  incorporated  in  the 
appliance.  The  use  of  inappropriate  guards 
can cause accidents. 

Cut-size

BIKP-91

Summary of Contents for BIKP-91

Page 1: ...NL FR GEBRUIKSAANWIJZING NOTICE D EMPLOI BIKP 91 BIKP 91inductiekookplaat Boretti B V ...

Page 2: ... aandachtig door te lezen teneinde problemen te voorkomen en u ervan te verzekeren dat u als gebruiker op de hoogte bent van de juiste en veilige werking van dit product Mochten er ondanks het lezen van deze handleiding of tijdens het gebruik van uw Boretti vragen ontstaan dan vernemen wij dat graag van u Op de achterzijde van deze handleiding kunt u de adresgegevens vinden van Boretti Wij wensen ...

Page 3: ...pe van inductie 8 Tiptoetsen 8 Zone voor de sterkteregeling slider 8 en de timerinstelling Inwerkingstelling 9 Detectie van de pan 9 Aanduiding restwarmte 9 Eerste booster functie en seconden booster functie 9 Timer functie 10 Programmeren van de aankookautomaat 11 Stop Go functie 11 Herhalingfunctie 12 Warmhoudfunctie 12 Bridge functie 13 Vergrendeling van het bedieningspaneel 13 Kookadvies Kwali...

Page 4: ... kunnen vlug vlam vatten Pas op voor brandwonden tijdens en na het gebruik van het apparaat Kinderen het apparaat niet laten manipule ren Verzeker u ervan dat geen enkele elektrische kabel van een vast of los apparaat met het warme kookvlak of met een warme pan in contact komt Magnetisch gevoelige voorwerpen cre ditcards informatica diskettes rekenma chines mogen zich niet in de onmiddellijke nabi...

Page 5: ...e toevoer uitschakelen Schakel onmiddellijk de elektrische stroom van het apparaat uit indien er een barst of spleet in het vitrokeramische glas is en ver wittig de dienst na verkoop De herstellingen dienen enkel door gespeci aliseerd personeel te worden uitgevoerd In geen geval het apparaat zelf openen WAARSCHUWING Als het glazen kookopper vlak gebroken is schakel het toestel uit om een mogelijke...

Page 6: ...tie kookpan Ø 100 mm Normaal 1850 W 1e Booster 2300 W 2e Booster 3000 W Gestandaardiseerde categorie van het kookgerei B Energieverbruik ECcw 175 4 Wh kg Rechts achter zone 220 x 180 mm Detectie kookpan Ø 100 mm Normaal 2050 W 1e Booster 2900 W 2e Booster 3700 W Gestandaardiseerde categorie van het kookgerei C Energieverbruik ECcw 182 2 Wh kg Rechts voor zone 220 x 180 mm Detectie kookpan Ø 100 mm...

Page 7: ...g van het vermogenniveau min Warmhoud toets Stop Go toets Vergrendelingstoets Aan Uit Zone voor de sterkteregeling SLIDER en timerinstelling zone voor Timer toets Aanduiding van de timer Naam Nul Vermogenniveau Detectie pan Onmiddellijke opwarming Foutmelding Restwarmte Eerste Booster Seconden Booster Warmtebehoud Stop Go Bridge Display 0 1 9 U A E H P U II Functie Kookzone geactiveerd Keuze kookn...

Page 8: ...m glas hout keramiek aardewerk inox zonder magnetische bodem De inductie kookzone houdt onmiddellijk reke ning met de afmeting van de gebruikte pan Is de diameter te klein dan werkt de pan niet De diameter varieert in functie van de diameter van de kookzone Wanneer de pan niet aan de kookplaat aange past is blijft het symbool U branden Tiptoetsen Uw apparaat is uitgerust met tiptoetsen waar mee u ...

Page 9: ...ken de pan van de kookzone wordt geno men Het symbool U verschijnt op de display De U verdwijnt wanneer de pan terug op het kookvlak wordt geplaatst Het koken gaat door op het voordien gekozen vermogen Schakel de kookzone uit na gebruik De pandetectie U blijft dan niet actief Aanduiding restwarmte Als na het uitzetten van de kookzones of het volledig uitzetten van de kookplaat de kookzones nog war...

Page 10: ...sche bediening automatisch het kookniveau van een andere kookzone Gedurende enkele seconden geeft de display van deze kookzone al knipperend 9 weer vervol gens wordt het hoogst mogelijke kookniveau weergegeven Gekozen kookzone Andere kookzone bijvoorbeeld kookniveau 9 P wordt weergegeven 9 wordt 6 of 8 naargelang de kookzone Timer functie De timerfunctie kan voor alle kookzones tegelijk gebruikt w...

Page 11: ...eer de timer druk tegelijkertijd op en 000 van de timer Duurtijd verminderen druk op van de timer 60 gaat naar 59 Duurtijd verlengen druk op van de timer de tijd verlengt Na enkele seconden knippert de led min niet meer De tijd is geselecteerd en het aftellen begint Automatisch uitschakelen op het einde van de kooktijd Zodra de geselecteerde kooktijd afgelopen is gaat de display knipperen 000 er k...

Page 12: ...Minuten en seconden van de geprogrammeerde kookzones door de timers Functie automatisch koken Warmhoud functie De herhalingsprocedure is als volgt Duw op de toets 0 I Duw opr II voor het knipperen stopt De vorige instellingen zijn opnieuw actief Warmhoudfunctie Deze functie maakt het mogelijk een temperatuur van 42 C 70 C of 94 C te bereiken en auto matisch te behouden Dit voorkomt dat vloeistoffe...

Page 13: ...ogen over de SLIDER 1 tot 9 glijden tot het gewenste vermogen Bridge stopzetten tegelijkertijd op U duwen 0 van de 2 gecombineerde zones Vergrendeling van het bedieningspaneel Om te vermijden dat een selectie van de kookplaat wordt gewijzigd bijvoorbeeld bij het poetsen van het glas kan het bedieningspaneel worden vergrendeld behalve de toets aan uit 0 I Vergrendelen Actie Bedieningspaneel Display...

Page 14: ... van de pannen De kookzones passen zich in zekere mate au tomatisch aan de diameter van de pan aan De bodem van deze pan dient wel een minimum diameter te hebben in functie van de diameter van de gekozen kookzone Plaats de pan goed in het midden van de kook zone teneinde een optimaal rendement van uw kooktafel te verkrijgen Kookadvies Voorbeelden van vermogensregeling de hieronder vermelde waarden...

Page 15: ...rwijder onmiddellijk suiker of spijzen die suiker bevatten Onderhoud en reiniging Kleine storingen verhelpen De kookplaat of de kookzone werkt niet de kookplaat is slecht op het elektrisch net aangesloten de veiligheidszekering is gesprongen kijk na of de vergrendeling niet is ingeschakeld de tiptoetsen zijn met water of vet bespat er staat een voorwerp op de tiptoetsen Het symbool U licht op er s...

Page 16: ...lf De bediening van automatisch koken treedt niet in werking de kookzone is nog warm H het maximum kookniveau staat aan 9 Het symbool of Er03 licht op Een voorwerp of vloeistof bedekt de toetsen van de bediening Het symbool verdwijnt van zodra de toetsen vrijgemaakt of afgekuist zijn Het symbool E2 licht op De kookplaat is oververhit laat afkoelen daarna kunt u ze weer terug inschakelen Het symboo...

Page 17: ...van het werkblad kunnen op zwellen bij contact van vocht Om de uitsnij ding te beschermen bestrijk deze met een vernis of een speciale lijm De strippen aan de muurranden dienen hit tebestendig te zijn Installeer de kookplaat niet boven een niet geventileerde oven of een vaatwasmachine Onder de omkasting van het apparaat een afstand van 20 mm voorzien om een goede verluchting van de elektronische a...

Page 18: ...van de kookplaat of de oven niet raakt Let op Dit apparaat is voorzien voor een aansluiting op een netspanning van 230V 50 60 HZ Verbind steeds de aarding Respecteer het aansluitingsschema Het aansluitblok bevindt zich onder de kook plaat Om het aansluitblok te openen gebruik een schroevendraaier en plaats deze in de 2 gleuven voor de 2 pijlen Voeding Aansluiting Kabelsectie Kabel Zekering 230V 50...

Page 19: ...n waardevolle materialen op intelligente wijze gerecycled worden Voordat u uw apparaat wegdoet is het belangrijk dat u de elektrische voedingskabel afsnijdt en sa men met de stekker verwijderd Dit apparaat is voorzien van het merkteken conform de Europese richtlijn 2002 96EG betreffende af gedankte elektrische en elektronische appara tuur De richtlijn bepaalt de normen voor het inzamelen en recycl...

Page 20: ...vous conseillons de lire attentivement son mode d emploi afin d éviter tout problème et de vous garantir une utilisation correcte et en toute sécurité Si vous aviez cependant des questions à la lecture de ce mode d emploi ou en cours d utilisation de votre produit Boretti n hésitez pas à nous en faire part Vous trouverez les coordonnées de Boretti au verso de ce mode d emploi Nous vous souhaitons ...

Page 21: ... 26 Touches sensitives 26 Zone de selection de puissance slider et de reglage de la minuterie 26 Mise en route 27 Detection de recipient 27 Indicateur de chaleur residuelle 27 Fonction booster 27 Fonction minuterie 28 Programmation d automatisme de cuisson 29 Fonction pause 30 Fonction rappel 30 Fonction maintien au chaud 30 Fonction bridge 31 Verrouillage du bandeau de commande 31 Conseils de cui...

Page 22: ...t après l utilisation de l appareil Assurez vous qu aucun câble électrique d appareil fixe ou mobile ne vienne en contact avec la vitre ou la casserole chaude Les objets magnétisables cartes de crédits disquettes informatiques calculatrices ne doivent pas se trouver à proximité immédiate de l appareil en fonction Les objets métalliques tels que des couteaux des fourchettes des cuillères et des cou...

Page 23: ...nir le service après vente Les réparations doivent être entreprises exclusivement par un personnel spécialisé N ouvrez en aucun cas l appareil vous même ATTENTION Si la surface vitrée est fissurée coupez l alimentation de l appareil pour éviter une éventuelle décharge électrique Autres protections Assurez vous que le récipient de cuisson soit toujours centré sur la zone de cuisson Le fond de la ca...

Page 24: ...on minimum Ø 100 mm Puissance nominale 1850 W Puissance du 1er booster 2300 W Puissance du 2ème booster 3000 W Catégorie de la casserole standard B Consommation d énergie ECcw 175 4 Wh kg Foyer arrière droit 220 x 180 mm Détection minimum Ø 100 mm Puissance nominale 2050 W Puissance du 1er booster 2900 W Puissance du 2ème booster 3700 W Catégorie de la casserole standard C Consommation d énergie E...

Page 25: ... Rappel Touche Verrouillage Touche Marche Arrêt Zone de sélection de puissance Slider foyer avant Touches Minuterie Affichage de la minuterie Utilisation de l appareil Désignation Zéro Niveau de puissance Non détection de casserole Accélérateur de chauffe Message d erreur Chaleur résiduelle 1er Booster 2nd Booster Maintien Chaud Stop Go Bridge Affichage 0 1 9 U A E H P U II Description La zone de ...

Page 26: ...inox alu minium verre bois céramique grès terre cuite inox non ferro magnétique La zone de cuisson à induction prend automati quement en compte la taille du récipient utilisé Avec un diamètre trop petit le récipient ne fonctionne pas Ce diamètre varie en fonction du diamètre de la zone de cuisson Lorsque le récipient n est pas adapté à la table de cuisson le symbole U reste affiché Touches sensiti...

Page 27: ...ctionnement est inter rompu Dans l afficheur le symbole U apparaît Le U disparaît lorsque le récipient est remis sur le foyer de cuisson La cuisson reprend au niveau de puissance sélectionnée au préalable Après utilisation éteignez la zone de chauffe Ne laissez pas la détection de casserole U active Indicateur de chaleur résiduelle Après l arrêt des zones de cuisson ou l arrêt complet de la table ...

Page 28: ...e zone de chauffe Durant quelques secondes l afficheur de cette zone de cuisson en clignotant 9 puis affiche le niveau de cuisson maximum possible Zone de cuisson sélectionnée Autre zone de cuisson exemple puissance niveau 9 P est affiché 9 passe à 6 ou 8 suivant le type de foyer Fonction minuterie La minuterie peut être affectée simultanément à tous les foyers de cuisson et ceci avec des régla ge...

Page 29: ...ent sur et 000 de la minuterie Diminuer la durée appuyer sur de la minuterie 60 passe à 59 58 Augmenter la durée appuyer sur de la minuterie le temps augmente Après quelques secondes le voyant min passe de clignotement à fixe La durée est sélectionnée et le décompte démarre Arrêt automatique en fin de cuisson Dès que le temps de cuisson sélectionné est écoulé la minuterie affiche en clignotant 000...

Page 30: ...mmées par les minuteries Fonction cuisson automatique Fonction maintien chaud La procédure de rappel est la suivante Appuyer sur la touche 0 I Appuyer sur II avant la fin du clignotement du voyant Les réglages précédents sont à nouveau actifs Fonction Maintien au chaud Cette fonction de maintien au chaud permet d atteindre et de maintenir automatiquement une température de 42 70 ou 94 C La durée m...

Page 31: ...Sélectionner la puissance glisser sur le SLIDER 1 à 9 qui affiche la puissance Arrêter le bridge appuyer simultanément sur U 0 des 2 zones combinées Verrouillage du bandeau de commande Pour éviter de modifier une sélection de la table de cuisson notamment dans le cadre du nettoyage de la vitre le bandeau de commande à l exception de la touche marche arrêt 0 I peut être verrouillé Action Bandeau de...

Page 32: ...es casseroles Les zones de cuisson s adaptent automatique ment à la dimension du fond de la casserole jusqu à une certaine limite Le fond de cette casserole doit cependant avoir un diamètre mi nimum en fonction du diamètre de la zone de cuisson correspondante Afin d obtenir le rendement maximum de votre table de cuisson veuillez placer la casserole bien au centre de la zone de cuisson Conseils de ...

Page 33: ... connectée au réseau électrique Le fusible de protection a sauté Vérifiez si le verrouillage n est pas activé Les touches sensitives sont couvertes d eau ou de graisse Un objet est posé sur les touches sensitives Le symbole U s affiche Il n y a pas de casserole sur la zone de cuisson Le récipient utilisé n est pas compatible avec l induction Le diamètre du fond de casserole est trop petit par rapp...

Page 34: ...iche Se référer au chapitre Pause Le symbole ou Er03 s affiche Un objet ou un liquide recouvre les touches de la commande Le symbole disparaît une fois les touches libérées ou nettoyées Le symbole E2 s affiche La table est en surchauffe laissez la refroidir puis rallumez la Le symbole E8 s affiche L entrée d air du ventilateur est obstruée libérez la Le symbole U400 s affiche La table est mal conn...

Page 35: ...re thermo résistantes Les matériaux des plans de travail peuvent gonfler au contact de l humidité Pour pro téger le chant de la découpe appliquer un vernis ou une colle spéciale N installer pas la table au dessus d un four non ventilé ou d un lave vaisselle Garantir entre le fond du caisson de l appareil un espace de 20 mm pour assurer une bon ne circulation de l air de refroidissement de l électr...

Page 36: ...être placé de sorte à ce qu il ne touche pas de parties chaudes de la table de cuisson Attention Cet appareil n est conçu que pour une alimentation en 230 V 50 60 Hz Raccordez toujours le fil de terre de protection Respectez le schéma de raccordement Le boîtier de raccordement se situe sous la plaque de cuisson Pour ouvrir le capot servez vous d un tournevis moyen Placez le dans les 2 fentes situé...

Page 37: ...rrait survenir à l usage d un appareil non relié à la terre ou équipé d une terre défectueuse Respectez les consignes suivantes si vous sou haitez mettre l appareil au rebut pour quelque raison que ce soit mettez l appareil au rebut auprès du centre lo cal désigné pour la collecte des appareils ména gers Un traitement correct permet de recycler les matériaux de valeur de manière intelligente Avant...

Page 38: ......

Page 39: ......

Page 40: ...16598 1 info boretti com The Netherlands ...

Page 41: ...D EN BEDIENUNGSANLEITUNG OPERATING INSTRUCTIONS BIKP 91 Boretti B V BIKP 91inductionkochgeschirr ...

Page 42: ...ten Sie auch keine Anleitung im Format eines Telefonbuchs in den Händen sondern ein handliches sehr gut lesbares Exemplar Genau so ist auch Ihr Einbaugerät das heißt verständlich und übersichtlich Wir empfehlen Ihnen vor Inbetriebnahme Ihres Einbaugeräts diese Anleitung auf merksam durchzulesen damit es nicht zu Problemen kommt Falls nach dem Lesen der Anleitung oder im Einsatz noch Fragen zum Pro...

Page 43: ...dem ersten aufheizen 8 Induktionsprinzip 8 Funktion der sensorschaltfelder 8 Slider auswahlzone und zeitschaltuhr auswählung 8 Kochfeld ein und ausschalten 9 Topferkennung 9 Restwärmeanzeige 9 Powerfunktion 9 Zeitschaltuhr 10 Ankochautomatik 11 Stop go funktion 12 Memory funktion 12 Warmhaltefunktionen 12 Bridge funktion 13 Kindersicherung verriegelung der kochmulde 13 Kochempfehlungen Kochgeschir...

Page 44: ...es Frites zubereiten sollten Sie den Kochvorgang beobachten Wenn Sie kochen und braten werden die Kochzonen heiß Hüten Sie sich deshalb vor Verbrennungen während und nach Benutzung des Gerätes Achten Sie darauf dass kein elektrisches Kabel von einem freistehenden oder einge bautem Gerät in Kontakt mit der Scheibe oder der heißen Kochzone kommt Magnetische Gegenstände wie z B Kredit karten Diskette...

Page 45: ...osen platzen und es besteht Verletzungsgefahr Vorsichtsmaßnahmen bei Geräteausfall Sollte ein Fehler festgestellt werden muss das Gerät ausgeschaltet und vom Netz get rennt werden Wenn Brüche Sprünge oder Risse auf dem Glas auftreten Schalten Sie das Kochfeld so fort aus Schrauben Sie die Sicherung für das Kochfeld ab bzw nehmen Sie diese heraus und wenden Sie sich an unseren Kunden dienst oder an...

Page 46: ...den Durchmesser Ø 100 mm Nominal Leistung 1850 W Erste Booster Leistung 2300 W Zweite Booster Leistung 3000 W Standardisiertes Kochgeschirr Kategorie B Energieverbrauch ECcw 175 4 Wh kg Kochzone hinten rechts 220 x 180 mm Minimal Topfboden Durchmesser Ø 100 mm Nominal Leistung 2050 W Erste Booster Leistung 2900 W Zweite Booster Leistung 3700 W Standardisiertes Kochgeschirr Kategorie C Energieverbr...

Page 47: ...VerriegelungTaste Ein Aus Taste SLIDER Leistung und Zeitschaltuhr Auswahlzone front zone Zeitschaltuhr Tasten Zeitschaltuhr Anzeige Benennung Null Leistungsstufe Nicht Topferkennung Ankochautomatik Fehleranzeige Restwärme Erste Booster Zweite Booster Warmhaltefunktion Stop Go Bridge Anzeige 0 1 9 U A E H P U II Beschreibung Die Kochzone ist aktiviert Einstellung der Leistung Topf nicht aufgesetzt ...

Page 48: ... Die Induktionskochzone wird automatisch an die Grösse des Kochgeschirrs angepasst Das Kochgeschirr darf einen bestimmten Bo dendurchmesser nicht unterschreiten da sich die Induktion sonst nicht einschaltet Jeder Topfboden Durchmesser muss je nach Kochzo nengröße eine Mindestgröße haben Wenn das Kochgeschirr der Induktion nicht geeignet ist erscheint die Anzeige U Funktion der Sensorschaltfelder D...

Page 49: ...von der Kochzone genommen schaltet sich die Kochzone sofort aus und in der Anzeige erscheint das Zeichen U Das U verschwindet wenn ein Topf wieder auf die Kochzone gesetzt wird Die Kochzone fährt mit der vorher eingestellten Leistungsstufe weiter Nach Benutzung schalten Sie die Kochzone aus damit die Topferkennung U nicht mehr er scheint Restwärmeanzeige Nach dem Ausschalten der Kochzonen bzw des ...

Page 50: ...ner anderen Kochzone wenn die Power Funktion aktiviert ist Diese Kochzone wird dann blinkend die reduzierte Leistung 9 anzeigen Ausgewählte Kochzone Andere Kochzone z B Leistungsstufe 9 P leuchtet 9 wird auf 6 oder 8 reduziert und blinkt Zeitschaltuhr Mit der integrierten Zeitschaltuhr kann auf allen vier Kochzonen eine Gardauer von 1 bis 999 Minuten eingestellt werden Jede Kochzone kann eine ande...

Page 51: ...ichzeitig drücken Zeit verkürzen Drücken auf der Zeitschaltuhr 60 Zeit verlängern Drücken auf der Zeitschaltuhr Zeit in Min erhöht sich Nach einigen Sekunden stellt sich das Blinken ab Die Dauer ist aktiviert und der Zeitablauf beginnt Automatisches Ausschalten Nach Ablauf der programmierten Kochdauer wird 00 blinkend angezeigt und ein akustisches Signal wird erfolgen Um den Signalton und das Blin...

Page 52: ...wieder aktivieren Folgende Einstellungen können durch die Memory Funktion wieder aktiviert werden Leistungsstufen der Kochzonen Timer Einstellungen der Kochzonen Einstellungen der Ankochautomatik Warmehaltefunktion Memory Funktion aufrufen Kochfeld einschalten 0 I drücken Innerhalb von 6 Sekunden auf die 2 hinteren Kochzonen Anzeigen gleichzeitig drücken Die Werte der letzten Einstellungen sind wi...

Page 53: ...u brücken beide U 0 und miteinander drücken Leistung erhöhen Auf dem SLIDER der die leistung anzeigt rutschen 1 bis 9 Bridge ausschalten Auf die beide U drücken 0 Kindersicherung Verriegelung der Kochmulde Um eine Veränderung der Kochzoneneinstellung zu vermeiden z B bei der Reinigung des Glases können die Bedienungstasten außer der Taste 0 I verriegelt werden Verriegelung aktivieren Betätigung Be...

Page 54: ...er Lärm setzt in keinem Fall einen Fehler des Gerätes um und beeinflußt keineswegs sein Funktionieren Geschirrgröße Die Kochzonen passen sich automatisch an das Topfbodenmaß bis zu einer gewissen Grenze an Das Kochgeschirr darf einen bestimmten Bodendurchmesser nicht unterschreiten da sich die Induktion sonst nicht einschaltet Zentrieren Sie immer den Topf in die Mitte der Kochzone um den besten W...

Page 55: ...ochfeld oder die Kochzonen lassen sich nicht einschalten Das Kochfeld ist falsch am Stromnetz angeschlossen Die Sicherung der Hausinstallation ist nicht korrekt eingesetzt oder defekt Das Kochfeld ist verriegelt Die Sensortasten sind mit Wasser oder Schmutz bedeckt Ein Kochtopf oder Gegenstände bedecken die Tasten In der Anzeige erscheint U Das Kochgeschirr ist nicht auf der Kochzone Das Kochgesch...

Page 56: ...t oder eine Flüssigkeit uberdeckt die Tasten Die Anzeige verschwindet sobald die Tasten losgelassen oder gereinigt werden In der Anzeige erscheint E2 Das Kochfeld ist überhitzt lassen Sie es zuerst abkühlen und dann schalten Sie es wieder ein In der Anzeige erscheint E8 Der Lufteingang des Lüfters ist verstopft befreien Sie ihn In der Anzeige erscheint U400 Das Kochfeld ist nicht gut mit dem Netzw...

Page 57: ...Kleber 100 C verarbeitet sein Die Wandabschlussleisten müssen hitzebe ständig sein Das Kochfeld darf nicht über Herde ohne Lüfter Geschirrspülern Wasch oder Troc kengeräten eingebaut werden Um eine ausreichende Belüftung der Elek tronik im Kochfeld zu erzielen ist unter der Mulde ein Luftraum von 20 mm notwendig Befindet sich unter dem Kochfeld eine Schu blade dürfen in der Schublade keine bren nb...

Page 58: ...berücksich tigt werden Das Zuleitungskabel muss so angebracht werden dass die heißen Teile des Kochfelds nicht berührt werden Achtung Dieses Gerät ist nur für eine Strom Versorgung von 230 V 50 60 Hz ausgelegt Schließen Sie immer die Erde mit an Beachten Sie das Anschlußschema Der Anschlußkasten befindet sich auf der Un terseite des Gerätes Um das Gehäuse zu öf fnen benutzen Sie einen Schraubenzie...

Page 59: ...n Sammelstelle für alte Haus haltsgeräte ab Durch ord nungsgemäße Entsorgung können wertvolle Materialien auf intelligente Weise wieder verwertet werden Bevor Sie Ihr Gerät weggeben müssen Sie unbedingt die Türen entfernen und die Gestelle in die Gebrau chsstellung stellen damit spielende Kinder nicht im Ofenraum eingeschlossen werden können Weiterhin müssen Sie die Netzkabel abschnei den und zusa...

Page 60: ... to use the product This will prevent possible problems and ensure that you are aware of the correct and safe use of this product In the event that queries arise once you have read the manual or at any time during the use of your Boretti product we will be happy to help you Please refer to the back cover of this manual for Boretti s contact details We hope you enjoy the product Boretti ...

Page 61: ...first use 26 Induction principle 26 Sensitive touch 26 Power selection zone slider and timer setting zone 26 Starting up 27 Pan detection 27 Residual heat indication 27 Booster function 27 Timer 28 Automatic cooking 29 Stop go function 30 Recall function 30 Keep warm function 30 Bridge function 31 Control panel locking 31 Cooking advices Pan quality 32 Pan dimension 32 Examples of cooking power se...

Page 62: ...ects such as knives forks spoons and lids should not be placed on the hob sur face since they can get hot In general do not place any metallic object except heating containers on the glass sur face In case of untimely engaging or residual heat this one may heat melt or even burn Never cover the appliance with a cloth or a protection sheet This is supposed to be come very hot and catch fire This ap...

Page 63: ...hock Other protections Note sure that the container pan is always centred on the cooking zone The bottom of the pan must have to cover as much as pos sible the cooking zone For the users of pacemaker the magnetic field could influence its operating We re commend getting information to the retailer or of the doctor Do not to use aluminium or synthetic mate rial containers they could melt on still h...

Page 64: ... mm Minimum detection Ø 100 mm Nominal power 1850 W 1st Booster power 2300 W 1nd Booster power 3000 W Standardised cookware category B Energy consumption ECcw 175 4 Wh kg Rear right heating zone 220 x 180 mm Minimum detection Ø 100 mm Nominal power 2050 W 1st Booster power 2900 W 1nd Booster power 3700 W Standardised cookware category C Energy consumption ECcw 182 2 Wh kg Front right heating zone ...

Page 65: ...ecal key Locking key On Off key Power selection zone Slider front zone Timer keys Timer display Use of the appliance Designation Zero Booster level No pan detection Heat accelerator Error message Residual heat 1st Booster 2nd Booster Keep warm Stop Go Bridge Display 0 1 9 U A E H P U II Description The heating zone is activated Selection of the cooking level No pan or inadequate pan Automatic cook...

Page 66: ...less steel aluminium glass wood ceramic stone ware The induction heating zone adapts automatical ly the size of the pan With a too small diame ter the pan doesn t work This diameter is va rying in function of the heating zone diameter If the pan is not adapted to the induction hob the display will show U Sensitive touch Your ceramic hob is equipped with electronic controls with sensitive touch key...

Page 67: ...e the operation is stopped The display shows U The symbol U disappears when the pan is put back to the heating zone The cooking continues with the power level set before After use switch the heat element off don t let the pan detection U active Residual heat indication After the switch off of a heating zone or the complete stop of the hob the heating zones are still hot and indicates H on the disp...

Page 68: ...uce automati cally the power level of an other heating zone The display is blinking on 9 during a few seconds and then shows the maximum of power allowed Heating zone selected The other heating zone example Booster level 9 P is displayed 9 goes to 6 or 8 depending the type of zone Timer The timer is able to be used simultaneous with all heating zones and this with different time set tings from 0 t...

Page 69: ...imer 60 to 59 58 Increase the time Press key from the timer Time increase After a few seconds the min display stops with blinking The time is confirmed and the timer starts Automatic stop at the end of the cooking time As soon as the selected cooking time is finished the timer displays blinking 000 and a sound rings To stop the sound and the blinking press the key and Automatic cooking All the coo...

Page 70: ...oking zone related timers Keep warm function Automatic cooking The recall procedure is following Press the key 0 I Then press II before the light stops blinking The previous settings are again active Keep warm Function This function allows the reach and automatically maintains at the temperature of 42 70 or 94 C This will avoid liquids overflowing and fast burning at the bottom of the pan To engag...

Page 71: ...ess simultaneously on U 0 and of the 2 cooking zones Increase bridge Slide on the SLIDER 1 to 9 witch indicates the power Stop the bridge Press simultaneously on U 0 of the 2 cooking zones Control panel locking To avoid modification of the setting of the cooking zones in particular during cleaning the control panel can be locked with exception to the On Off key 0 I Action Control panel Display Loc...

Page 72: ...ooking zones are until a certain limit au tomatically adapted to the diameter of the pan However the bottom of this pan must have a minimum of diameter according to the corres ponding cooking zone To obtain the best efficiency of your hob please place the pan well in the centre of the cooking zone Cooking advices Examples of cooking power setting the values below are indicative Melting Reheating S...

Page 73: ... immediately You will thus prevent the surface being damaged Maintenance and cleaning What to do in case of a problem The hob or the cooking zone doesn t start up The hob is badly connected on the electrical network The protection fuse cut off The looking function is activated The sensitive keys are covered of grease or water An object is put on a key The control panel displays U There is no pan o...

Page 74: ...he control panel displays or Er03 An object or liquid covers the control keys The symbol disappear as soon as the key is released or cleaned The control panel displays E2 The hob is overheated let it cool and then turn it on again The control panel displays E8 The air inlet of the ventilator is obstructed release it The control panel displays U400 The hob is not connected to the network Check the ...

Page 75: ...s of edge must be heat resi sting Not to install the hob to the top of a not ven tilated oven or a dishwasher To guarantee under the bottom of the hob casing a space of 20 mm to ensure a good air circulation of the electronic device If a drawer is placed under the work avoid to put into this drawer flammable objects for example sprays or not heat resistant objects Materials which are often used to...

Page 76: ... The inlet hose must be positioned so that it does not touch any of the hot parts of the hob or oven Caution This appliance has only to be connected to a network 230 V 50 60 Hz Connect always the earth wire Respect the connection diagram The connection box is located underneath at the back of the hob casing To open the cover use a medium screwdriver Place it in the slits and open the cover calcula...

Page 77: ...corded the appropriate mark in ac cordance with European Directive 2002 96EG regarding discarded electric and electronic equipment This directive determines the standards for the collection and recycling of discarded equipment that apply to the entire territory of the European Union Environmental Regulations Biphase 400V 2P N Put the 1st bridge between terminal 1 and 2 the 2nd between 4 and 5 Atta...

Page 78: ......

Page 79: ......

Page 80: ...16599 1 info boretti com The Netherlands ...

Reviews: