21
Electrical connection
WARNING:
•
The installation to the mains supply must conform
to the local standards and regulations.
•
Improper connection may cause to an electric
shock!
•
Do not modify the appliance plug. If the plug does
not fit properly to the outlet, let install a proper
outlet by an authorized specialist.
•
The accessibility of the power plug must be en-
sured to disconnect the appliance from the power
supply in case of emergency.
•
Make sure that the voltage supply matches the
specifications on the rating label before connect-
ing.
•
Connect the mains cable to a properly installed
and earthed wall outlet.
•
If the plug after installation is not accessible, a
corresponding disconnect device must be availa-
ble to meet the relevant safety regulations.
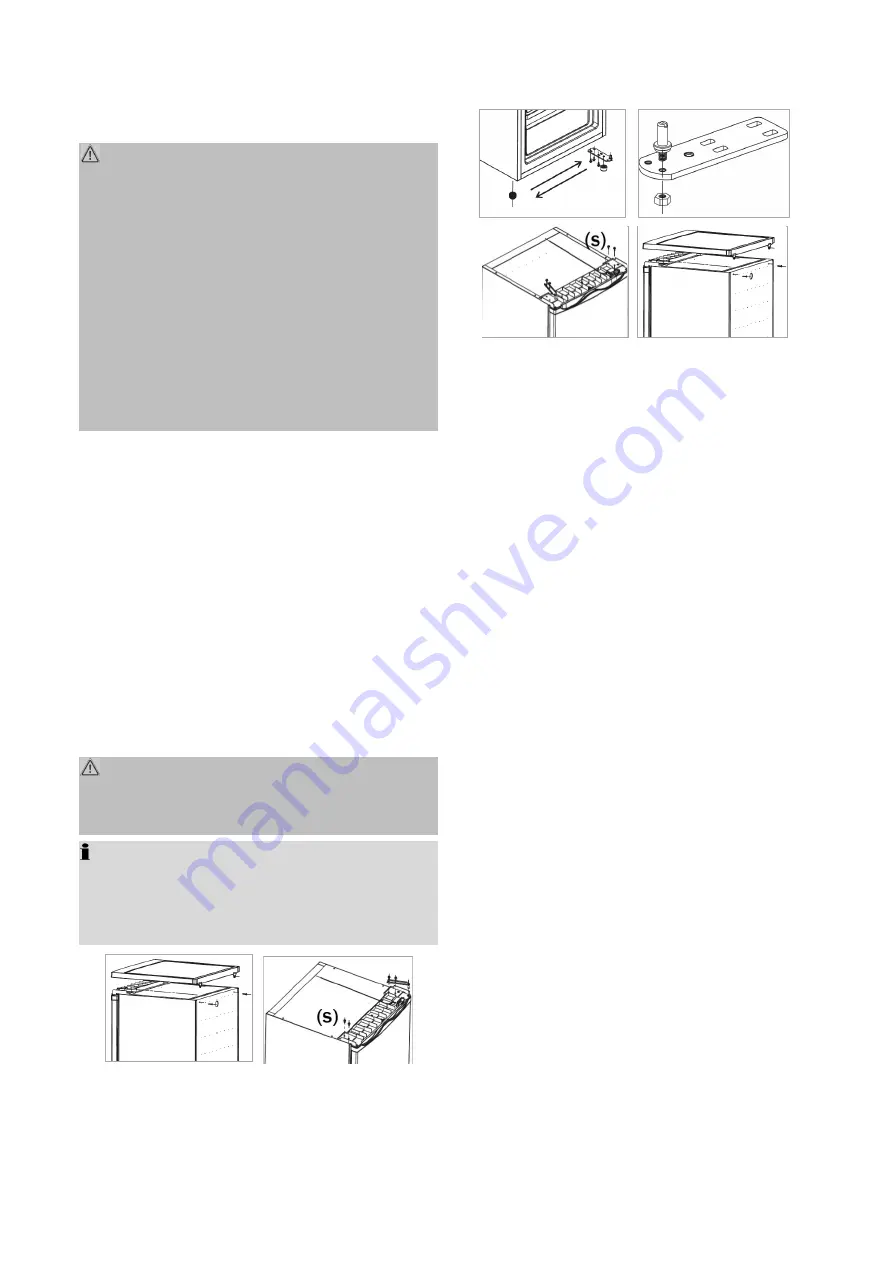
Reversing the door opening
If required, the door opening can be moved from the
right (supplied condition) to the left side.
WARNING:
When replacing the door stop, the appliance must be
disconnected from the power supply first.
NOTE:
•
Ask another person to assist.
•
You possibly need:
screw wrench, Phillips screw-
driver as well as a thin-blade screwdriver.
•
Loosen the screws on the appliance back and re-
move the appliance cover.
•
Dismount the upper door hinge and the screws
(s). Lift the appliance door and set it safely aside.
•
Tilt the appliance slightly backwards and block it
in this position. Unscrew the feet and disassemble
the lower door hinge.
•
Transfer and attach the lower door hinge to the
opposite appliance side. Screw in the feet accord-
ingly.
•
Put the appliance back in the upright position.
Put on the appliance door and fix it its intended
position.
•
Transfer and attach the upper door hinge to the
opposite appliance side after unscrewing the
hinge pin and inserting it into the adjacent hole.
Screw in the screws (s) on the opposite side.
•
Replace the appliance cover and fix it.
•
Dismount the door handle and attach it to the cor-
responding other door outer side. Refer to the in-
structions in
"Assembling the door handle"
. Trans-
fer the cover caps on the exposed holes to the re-
spective other door outer side.
Check that the door is optimally aligned both verti-
cally and horizontally to ensure smooth opening and
closing of the door.


