background image

 Maintenance every day

BOMAG

36

BPH 80/65

Maintenance every day

4.6

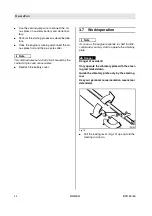
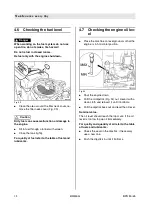
Checking the fuel level

!

Danger

When working on the fuel system do not use
open fire, do not smoke, fire hazard!

Do not refuel in closed rooms.

Refuel only with the engine shut down.

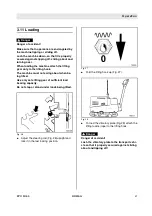
Fig. 33

l

Clean the area around the filler neck cover, re-
move the filler neck cover (Fig. 33) .

!

Caution

Dirty fuel can cause malfunction or damage to
the engine.

l

Fill in fuel through a funnel with screen.

l

Close the tank tightly.

For quality of fuel refer to the table of fuels and
lubricants.

4.7

Checking the engine oil lev-
el

l

Place the machine on level ground, so that the
engine is in horizontal position.

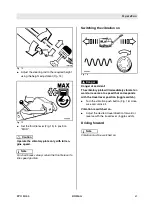
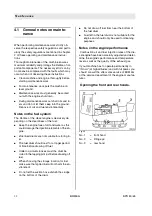
Fig. 34

l

Shut the engine down.

l

Pull the oil dipstick (Fig. 34) out, clean it with a
clean cloth and reinsert it until it bottoms.

l

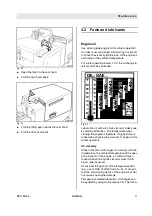
Pull the dipstick back out and read the oil level.

Nominal value:

The oil level should reach the top mark. If the oil
level is too low top up oil immediately.

For quality and quantity of oil refer to the table
of fuels and lubricants.

l

Check the seal on the dipstick, if necessary
use a new one.

l

Push the dipstick in until it bottoms.

Summary of Contents for BPH 80/65

Page 1: ...Operating instructions Maintenance instructions Catalogue number 008 147 41 09 2005 BPH 80 65 S N 101 700 00 Vibratory plate compactor ...

Page 2: ......

Page 3: ...anual was written to be used by operators and maintenance personnel on the site You should only operate the machine if you have been properly instructed in the operation of it and by observing the contents of this manual Please observe strictly all applicable safety regu lations Please observe also the guidelines of the Civil En gineering Liability Association Safety Rules for the Operation of Roa...

Page 4: ...type Fig 3 Engine No Fig 3 i Note Fill in the above listed data when receiving the ma chine Upon receipt of the machine our organization will instruct you about correct operation and mainte nance Please observe strictly all safety regulations and notes on potential dangers Fig 1 Fig 2 Fig 3 ...

Page 5: ...uel level 36 4 7 Checking the engine oil level 36 4 8 Checking the hydraulic oil level 37 4 9 Checking the air filter service indicator 37 4 10 Checking the water separator 38 4 11 Checking the condition of the battery greasing the poles 39 4 12 Checking the air filter cleaning if necessary 40 4 13 Changing the engine oil 42 4 14 Changing the engine oil filter 43 4 15 Checking adjusting the valve ...

Page 6: ...Table of Contents BOMAG 6 BPH 80 65 ...

Page 7: ...BOMAG 7 BPH 80 65 1 Technical Data ...

Page 8: ...0 W Overall width mm 650 W1 Width with extension plates mm 800 W2 Width with extension plates mm 950 H Lowest passing height mm 785 H1 Max height with ex treme position of steering rod mm 1630 Weights Basic weight kg 775 Operating weight CECE with wear plates kg 780 Operating weight CECE with extension plates kg 799 ...

Page 9: ...mber of cylinders 1 Rated power ISO 9249 kW PS 11 5 15 6 Rated speed rpm 3000 Starting gear electric starter Fuel diesel Fuel tank capacity l 10 Drive hydro mech 2 shafts Working speed max m min 28 max gradability 30 Vibration system Frequency Hz 55 Amplitude mm 2 5 Technical modifications reserved BPH 80 65 ...

Page 10: ... operating conditions Noise value sound pressure level on the operator s stand LpA 91 8 dB A determined acc to ISO 11204 and EN 500 Garanteed sound capacity level LWA 109 dB A determined acc to ISO 3744 and EN 500 Danger Loss of hearing Wear your personal noise protection means ear defenders before starting operation Vibration value Hand arm vibration Vector total of the weighted effective acceler...

Page 11: ...BOMAG 11 BPH 80 65 2 Safety regulations ...

Page 12: ...if it is used for purposes other than those mentioned in these instructions Who is allowed to work with the ma chine The machine must only be operated by trained and authorized persons who are at least 18 years of age The responsibilities for the operation of the machine must be clearly specified and complied with Persons under the influence of alcohol medica tion or drugs must not operate service...

Page 13: ...must always be shut off before start ing the engine For starting remove your feet from the danger zone of the base plate Starting in closed rooms Exhaust fumes are life threatening Always ensure an adequate supply of fresh air when starting in closed rooms Operation Guide the machine in such a way that your hands stay clear of any solid obstructions risk of injury Watch out for unusual noises and ...

Page 14: ... not mix up hoses by mistake l damage or deformation of the fitting which im pairs the function and strength of the hose hose connection Only genuine BOMAG hydraulic hoses ensure that the correct type of hose pressure range is used at the right place Working on the engine Drain the engine oil at operating temperature danger of scalding Wipe off spilled oil catch running out oil and dis pose of env...

Page 15: ...el Use our repair instructions for this purpose Exhaust gases are a threat to life Always ensure an adequate supply of fresh air when starting in closed rooms If the machine is defective attach a warning tag on the steering handle Test Depending on the type of applicational and the op erating conditions vibratory equipment has to be examined by a specialist whenever required but at least once ever...

Page 16: ...Safety regulations BOMAG 16 BPH 80 65 ...

Page 17: ...BOMAG 17 BPH 80 65 3 Operation ...

Page 18: ...s Refer also to the detailed description in the chapter Maintenance Top up missing lubricants in compliance with the maintenance instructions l Stand the machine on ground as level as pos sible l Check fuel tank and lines for leakages l Check the engine oil level if necessary top up to the top level mark l Check the hydraulic oil level top up if neces sary l Check the fuel level top up if necessar...

Page 19: ...the machine only by the steering rod The steering rod is resiliently mounted in oper ating position Fig 5 l Pull the locking lever Fig 5 up and fold the steering rod down so that it can swing freely 3 4 Control elements Fig 6 No 1 throttle lever No 2 ignition key No 3 push button vibration ON OFF No 4 Travel lever toggle switch No 5 Back up protection ...

Page 20: ...rting remove your feet from the danger area of the base plate The vibration must always be switched off be fore starting the engine Fig 7 l Press the push button vibration ON OFF Fig 7 The vibration is now switched for starting the engine Fig 8 l Set the throttle lever Fig 8 to position MIN idle speed Fig 9 l Turn the ignition key to position I Fig 9 the warning buzzer sounds l Then turn the ignit...

Page 21: ...east 15 seconds before trying again Too long operation of the starter motor will dis charge the battery 3 6 Starting with jump leads i Note Choose this starting method if the starter battery is discharged l Remove the cover from the battery Caution Wrong connections will cause tremendous damage in the electric system The auxiliary battery must have the same volt age as the normal starter battery F...

Page 22: ...t a short circuit caused by the contact of plus and minus cables l Reattach the battery cover 3 7 Work operation i Note As soon as the engine responds to short throttle commands you may start to operate the vibratory plate Danger Danger of accident Only operate the vibratory plate with the steer ing rod folded down Guide the vibratory plate only by the steering rod Use your personal noise insulati...

Page 23: ...n the throttle lever to idle speed position Switching the vibration on Fig 16 Danger Danger of accident The vibratory plate will immediately vibrate for ward or reverse at a speed that corresponds with the travel lever position toggle switch l Turn the vibration push button Fig 16 clock wise and unlock it Vibration is switched on l Adjust the desired travel direction forward or reverse with the tr...

Page 24: ...riving re verse the vibratory plate should only be guided by the hand from the side i Note Vibration must be switched on l Press the bottom part of the travel lever tog gle switch Fig 18 until the vibratory plate has reached the desired reverse speed i Note The travel lever toggle switch returns to middle position The chosen reverse travel speed re mains unchanged If the vibratory plate gets stuck...

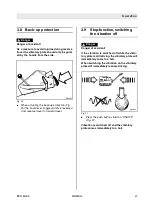
Page 25: ...gle switch is reversed from reverse travel to forward travel 3 9 Stop function switching the vibration off Danger Danger of accident If the vibration is switched off while the vibra tory plate is still driving the vibratory plate will immediately come to a halt When switching the vibration on the vibratory plate will immediately resume driving Fig 21 l Press the push button vibration ON OFF Fig 21...

Page 26: ...bratory plate vibrates on the spot Fig 22 Fig 23 l Press the push button vibration ON OFF Fig 23 Vibration is switched off Caution Do not shut the engine down all of a sudden from full load but let it idle for a while for tem perature equalization Fig 24 l Shift the throttle lever to position Min Fig 24 and let the engine run with idle speed for a short while Fig 25 l To shut the engine down turn ...

Page 27: ...The machine must not swing about when be ing lifted Use only safe lifting gear of sufficient load bearing capacity Do not step or stand under loads being lifted Fig 26 l Adjust the steering rod Fig 26 upright and lock it in the last locking position Fig 27 l Fold the lifting hook up Fig 27 Fig 28 l To load the vibratory plate Fig 28 attach the lifting tackle rope to the lifting hook Danger Danger ...

Page 28: ...Operation BOMAG 28 BPH 80 65 ...

Page 29: ...BOMAG 29 BPH 80 65 4 Maintenance ...

Page 30: ...e of dirt and water as this could damage the injection elements of the en gine l Zinc lined drums are not suitable for storing fu el l The fuel drum should rest for a longer period of time before drawing off fuel l Under no circumstances must the drum be rolled to the tapping pint just before drawing off fuel l When choosing the storage location for fuel make sure that spilled fuel will not harm t...

Page 31: ...il with a too high viscosity index caus es starting difficulties The temperature when starting the engine is therefore of highest impor tance when choosing the viscosity of engine oil for winter operation Oil viscosity Since lubrication oil changes its viscosity with the temperature the ambient temperature at the oper ating location of the engine is of utmost impor tance when choosing the viscosit...

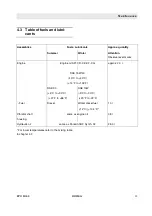
Page 32: ...ality after a longer period of operation it is recommended to perform the first oil change of the higher quality oil already after 25 operating hours Fuels Quality You should only use commercially available brand diesel fuel with a sulphur content below 0 5 and ensure strict cleanliness when filling in A higher sulphur content has a negative effect on the oil change intervals Use only winter grade...

Page 33: ...s Approx quantity Summer Winter Attention Observe level marks Engine Engine oil API CD CE CF CG approx 2 0 l SAE 15W 40 10 C to 40 C 14 F to 104 F SAE 30 SAE 10W 5 C to 30 C 5 C to 30 C 41 F to 86 F 23 F to 22 F Fuel Diesel Winter diesel fuel 10 l 12 C 10 4 F Vibrator shaft same as engine oil 0 8 l housing Hydraulic oil same as Panolin SHF Synth 32 28 0 l ...

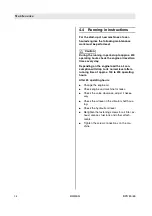
Page 34: ...n the engine load the oil con sumption will drop to its normal level after a running time of approx 100 to 200 operating hours After 25 operating hours l Change the engine oil l Check engine and machine for leaks l Check the valve clearance adjust if neces sary l Check the oil level in the vibrator shaft hous ing l Check the hydraulic oil level l Retighten the fastening screws for air filter ex ha...

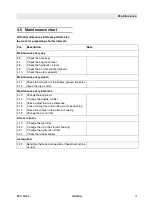
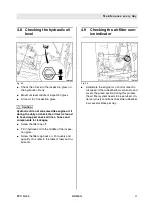
Page 35: ...11 Check the condition of the battery grease the poles 4 12 Clean the dry air filter Maintenance every 6 months 4 13 Change the engine oil 4 14 Change the engine oil filter 4 15 Check adjust the valve clearance 4 16 Clean cooling fins and cooling air intake opening 4 17 Check the oil level in the vibrator housing 4 18 Change the dry air filter Dim mm inch 4 19 Change the fuel filter 4 20 Change th...

Page 36: ...the tank tightly For quality of fuel refer to the table of fuels and lubricants 4 7 Checking the engine oil lev el l Place the machine on level ground so that the engine is in horizontal position Fig 34 l Shut the engine down l Pull the oil dipstick Fig 34 out clean it with a clean cloth and reinsert it until it bottoms l Pull the dipstick back out and read the oil level Nominal value The oil leve...

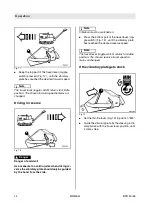
Page 37: ... check all lines hoses and components for leakages l Screw the filler cap off l Fill in hydraulic oil to the middle of the inspec tion glass l Screw the filler cap back on For quality and quantity of oil refer to the table of fuels and lu bricants 4 9 Checking the air filter serv ice indicator Fig 36 l Accelerate the engine for a short moment to full speed If the rubber bellows contracts and cover...

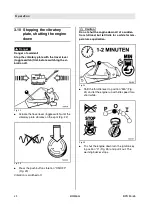
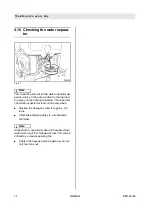
Page 38: ...you take during refuelling The separator should be inspected at least once every week l Slacken the hexagon screw for approx 2 3 turns l Catch the emerging drops in a transparent container i Note Since water is specifically heavier than diesel fuel water will run out first followed by fuel This can be noticed by a clear separating line l Tighten the hexagon screw again as soon as only fuel runs ou...

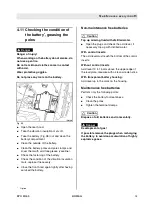
Page 39: ...on mats replace if necessary l Close the front hood again tightly after having serviced the battery Non maintenance free batteries Caution Top up missing fluid with distilled water l Open the plugs and check the acid level if necessary top up with distilled water With control inserts The acid level must reach the bottom of the control inserts Without control inserts Acid level 10 to 15 mm above th...

Page 40: ...w filter cartridge Incorrectly handled filter cartridges may be come ineffective because of damage e g cracks and lead to engine damage In case of wet or oily contamination replace the filter cartridge Do not run the engine without air filter Fig 39 l Remove the air filter cover Fig 39 Fig 40 l Taking the air filter cartridge off Fig 40 Caution No dirt or foreign particles must enter the clean air...

Page 41: ...Maintenance every month BOMAG 41 BPH 80 65 Fig 42 l Insert the filter cartridge Fig 42 into the housing l Assemble the filter cover ensure correct fit of cover and seal ring ...

Page 42: ...nge l Open the front hood Fig 43 l Pull the dipstick Fig 43 out Fig 44 l Unscrew the oil drain plug and catch running out oil Fig 44 l Clean the plug and screw it back in with a new seal ring Caution Clean the engine oil filter before filling in new oil refer to the next section Fig 45 l Unscrew the oil filler neck cap l Fill in new engine oil Fig 45 For quality and quantity of oil refer to the ta...

Page 43: ...ply some oil to the thread and the O ring of the plug l Push the engine oil filter into the housing and tighten the plug l After filling in engine oil perform a short test run and check for leaks if necessary retighten the fastening screw 4 15 Checking adjusting the valve clearance i Note Check and adjust only when the engine is cold 20 10 C The gasket for the cylinder head cover must be generally...

Page 44: ...d tighten the screws evenly l Check the cylinder head cover for leaks after a short test run 4 16 Clean cooling fins and cool ing air intake opening i Note Dirty operating conditions especially lubrication oil and fuel deposits on the cooling fins of the cyl inder and in the cooling air intake reduce the cool ing power You should therefore immediately seal any leaks in the area of the fuel tank th...

Page 45: ...ly into the air fil ter the exhaust and the electric system if present l Disconnect the battery l Spray the entire cooling air area with cleaning solution e g cold cleansing agent let it soak in for a while and clean off with a sharp water jet l Run the engine warm for a short while to avoid corrosion 4 17 Check the oil level in the vi brator housing i Note Park the machine on level ground Fig 51 ...

Page 46: ... 53 Turn in bleeding screw 1 Fig 53 4 18 Changing the dry air filter Fig 54 l Remove the air filter cover Fig 54 Fig 55 l Taking the air filter cartridge off Fig 55 Caution No dirt or foreign particles must enter the clean air side Do not blow the filter housing out with com pressed air l Clean the inside of the filter housing only with a clean cloth l Clean the cover thoroughly ...

Page 47: ...Maintenance every 6 months BOMAG 47 BPH 80 65 Fig 56 l Insert the filter cartridge Fig 56 into the housing l Assemble the filter cover ensure correct fit of cover and seal ring ...

Page 48: ... Fig 58 l Place a suitable container under the filter to catch running out fuel Fig 58 l Close the fuel supply line Fig 59 l Pull the fuel lines off both sides of the fuel filter and install a new filter Fig 59 Environment Dispose of the used filter environmentally Caution Ensure strict cleanliness so that no dirt can fall into the fuel hose l The fuel filter must be generally renewed l Mind the f...

Page 49: ...d drain plug 2 l Drain off and catch old oil i Note Leave the machine in this position until all oil has run out of the drain bore For quality and quantity of oil refer to the table of fuels and lubricants l Stand the machine horizontally Fig 62 l Fill in oil until oil starts to run out through in spection bore 1 Fig 62 l Clean inspection and drain plug 2 and screw it back in with a new seal ring ...

Page 50: ...hydraulic oil filter with every oil change Fig 65 l Unscrew the fitting and take the cover off Fig 65 l Take the hydraulic oil filter out and wipe the fil ter chamber out with a lint free clean cloth l Install the new hydraulic oil filter l Attach the cover and fasten it with the screws l Fill in hydraulic oil to the middle of the inspec tion glass For quality and quantity of oil refer to the tabl...

Page 51: ...tenance every year BOMAG 51 BPH 80 65 4 22 Checking the rubber buffers Fig 66 l Check all rubber buffers Fig 66 for cracks and broken out bits and replace if damaged l Check the rubber buffers for tight fit ...

Page 52: ...red 4 23 Retightening the bolted connections l Check all bolted connections for tight fit retighten if necessary i Note Do not re tighten the cylinder head fastening screws l Check the machine for damage and leaks have repaired if necessary ...

Page 53: ...BOMAG 53 BPH 80 65 5 Trouble shooting ...

Page 54: ...act that the machine has not been properly operated or serv iced Therefore whenever a fault occurs read through these instructions on correct operation and maintenance If you cannot locate the cause of the fault or eliminate it yourself by following the trouble shooting charts you should contact our customer service departments at our branch office or dealers On the following pages you will find a...

Page 55: ...Drain the oil and fill in oil with lower vis cosity Engine has no compression no valve clearance Check and adjust the valve clearance Under very low temperatures Too high fuel viscosity die to insufficient cold resistance Fill in a temperature resistant fuel mixture Starting speed too low viscosity of oil too high Change the lubrication oil and fill in oil of correct viscosity class Black exhaust ...

Page 56: ...lter clogged can be noticed if no fuel runs after pulling the fuel line off Change the fuel filter Check the function of the bleeding valve Vacuum in the fuel tank Clear the ventilation bore in the tank filler cap The throttle lever returns by itself to Stop position Block the throttle control The mechanical oil pressure monitoring system shuts the engine down because of too low oil pressure Check...

Page 57: ......

Page 58: ......
Reviews: