

Form No. 1045-69 r5/21/14 © 2014 Bobrick Washroom Equipment, Inc. Printed in U.S.A.
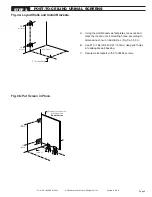
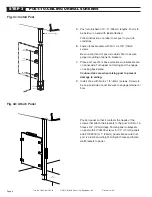
46''
(1170mm)
18''
(455mm)
CL Panel
CL Threaded Rod
12''
(305mm)
18''
(455mm)
46''
(1170mm)
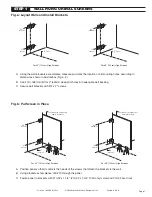
Set panel on support(s)
and in brackets.
Do Not Fasten
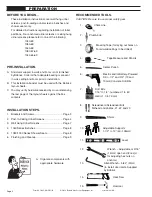
POST-TO-CEILING URINAL SCREENS
STEP 3
Fig. 3a: Layout Walls and Install Brackets.
Fig. 3b: Put Screen in Place.
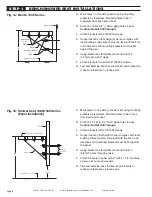
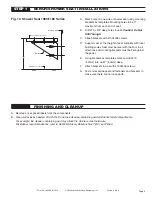
A. Using the wall brackets as templates, measure and
mark the location of all mounting holes, according to
dimensions shown in illustrations (Fig. 3a, 3b, 3c).
B. Use #19 (.166) drill bit for 2" (50mm) deep pilot holes
into adequate wall backing.
C. Secure wall brackets with #1002495 screws.
Page 5