


The HDMI 4K Series Camera Help Manual
8
/
29
7.4
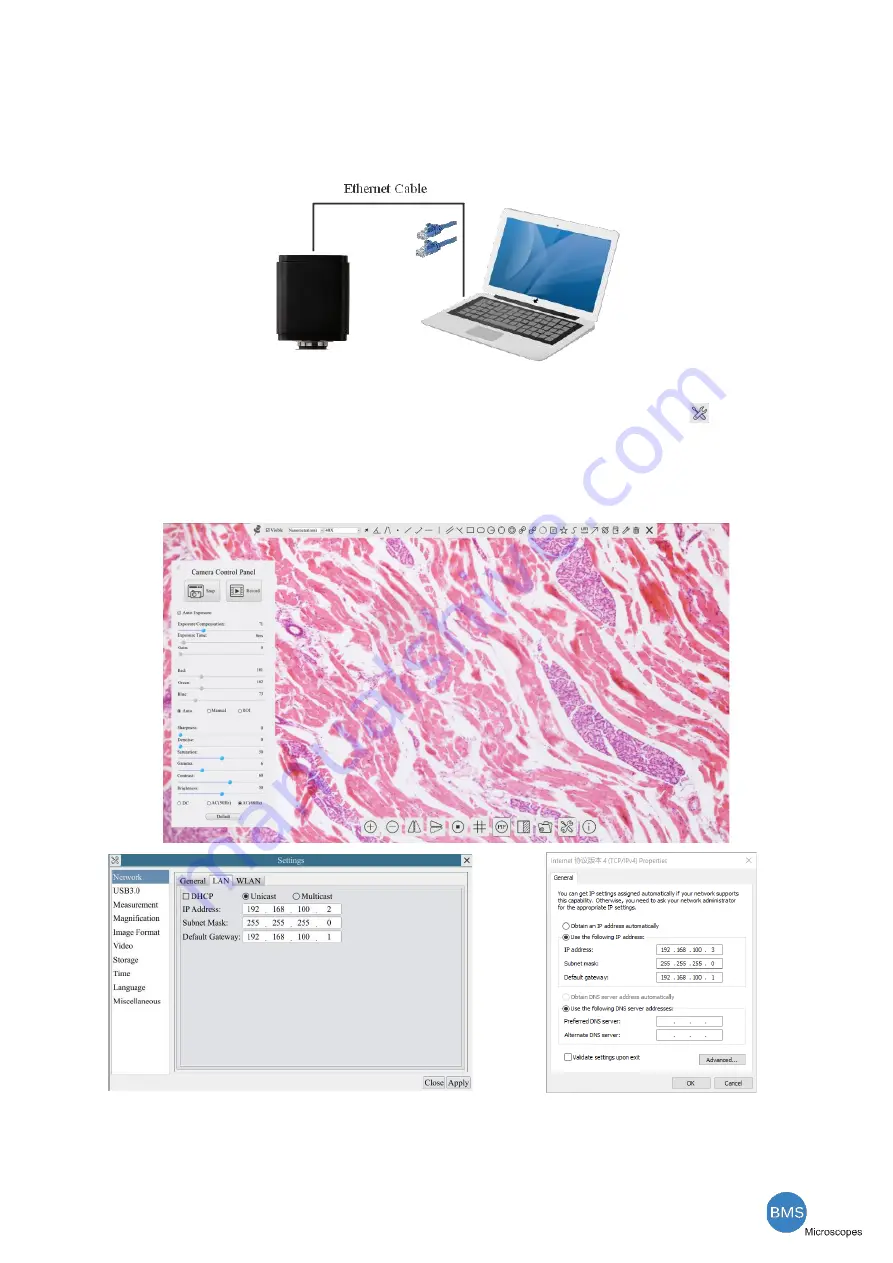
Connecting camera to the PC with LAN port
This application uses the camera as the network camera. User must configure the IP of the camera and PC
manually and ensure their IP addresses are in the same net. The subnet mask and gateway of the camera and PC
must be the same.
Figure 7
-
3 Connecting the HDMI 4K Camera with Ethernet Cable to the PC
⚫
Start the camera according to Sec. 7.1 after the camera is running, clicking the
button on the
Synthesis Camera Control Toolbar
at the bottom of the video window, a small window called
Settings
will
pop up as shown below on the left side, clicking the
LAN
property page, uncheck the DHCP item. Input the
IP Address
,
Subnet Mask
and
Default Gateway
for the camera. Designate the
Internet Protocol Version 4
(TCP/IPv4) Settings
page’s IP address on the PC with similar configuration as shown below on the right side
but with different
IP address
.
Figure 7
-
4 Configure the HDMI 4K Camera IP
Figure 7
-
5 Configure the PC’s IP
After the above configurations are finished, user can connect the HDMI 4K camera to the computer through
the USB to Ethernet adapter as shown below:


