background image

®

Outdoor Patio Heater Model No. 235000

Contact 1.800.762.1142 for assistance. Do not return to place of purchase.

Assembly Instructions

1

DO NOT RETURN PRODUCT TO STORE. 

For assistance call 

1.800.762.1142

 toll free. Please have your 

owner’s manual and serial number available for reference.

For Easiest Assembly:

•  To avoid losing any small components or hardware, assemble 

your product on a hard level surface that does not have cracks 
or openings.

•  Clear an area large enough to layout all components and 

hardware.

•  When applicable, tighten all hardware connections by hand 

first. Once the step is completed go back and fully tighten all 
hardware.

•  Follow all steps in order to properly assemble your product.

To complete assembly you will need:

•  (1) Leak Detection Solution (Instructions on how to make 

solution are included in step Operations Section)

•  (1) Precision Filled LP Gas Grill Tank with Acme Type 1 external 

threaded valve connection (4-5 gallon size)

Note:

 You must follow all steps to properly assemble heater.

Typical assembly: approximately 1 (one) hour.

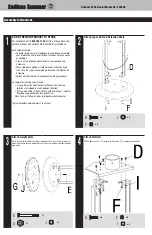
3

Attach weight plate

Note

:  If you plan to anchor your heater permanently, be sure to line up two outer 

holes in base with those in weight plate so that your anchor bolt will pass through 
both holes.

E

x 1

G

x 1

J

x 1

4

Attach Platform

TIP

: To tighten use a 7/16” wrench on Bolt and a 7/16” socket wrench on Nut.

D

x 6

F

x 6

I

x 6

2

Attach Legs and Tank Retention Chain

D

x 6

F

x 6

I

x 6

Summary of Contents for Endless Summer 235000

Page 1: ...such as a camper tent car or home WARNING FOR YOUR SAFETY For Outdoor Use Only outside any enclosure Table of Contents Important Safeguards Page 2 Exploded View Hardware 3 Assembly Instructions 4 Inst...

Page 2: ...clean Inspect heater before each use Installation and repair should be done by a qualified service person Do not alter heater in any manner Do not use the heater unless it is COMPLETELY assembled and...

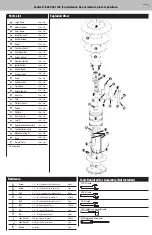
Page 3: ...Nickel Plated Lock Washer 1 pc K Battery AA Battery 1 pc Parts List 1 Large Dome 56 01 309 2 Medium Dome 56 01 257 3 Small Dome 56 01 258 4 Insulation Cone 56 01 114 5 Emitter Screen 56 01 113 6 Burne...

Page 4: ...teps in order to properly assemble your product To complete assembly you will need 1 Leak Detection Solution Instructions on how to make solution are included in step Operations Section 1 Precision Fi...

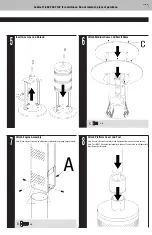
Page 5: ...ll Dome C x 6 7 Attach Engine Assembly Note Make sure gas line comes out bottom of pole before securing engine to pole A x 4 8 Attach Platform Cover and Post Note Secure setscrews in platform and tigh...

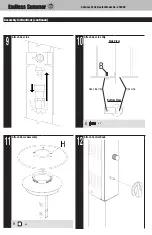
Page 6: ...Patio Heater Model No 235000 Assembly Instructions continued 12 Attach Control Knob 11 Attach Dome Assembly H x 3 9 Attach Gas Line 10 Attach Gas Line Clip Bottom View Side View Gas Line Clip Gas Line...

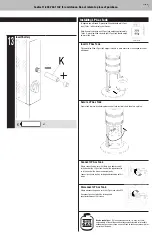
Page 7: ...attaching loose end of tank restraint chain to hole in right leg Connect LP Gas Tank Before connecting be sure that there is no debris caught in the head of the LP gas tank head of the regulator valv...

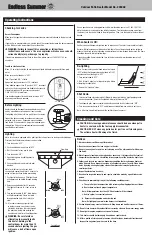
Page 8: ...sive cleaners Use warm soapy water 11 Do not paint engine engine access panel or dome 12 This heater should be thoroughly cleaned on a regular basis 13 After a period of storage and or nonuse check fo...

Page 9: ...all remaining parts from the date of purchase all parts in such product shall be free from defects in material and workmanship Vendor may require reasonable proof of your date of purchase Therefore y...

Page 10: ...ture is less than 40 F and tank is less than 1 4 full Use a full tank Supply hose is bent or kinked Straighten hose Control knob fully ON Check burner and orifices for blockage Emitter glows uneven No...

Reviews: