PE3M Small Form Factor PC
Upgrading the System Hardware
Page 28
Adding a CD-ROM or DVD Drive
The chassis will accommodate a single removable media drive. This may be a CD-ROM drive or a DVD-ROM
drive.
The CD or DVD drive must be a slim-line unit of the type commonly fitted in laptop computers. It is important
when selecting a drive, that it is compliant with the regulatory requirements of the territory in which it is to be
used. For example, for the European market the unit must be compliant with the EMC Directive and the Safety
requirements.
Cables for this option are supplied with the drive.
The procedures for installing the CD and the DVD drives are the same, and require a CD/DVD fixing kit. Note
that fixing screws must not be longer than those defined in this procedure, otherwise damage to the drive will
result.
Procedure
This procedure assumes that the system is not fitted with a removable media drive.
First remove the screws on the top cover and lift the cover off.
The AGP and PCI expansion card section must be removed to give access to the drive bay. Refer to the
diagram in the previous section:
Remove the two M3 countersunk-head screws on the front face of the chassis (in line with the upper
[AGP] card bracket).
Lift the AGP/PCI Riser card sub-chassis, complete with any expansion cards, vertically out of the
chassis to disengage the riser cards from the motherboard sockets. It is important that the sub-chassis
is removed evenly, disengaging the rear locating slot, and the front section.
Lift the sub-chassis clear of the main chassis.
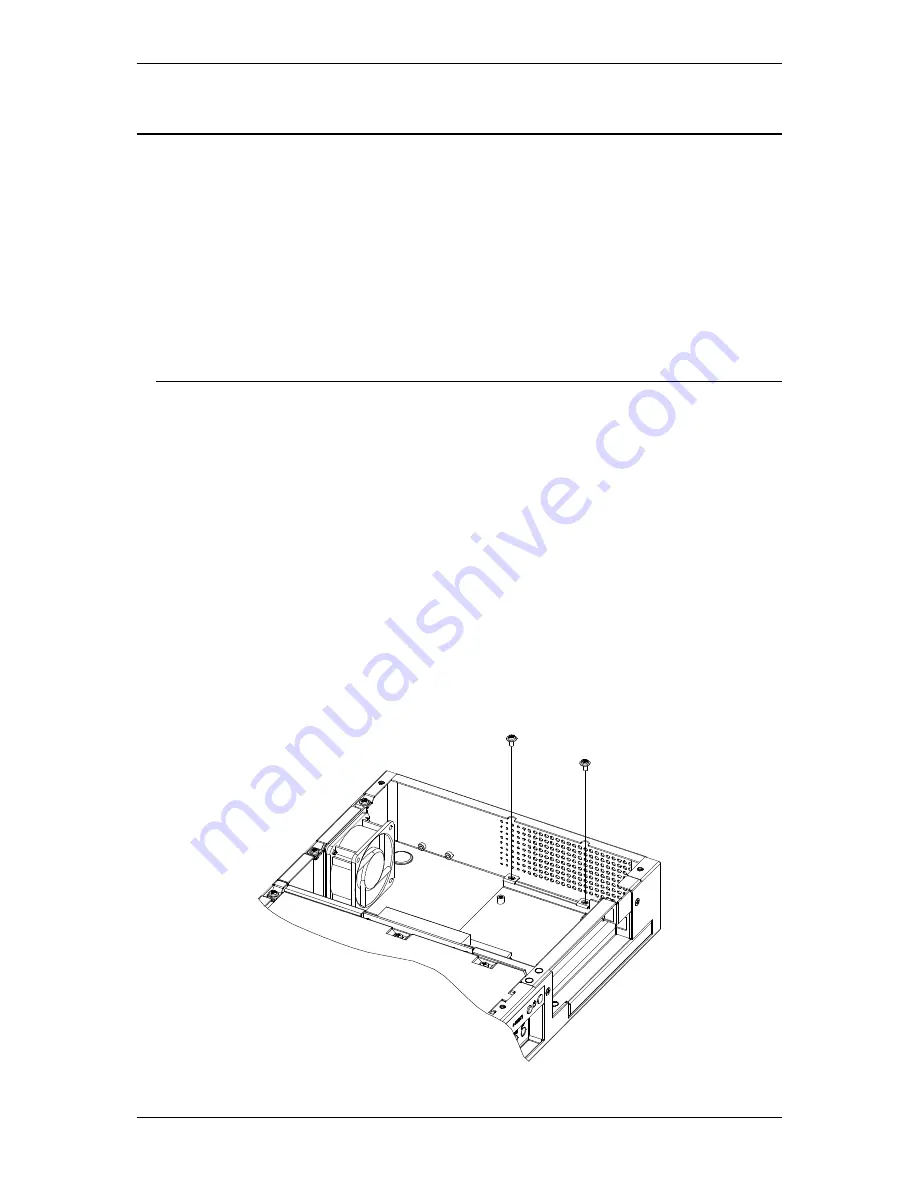
Remove the two M3 x 6mm screws holding the Removable-Drive Baseplate (see diagram) and slide it
towards the rear of the chassis to disengage the clip mountings.
Lift the baseplate out of the chassis.
Remove the drive bay blanking plate from the baseplate (two screws). This will not be required again
unless the drive is to be removed at some point in the future.
Place the Removable-Drive Baseplate to one side.


