background image

3

NeXgen Platform Base

Quick Guide

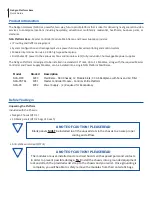
Mount the 5 RU NeXgen chassis into the 19 inch rack using rack screws (not provided). 

Install the Air Filter in the bottom of the chassis, if not installed already, and tighten the screws. 

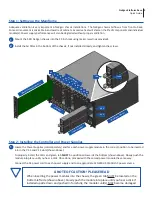
Step 1: Setting up the Mainframe

Adequate ventilation is very important in NeXgen chassis installations.  The NeXgen chassis Airflow is from front to back. 
Some air movement is advisable in enclosed rack cabinets. Excessive heat will shorten the life of components and individual 
module(s). Power supply performance will also be degraded without proper ventilation.

1

2

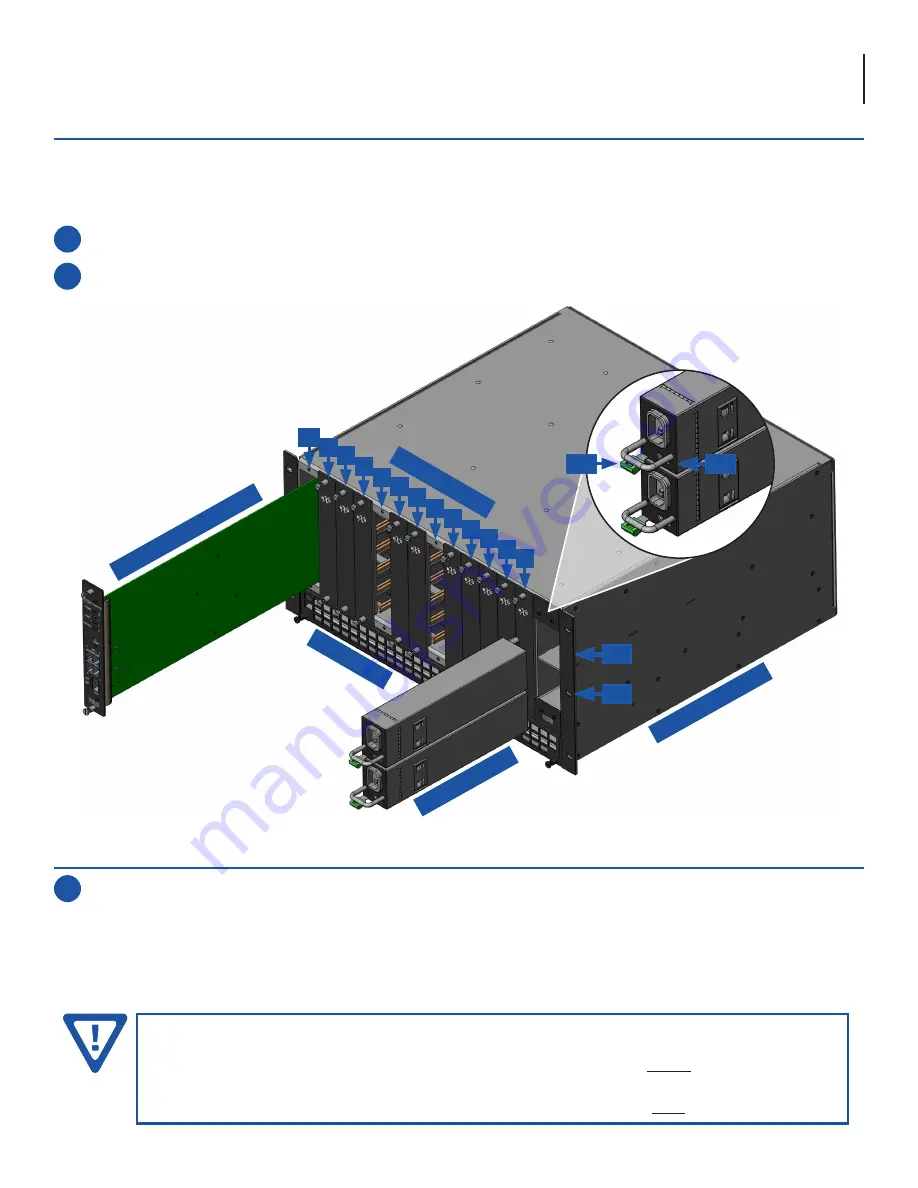
Step 2: Installing the Controller and Power Supplies

Locate the Power Supplies (sold separately) and face each power supply module in the correct position to be inserted 

into in the PS 1 and PS 2 slots (shown above).

To properly install, the LEDs and green tab 

MUST

 be positioned towards the bottom (shown above). Slowly push the 

module into place until you hear a click. Once done, proceed with the second power module the same way. 

Connect the AC power cord to each power supply and to an appropriate 120-240V, 50/60Hz AC power source.

1

2

1

5

10

3

8

6

11

4

9

7

12

Module 

Slots

Air Filt

er

Mas

ter 

Con

troller 

Module

Pow

er Supplies

MC

PS 2

PS 1

Main

frame 

Chassis

A NOTE OF CAUTION!  PLEASE READ

When inserting the power modules into the chassis, the green tab MUST be located on the 

bottom left side (shown above). Slowly push the module into place until you hear a click. If 

installed upside down and pushed in forcefully, the modular unit(s) 

MAY

 become damaged.

Tab

LEDs

Summary of Contents for NeXgen

Page 1: ...erved Specifications are subject to change without notice Trademarks are the property of their respective owner Blonder Tongue is ISO 9001 2015 Certified Status Date Document No Issue No Author ACTIVE October 24 2018 651247100A 1 DY Quick Setup and Configuration NXG Platform Quick Guide ...

Page 2: ...the required Master Controller and Power Supply Modules can be installed into a single NXG Platform Mainframe Unpacking the Platform Included with the Chassis NeXgen Chassis QTY 1 10 blank panels QTY 2 bags of 5 each Anti static wrist strap QTY 1 Model Stock Description NXG MFR NXG CNTRL NXG PS 6780 6781 6782 Mainframe 5RU Chassis 12 Module Slots 30 Gb Backplane with Fans and Air Filter Master Con...

Page 3: ... separately and face each power supply module in the correct position to be inserted into in the PS 1 and PS 2 slots shown above To properly install the LEDs and green tab MUST be positioned towards the bottom shown above Slowly push the module into place until you hear a click Once done proceed with the second power module the same way Connect the AC power cord to each power supply and to an appr...

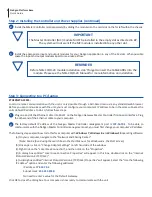
Page 4: ...d side of the window c Right click on the Local Area Connection and then click on the Properties d A dialog box entitled Local Area Connection Properties will appear In this box double click on the Internet Protocol Version 4 TCP IPv4 e A dialog box entitled Internet Protocol Version 4 TCP IPv4 Properties will appear Select the Use the following IP address option and enter the following addresses ...

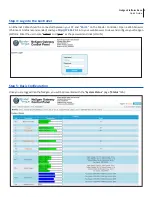
Page 5: ... PC and Port 1 on the Master Controller Open a Web browser Chrome or Firefox recommended and type http 172 16 70 1 in to your web browser to view and configure your NeXgen platform Enter the username Admin and pass as the password and click LOG IN Once you are logged into the NeXgen you will be presented with the System Status page Status tab ...

Page 6: ...00 523 6049 between the hours of 8am and 5pm EST Please refer to the operation manuals of each module for additional information After the hardware installation of any additional modules go through the control panel and set up each module slot to configure your NeXgen application Please refer to the user manuals of each module for in depth configuration Step 6 Module Configuration Module Slot Tabs...

Page 7: ...7 NeXgen Platform Base Quick Guide NOTES ...

Page 8: ... 1 800 523 6049 Ext 4256 or visit our website www blondertongue com for further information Product and Documentation Updates Download the latest User Manual PDF by visiting our website Navigate to the product page by entering the full Model Name or Stock Number in the search field Upon reaching the product page the User Manual download link will be located beneath the product image Firmware Updat...

Reviews: