background image

ENGLISH

E-6

CD Operations

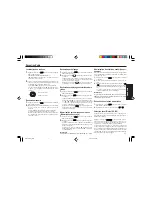
Playing the CD player

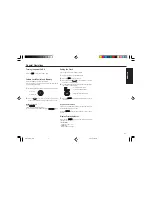
Loading Discs

Insert the disc into the CD insertion slot with the labeled side
facing up.
Playback begins automatically.

NEVER Insert a 3-inch CD!

This unit is designed for playback of standard 5-inch CD’s
only. Do not attempt to use 3-inch CD singles in this unit,
either with or without an adaptor, as damage to the player
and/or disc may occur.

Tips

• When a CD is loaded, the 

 on the display remains lit.

Listening to a disc that is already loaded

Press the 

CD

 to select the CD mode.

Playback begins automatically.

Pausing Playback

Press the 

6/    

.

To resume playback, press the 

6/    

 again.

Labeled side up

Stopping Playback

Press the 

BAND

 to select the radio reception (FM 

I

, FM 

II

, FM

III

 or AM 

I

, AM 

II

).

Ejecting Discs

Press the 

 to eject the disc.

Notes

• The unit will turn on automatically when a CD is inserted if

the ignition switch is  ‘‘ON’’.

• When the disc is ejected from the CD slot, remove it within

10 seconds; otherwise, the disc will be reloaded automati-
cally.

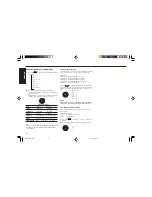
Track Search

Rotate the TUN/TRK dial  during CD mode. Track numbers
appear in the display window.

: Playback starts from the beginning of the

current track. Rotate again to play the pre-
vious track.

: Playback starts from the beginning of the

next track.

Cue / Review

Rotate and hold the TUN/TRK dial. Release when you have
found the desired point.

: To search backward.

: To search forward.

Scan Play

Press the 

SC/PS

 during CD mode.

The ‘‘ 

 ’’ indicator appears in the display window. This

will play the first 10 seconds of all the tracks on the disc.
Press the 

SC/PS

 again to cancel this feature.

Repeat Play

Press the 

5/RPT

 during CD mode.

The ‘‘ 

 ’’ indicator appears in the display window and the

current track is played repeatedly.
Press the 

5/RPT

 again to cancel this feature.

Mix Play

Press the 

4/MIX

 during CD mode.

The ‘‘ 

 ’’ indicator appears in the display window.

All the tracks on the current disc are played in random order.
Press the 

4/MIX

 again to cancel this feature.

BPV655(EN)_body

1/10/02, 5:50 PM

6

Summary of Contents for BPV 655

Page 1: ...ctor de CD de Alta Potencia y con Panel Extraíble Rádio FM AM CD de Alta Potência com Face Removível Robert Bosch Corporation Sales Group Blaupunkt Division 2800 South 25th Avenue Broadview Illinois 60155 http www blaupunktUSA com ENGLISH FRANÇAIS ESPAÑOL PORTUGUÊS Issue date 12 01 CD MAN FMlllAMll X BASS TRE TRE lo LOUD LOUD BPV655_Cover 1 10 02 5 49 PM 1 ...

Page 2: ...t the dealer where you purchased the unit or the dealer nearest to you This unit has been designed specifically for playback of compact discs bearing the following mark Other discs can not be played Handling Compact Discs Be careful when removing a compact disk after the play back is completed because the disk may be extremely hot Do not use non conventional discs such as heart shaped octangonal d...

Page 3: ... tune in to the desired station 11 PRESET MEMORY button During radio reception 1 6 For Preset memory During CD mode 4 MIX For Mix play 5 RPT For Repeat play 6 For Pause 12 CD button Selects the operating source CD CD changer or AUX 13 BAND button Selects the AM FM band Travel store 14 VOL dial Adjusts the volume level and audio control 3 4 2 1 5 6 7 8 9 10 11 12 14 Front Panel LCD Display 1 SCAN i...

Page 4: ... display system 1 Turn the ignition key to the ON position 2 Press the PWR to turn on the unit 3 Press and hold the DISPLAY for more than two seconds to enter the Clock setting mode 4 Use the following buttons and dial to set the clock The blink ing section can be adjusted AUDIO To activated Hour blink MUTE SENS To activated Minute blink Adjust the Hour and minute 5 Press the DISPLAY momentarily t...

Page 5: ...ss sound For extended bass centered 72Hz Blaupunkt s X BASS function can be set for either each band and CD mode You can select X BASS 1 Enhanced BASS level low X BASS 2 Enhanced BASS level Middle X BASS 3 Enhanced BASS level High X BASS 4 Enhanced BASS level Very high X BASS 0 No BASS enhanced Press the AUDIO to display the X BASS on the display win dow Each time you rotate the VOL dial the curre...

Page 6: ...e next station Press the SC PS again to stop Scan Tuning and remain this on the selected frequency Preset Scan Tuning 1 Press the BAND to select the desired AM or FM band 2 Hold the SC PS pressed for more than 2 seconds The unit will scan preset memory for the 12 stations from the AM I AM II band or the 18 stations from the FM I FM II FM III bands The unit will stop at each preset station for 8 se...

Page 7: ...isc is ejected from the CD slot remove it within 10 seconds otherwise the disc will be reloaded automati cally Track Search Rotate the TUN TRK dial during CD mode Track numbers appear in the display window Playback starts from the beginning of the current track Rotate again to play the pre vious track Playback starts from the beginning of the next track Cue Review Rotate and hold the TUN TRK dial ...

Page 8: ...d bend the appropriate tabs to hold the sleeve firmly in place Mounting Strap Use 3 Attaching the Mounting Strap to the underside of the dash board using screw Attach the back of the unit to the Mounting Strap us ing the support stem bolt and hardware Fire wall Fire wall Warning Failure to properly install the Mounting Strap or rear support Bushing is a major cause of CD skipping Without these sec...

Page 9: ...tion key has been removed 2 Disconnect the negative terminal of the car s bat tery 3 Connect the wiring harness wires in the following order Ground wire Black 12V Constant Power Supply Yellow 12V Accessory Switched Red and Power Antenna Amplifier Turn On Blue and tape each so they do not come in contact with each other 4 Connect the speaker wires of the wiring harness 5 Connect the car s antenna t...

Page 10: ...ol dampened cotton swab as shown below Main unit Back of the front panel Returning to the Initial Settings When the Eject button is pressed for more than 10 seconds the microcomputer of the unit returns to the initial settings If the display window is not properly shown or the unit mal functions press the Eject button for more than five seconds Removing the Unit Use the supplied release keys when ...

Page 11: ...roduct brochure Cause Solution Leads are not matched correctly with the car s accessory power connector Check wiring for short circuits The car doesn t have an ACC position Trouble Memorized stations and correct time are erased The fuse has blown Radio works when the igni tion key is the ON ACC and OFF positions No power is being supplied to the unit The power is continuously supplied to the unit ...

Page 12: ...re vendeur le plus proche Le présent appareil a été conçu tout spécialement pour la lecture des disques compacts qui portent la marque sui vante Il ne permet pas d écouter d autres disques Manipulation des disques compacts Faire attention lors du retrait d un disque compact après sa lecture car il se peut qu il soit extrêmement chaud Ne jamais utiliser de disques non traditionnels comme des disque...

Page 13: ...oix 11 Touche PRESET MEMORY MEMOIRE DE PRESELECTIONS Durant la réception radio 1 6 pour la mémoire de présélections En mode CD 4 MIX pour une lecture aléatoire 5 RPT pour répéter la lecture 6 pour effectuer une pause 12 Touche CD Sélectionne la source de fonctionnement CD changeur de CD ou AUX 13 Touche BAND BANDE Sélectionne la bande AM FM et la mémorisation automa tique de voyage 14 Bouton rotat...

Page 14: ...age avec un cycle de 12 heures 1 Tournez la clé de contact sur la position ON 2 Appuyez sur PWR pour mettre l appareil sous tension 3 Maintenir la touche DISPLAY enfoncée pendant plus de deux secondes pour passer au mode de réglage de l hor loge 4 Utiliser les touches et le bouton rotatif suivants pour ré gler l horloge La section clignotante est celle qui se rè gle AUDIO Pour faire clignoter les ...

Page 15: ...si ble de régler la fonction X BASS de Blaupunkt pour chacune des gammes et pour le mode CD Sélections possibles X BASS 1 Niveau des sons graves accentué Faible X BASS 2 Niveau des sons graves accentué Moyen X BASS 3 Niveau des sons graves accentué Fort X BASS 4 Niveau des sons graves accentué Très fort X BASS 0 Pas d accentuation des sons graves Appuyer sur la touche AUDIO pour faire apparaître X...

Page 16: ...r arrêter la recherche par balayage et conserver la fréquence sélectionnée Recherche par balayage des stations mémo risées 1 Appuyer sur la touche BAND pour sélectionner la bande AM ou FM souhaitée 2 Maintenir la touche SC PS enfoncée pendant plus de 2 secondes L appareil balaye les présélections pour les 12 stations de la bande AM I AM II ou pour les 18 stations des ban des FM I FM II FM III L ap...

Page 17: ...disque si le contact est mis Lorsque le disque est éjecté du lecteur retirez le au plus tard 10 secondes après autrement il sera automatiquement rechargé Recherche de plages Tourner le bouton rotatif TUN TRK en mode CD Les numé ros des plages apparaissent à l écran d affichage la lecture commence au début de la plage actuelle Continuer à tourner pour lire la plage précédente la lecture commence au...

Page 18: ...dre fermement en place Avec la patate perforée 3 Attacher la patte perforée sous le tableau de bord avec la vis Attacher l arrière de l appareil à la patte perforée en utilisant le boulon et le matériel de soutien Protection Protection Avertissement Une installation incorrecte de la patte perforée ou de la cap sule en caoutchouc de soutien arrière est une cause majeure de saut du son des CD Sans c...

Page 19: ...se touchent pas 4 Brancher les fils des enceintes du harnais de câbles 5 Brancher la borne de l antenne du véhicule à la prise d antenne de l appareil 6 Brancher le harnais de câbles amovible à l appareil 7 Rebrancher la borne négative de la batterie du véhicule 8 Mettre le contact 9 Vérifier si l appareil fonctionne correctement Exemple de raccordement Blanc Blanc Noir Gris Gris Noir Vert Vert No...

Page 20: ...es connecteurs au moyen d un coton tige imbibé d alcool comme illustré ci dessous Appareil principal Arrière de la façade détachable Retour aux réglages initiaux Lorsque vous appuyez sur la touche d éjection pendant plus de 10 secondes le microprocesseur de l appareil rappelle les réglages initiaux Si la fenêtre d affichage n apparaît pas correctement ou si l appareil ne fonctionne pas bien appuye...

Page 21: ...ccessoi res disponibles Guide de dépannage du lecteur CD En cas de problèmes lors de la lecture d un CD un message d erreur s inscrit dans la fenêtre d affichage Veuillez consulter le tableau ci après pour identifier le pro blème et y remédier comme indiqué Si l erreur persiste con tactez votre revendeur Blaupunkt le plus proche Message Possible cause Recommended action E 01 Le disque est sale Net...

Page 22: ...explicado en este manual póngase en contacto con el establecimiento en el que lo compró o con el distribuidor más cercano Esta unidad se ha concebido específicamente para repro ducir discos compactos que lleven la siguiente marca No podrá reproducirse otro tipo de discos Cómo tratar los discos compactos Extreme las precauciones para no quemarse cuando ex traiga el disco compacto nada más acabar la...

Page 23: ...izar la emisora deseada 11 Botón PRESET MEMORY En modo radio 1 6 Cambia de emisora presintonizada En modo disco compacto 4 MIX Cambia a reproducción aleatoria 5 RPT Cambia a reproducción repetida 6 Activa el modo de pausa 12 Botón CD Selecciona la fuente de funcionamiento disco compac to cargador de discos compactos o entrada auxiliar 13 Botón BAND Selecciona la banda AM FM y la sintonización de v...

Page 24: ... 12 horas 1 Ponga la tecla de encendido en la posición ON 2 Presione PWR para encender la unidad 3 Pulse y retenga pulsado DISPLAY durante más de dos segundos para establecer el modo de puesta en hora del reloj 4 Emplee los botones y el mando siguientes para poner en hora el reloj La sección que parpadea puede ajustar se AUDIO Para activar el parpadeo de las ho ras MUTE SENS Para activar el parpad...

Page 25: ... con centro 72Hz se puede seleccionar la función X BASS de Blaupunkt con todas las bandas y en el modo CD Podrá seleccionar X BASS 1 potenciación del nivel de graves baja X BASS 2 potenciación del nivel de graves media X BASS 3 potenciación del nivel de graves alta X BASS 4 potenciación del nivel de graves muy alta X BASS 0 sin potenciación del nivel de graves Pulse el botón AUDIO para visualizar ...

Page 26: ...ener la explora ción automática y que el equipo se quede en la emisora sintonizada Exploración de emisoras preseleccionadas 1 Pulse el botón BAND para seleccionar la banda AM o FM deseada 2 Mantenga pulsado el botón SC PS durante más de dos segundos El equipo puede explorar hasta 12 presintonías en las bandas AM I AM II y hasta 18 presintonías en las ban das FM I FM II FM III Se detiene en cada pr...

Page 27: ... CD por la ranura Tiene 10 segundos para retirar el disco expulsado de la ra nura Si no lo retira el disco volverá a introducirse automáticamente en el equipo Cómo buscar una pieza del disco Gire el mando TUN TRK durante el modo de discos CD En la pantalla aparecerá el número de la pieza seleccionada El equipo vuelve al principio de la pieza que se estaba reproduciendo Gírelo de nuevo para reprodu...

Page 28: ...e abrazadera de montaje 3 Conecte la abrazadera a la parte inferior del salpica dero mediante tornillos Conecte la espalda del aparato a la abrazadera de montaje mediante pernos y soporte metálico Pared de protección Pared de protección Advertencia Si no se instala correctamente la regleta de montaje o el buje de soporte trasero pueden producirse saltos al reproducir los discos CD Sin estos dispos...

Page 29: ... sí 4 Conecte los cables de los altavoces al mazo de cables 5 Conecte el terminal de la antena del coche a la entra da de antena que posee el equipo 6 Conecte el mazo de cables desconectable al equipo 7 Vuelva a conectar el terminal negativo a la batería del coche 8 Ponga en marcha el motor 9 Compruebe que el equipo funciona correctamente Procedimiento de conexión Cable de corriente constante de 1...

Page 30: ...e ilustra ción Equipo principal Parte posterior del panel frontal Cómo recuperar la configuración inicial Cuando pulse el botón de expulsión durante más de 10 se gundos el microprocesador del aparato repone los ajustes predeterminados iniciales Si la ventana de la pantalla no muestra correctamente o se nota mal funcionamiento del aparato pulse el botón de expulsión durante más de cinco segundos se...

Page 31: ...2528 Cómo solucionar anomalías en la reproduc ción de discos compactos Cuando se produce algún problema en la reproducción de discos compactos aparece un mensaje de error en la panta lla Consulte la tabla que le mostramos a continuación para saber a qué se debe el problema y siga las recomendaciones Si persis te el error póngase en contacto con su distribuidor de Blaupunkt Message Possible cause R...

Page 32: ...lte o revendedor onde adquiriu a unidade ou o revendedor mais perto de si Esta unidade foi especialmente desenvolvida para repro duzir discos compactos CDs contendo a seguinte marca Não podem ser reproduzidos outros discos Manuseamento de discos compactos Tenha cuidado ao retirar um CD após a leitura porque ele pode estar muito quente Não utilize discos não convencionais tais como os de forma de c...

Page 33: ...rogramada Durante a recepção de rádio 1 6 Para memória pré programada Durante o modo de CD 4 MIX Para leitura aleatória 5 RPT Para leitura repetida 6 Para pausa 12 Botão CD Selecciona o elemento activado CD Permutador de CDs ou AUX 13 Botão BAND Selecciona a banda AM FM e memorização de percurso 14 Dial VOL de volume Ajusta o nível de volume o controlo de áudio 3 4 2 1 5 6 7 8 9 10 11 12 14 Painel...

Page 34: ...visualização de 12 horas 1 Vire a chave de ignição até a posição ON 2 Carregue em PWR para ligar a unidade 3 Mantenha premido DISPLAY durante mais de 2 segundos para entrar no modo de acerto do relógio 4 Utilize os seguintes botões e o dial para acertar o relógio A secção que cintila pode ser ajustada AUDIO Para activar a cintilação dos dígitos da hora MUTE SENS Para activar a cintilação dos dígit...

Page 35: ... FM AM CD Realce dos baixos Para baixos extensos centrados 72Hz a função X BASS de Blaupunkt pode ser ajustada para cada banda e modo de CD Pode se seleccionar X BASS 1 Nível de BAIXOS realçados baixo X BASS 2 Nível de BAIXOS realçados médio X BASS 3 Nível de BAIXOS realçados alto X BASS 4 Nível de BAIXOS realçados muito alto X BASS 0 Sem BAIXOS realçados Carregue em AUDIO para exibir X BASS no vi...

Page 36: ...rar a sintoniza ção por pesquisa e permanecer na frequência do posto seleccionado Sintonização através de Pesquisa Pré programada 1 Carregue em BAND para seleccionar a banda AM ou FM desejada 2 Mantenha o botão SC PS carregado durante mais de 2 segundos A unidade pesquisa a memória pré programada para as 12 estações das bandas AM I AM II ou para as 18 estações das bandas FM I FM II FM III A unidad...

Page 37: ...o Quando o disco é ejectado da ranhura do CD retire o den tro de 10 segundos porque depois deste prazo o CD será automaticamente recolhido para dentro Procura da faixa Rode o dial TUN TRK durante o modo de CD Os números das faixas serão visualizados no visor A reprodução começa no início da faixa actual Rode o novamente para reprodu zir a faixa prévia A reprodução começa no início da faixa seguint...

Page 38: ... bem o suporte no seu lugar Usar a Barra de Montagem 3 Fixe a Barra de Montagem à parte inferior do tablier usando parafusos Fixe a parte de trás da unidade à Barra de Montagem com o parafuso e o material de apoio Parede de incêndio Parede de incêndio Advertência Falhas na instalação correcta da barra de montagem ou do casquilho de suporte traseiro são as principais causas do salto de CDs Sem tais...

Page 39: ...5 Ligue o terminal da antena do carro à tomada da an tena da unidade 6 Ligue o conector do sistema de cabos à unidade 7 Volte a ligar o terminal negativo da bateria do carro 8 Ligue o motor do carro 9 Certifique se de que a unidade funciona correctamente Procedimento de Ligação Sistema de 4 altifalantes Sistema de 2 altifalantes No caso de um sistema de 2 altifalantes isole as extremidades dos ter...

Page 40: ...ool como mostrado na figura abaixo Unidade principal Parte traseira do painel frontal Voltar para as Definições Iniciais Quando premir o botão de ejecção durante mais de 10 se gundos o microcomputador do aparelho retornará às predefinições iniciais Se o visor não aparecer correctamen te ou se o aparelho apresentar algum defeito prima o botão de ejecção durante mais de 5 segundos Retirar a unidade ...

Page 41: ...endedor ou para pedir catálogos sobre o produto Resolução de Problemas do Leitor de CD Quando surgirem problemas de leitura de CD aparece uma mensagem de erro no visor Consulte o quadro abaixo para identificar o problema depois efectue as correcções sugeridas Caso o erro persista entre em contacto com o seu agente Blaupunkt mais próximo Message Possible cause Recommended action E 01 Disco com suji...

Reviews: