RIDING
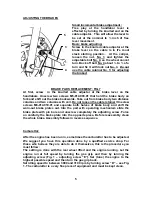
After starting up the engine place one foot on the deck board and slightly
rotate the twistgrip. In the moment when the SCOOTER begins to move forward
place the other foot on the deck board, too. To stop or slow down rotate the
gas lever backward and slow down, following these steps –
- pull with left hand the rear brake leverto slow down or stop
- slightly pull with right hand the front brake only to slow down
Do not brake abruptly with front brake as it can cause a CRASH (the brakes are
very effective). Pressing the red button on the handlebars shuts down the
engine.
To keep the SCOOTER quiet and safe do not drive with wide open throttle.
Reasonable operations with the throttle lower the fuel consumption and
noisiness without much speed reduction. Drive safely and always hold the
handlebars with both hands .
SERVICE INSTRUCTIONS
The following service instructions should be performed periodically to keep the
SCOOTER in fail-safe conditions.
Bolts and Nuts:
The bolts and nuts must be checked and tightened up again after every 25
hours of running time.
Air Filter:
The air filter must be checked and cleaned if needed after every 50 hours of
running time. If the SCOOTER is used in a dusty environment the air filter
must be checked and cleaned more often.
Instructions for dismantling the air filter:
The backside of the air filter can be dismantled after unlocking the interlock
placed at the topside of the filter. Take out the filter elements and check for
contamination. Contaminated filter elements should be carefully washed with
detergent and dried thoroughly. The re-installation is made in the reverse order
of the dismantling instructions.
Clutch:
The thickness of the clutch-lining shoe must be checked after every 100 hours
of driving. The thickness cannot be less than 1 mm (0,039 in). The engine must
be removed from the frame during the clutch control.
Instructions for dismantling the engine:
The first step is to dismantle the fuel tank and disconnect the fuel pipes.
Disconnect the gas cable from the carburetor and unscrew the four bolts on
the clutch housing. The engine must be removed in the direction away from the
clutch housing. The clutch housing will remain on the frame. Second step is
the control of the clutch lining – the thickness cannot be less than 1 mm (0,039
in). In case the jaws (shoe) of the clutch must be changed the clutch spring
must be changed, too.
The installation is made in the reverse order of the dismantling instructions.
Check the connections of the fuel pipes to the carburetor.
4
Summary of Contents for Blatino
Page 1: ...USER S MANUAL SCOOTER WITH AUXILIARY ENGINE...
Page 2: ......
Page 10: ...7 FIG 4...
Page 11: ...8...
Page 12: ...9...
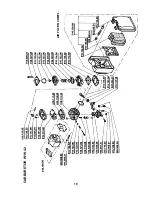
Page 13: ...10 AIR FILTER COMPL CARBURETOR WYK 42...
Page 14: ...11 916 072 02 512 055 00 FRONT BRAKE COMPLETE 512 056 00 REAR BRAKE COMPLETE 916 072 02...
Page 18: ......
Page 19: ......
Page 20: ...COPYRIGHT BLATA 2007 C...

