


Getting Started
Getting started with your Blackmagic MultiView is as easy as plugging in power, connecting
your SDI video sources, and plugging your monitors and televisions into the HDMI or SDI
outputs. This section of the manual will show you everything you need to know to get started
using your Blackmagic MultiView.
Plugging in Power
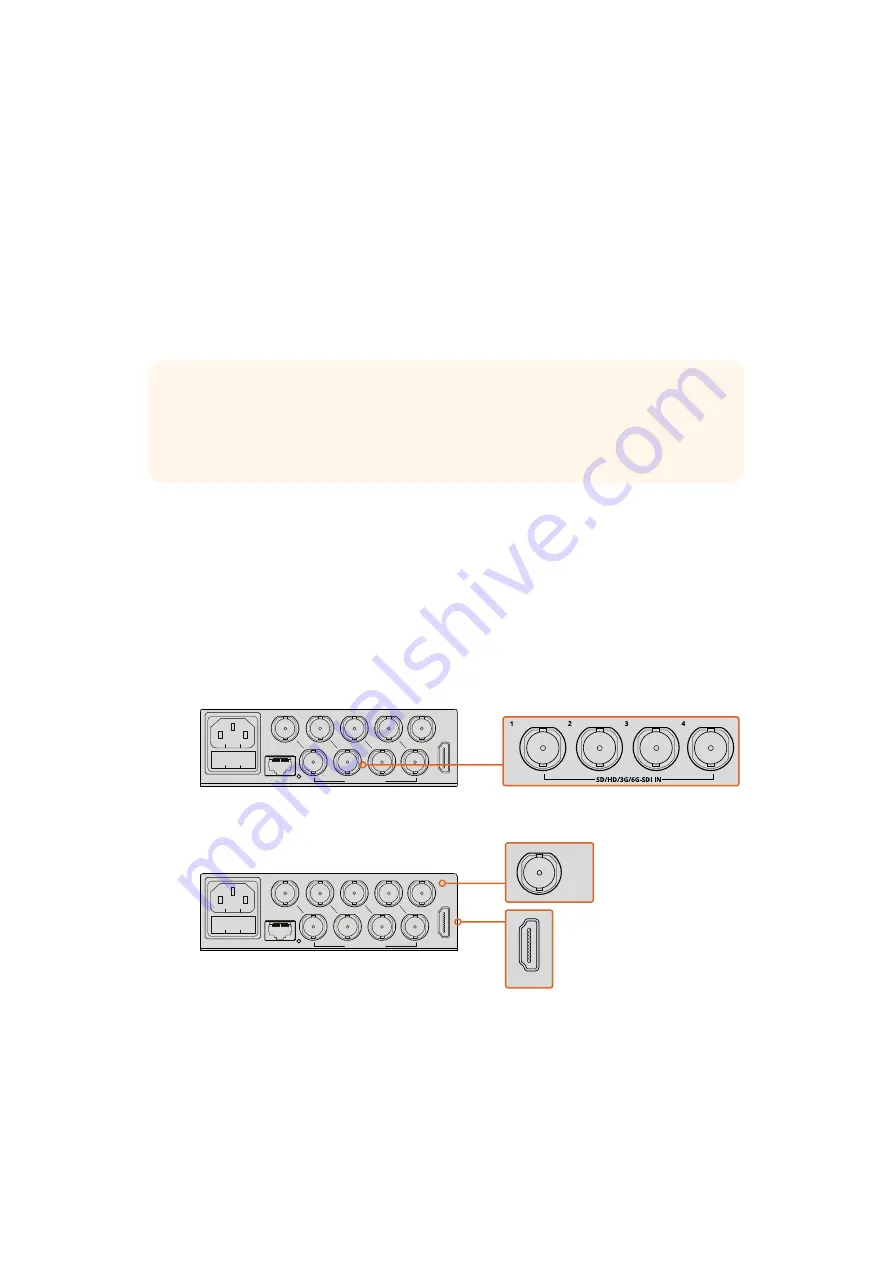
To power your Blackmagic MultiView, simply plug a standard IEC power cord into the 110-240V
AC power input on the rear panel.
To power Blackmagic MultiView 4 HD, plug the supplied power adapter into the 6-36 V DC
input. A screw thread housing is provided so you can secure power to the unit and prevent
accidental disconnection.
Connecting SDI Sources and Monitors
Plug your SDI sources into any of your Blackmagic MultiView’s SDI video inputs. The video
format will be automatically detected and the video will be displayed in the multi view output.
To see the output, simply connect a monitor to the SDI or HDMI multi view outputs.
Connect the video sources to your Blackmagic MultiView’s SDI video inputs
Connect monitors to your Blackmagic MultiView’s HDMI or SDI multi view outputs
When connecting an HDMI monitor to the HDMI output, your Blackmagic MultiView will
automatically detect whether the monitor supports Ultra HD or HD and switch the multi view
output accordingly.
TIP
Blackmagic MultiView 4 can also accept Power over Ethernet Plus, which means
you only need to plug it into an Ethernet switch capable of supplying PoE+. If you have
both AC power and PoE+ connected to your MultiView 4, it will automatically switch to
the remaining power supply if one is unplugged or fails.
4
MultiView 4
Blackmagic
3
1
2
ETHERNET
HDMI OUT
HD
UHD
OUT
SD/HD/3G/6G-SDI IN
4
MultiView 4
Blackmagic
3
1
2
ETHERNET
HDMI OUT
HD
UHD
OUT
SD/HD/3G/6G-SDI IN
HD
UHD
OUT
HDMI OUT
5
Getting Started


