

2
3
USB PnP Installation 3
Windows 98/ME/2000/XP
1. Make sure the USB560 Emulator is powered.
2. Connect the USB cable to the emulator and to the com-
puter.
3. Follow the Windows “New Hardware” prompts selecting
the location where the Blackhawk USB device drivers ex-
ist.
These file were installed to your system during the
Emulation Driver Installation—step 1. Typical location for
these files is folder:
C:\ti\blackhawk\drivers
, where
<
C:\ti
> is the location selected in step 1.
4. When completed, the Blackhawk Control Panel and Win-
dows Device Manager will show the device. The Black-
hawk Control Panel can be activated from its icon, located
in the Windows Control Panel Dialog Box.
5. Now follow the Code Composer Studio Setup—Step 4
1 Emulation Driver Installation
The USB560 JTAG Emulator shipped with its drivers on
CDROM media that are needed by Windows and Code Com-
poser Studio for operation.
WARNING
Be careful to connect interface cables with the correct ori-
entation. Pin 1 on the interface cable should match Pin 1
on the DSP system connector. The JTAG cable assembly
features a "keyed" connector to minimize the chance of er-
ror.
1. Place the USB560 JTAG Emulator module in desired loca-
tion.
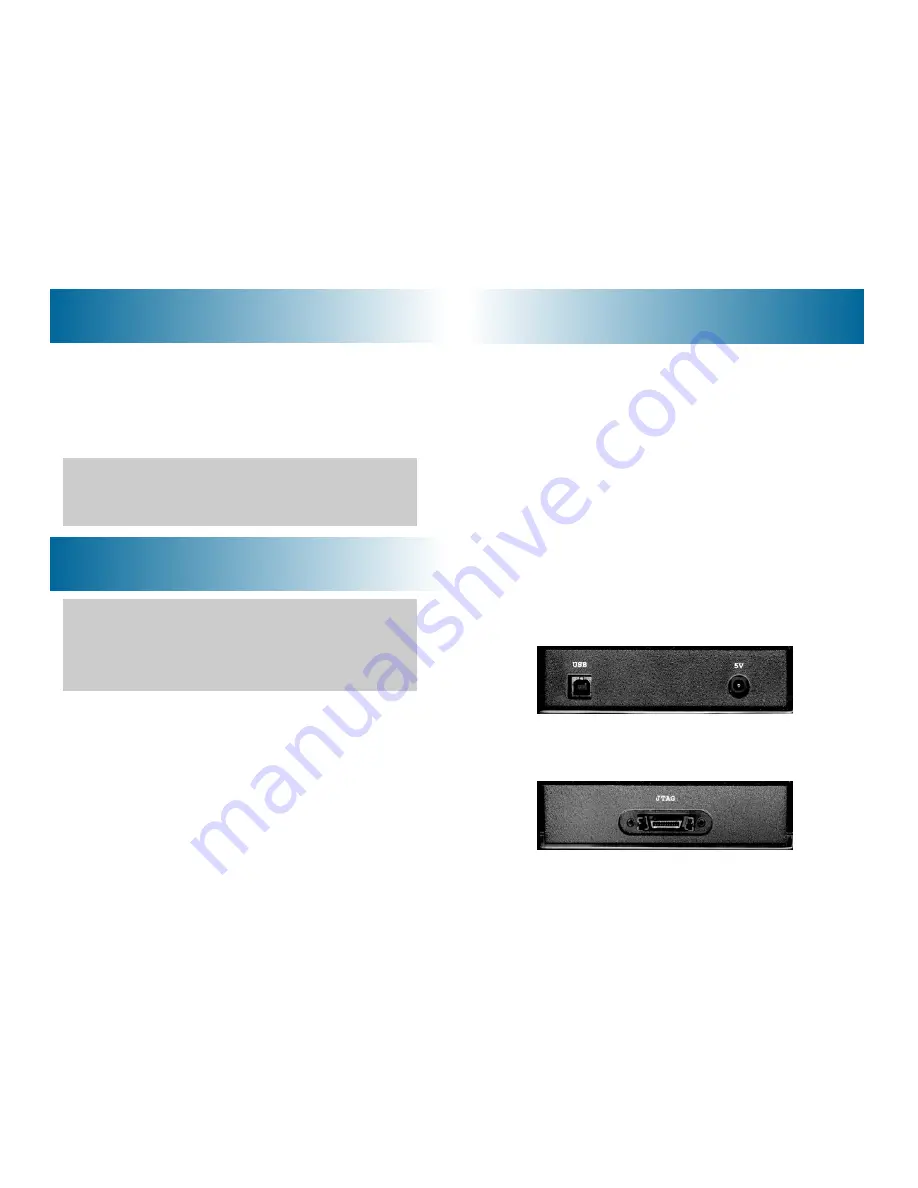
2. Connect the 5v DC power plug of the power supply to the
5-volt DC input on the USB560 JTAG Emulator (see figure
1).
3. Attach the USB cable to an available USB port on the PC
and to the USB connector on the USB560 JTAG Emulator
(see figure 1).
4. Attach the JTAG cable assembly to the corresponding “D”
connector of the USB560 JTAG Emulator (see figure 2).
5. Connect the power supply A/C wall cord to A/C power,
which will power the USB560 JTAG Emulator and initiate
Plug and Play installation for the Windows device driver
(see step 3 on USB PnP Installation).
FIGURE 1—USB & Power Endplate
FIGURE 2—JTAG End Plate
2 Hardware Installation
1. Insert the Emulation Driver CD.
2. Follow the installation wizard, and when done, you are
ready to install the emulator hardware.
NOTE:
If the installation executable fails to start automatically,
run X:\Demoshield\Setup.exe,
where [X] is the drive letter for your CDROM drive.


