


■
Overview
Installation Procedures
■
12
13
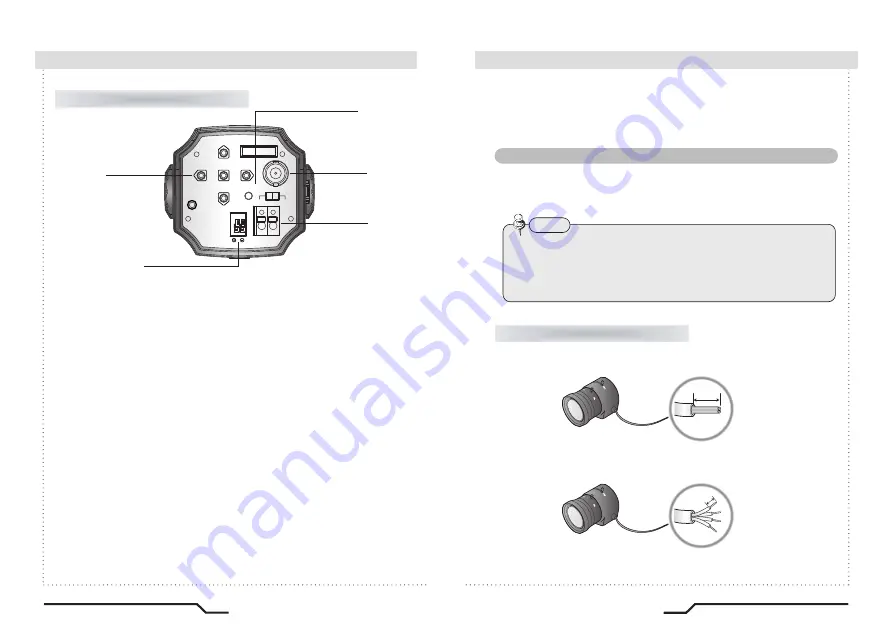
Rear View
⑥
Function Setup Button
ㆍ
SET Button : Displays the menu on the screen. Press this button to confirm
status or after changing a selected item.
ㆍ
Up and Down Button : Used to move the cursor up or down in the menu
screen to select a desired menu item.
ㆍ
Left and Right Button : Used to move the cursor left or right in the menu
screen or to change the value of the selected item.
⑧
Power LED
When power is properly connected, this LED comes on.
⑨
Video OUT Port
Video signals are output through this port. Connect this port to the Video IN
port of a monitor.
Lens
The lens is not supplied with this camera. Purchase a lens suitable for
your environment. This camera accepts the auto iris lens and both
C-and CS-mount lens.
• It is recommended to use the DC type Auto Iris Lens to effectively
enjoy the major functions of this camera.
• Keep the lens surface clean, since if it is contaminated with dirt or
fingerprints the picture quality suffers.
Note
When Using Auto Iris Lens
1. Strip the insulation of the auto iris lens cable 8mm from the end..
2. Strip the insulation of the core of the auto iris lens cable to expose a
2mm length.
⑩
Power IN Port
Connect the power as specified for each model here.
m
m
8
.
x
o
r
p
p
a
m
m
2
.
x
o
r
p
p
a
Pixim CMOS WDR Color Camera
Pixim CMOS WDR Color Camera
⑥
⑦
⑧
⑨
⑩
REMOTE
VIDEO OUT
DC
VIDEO
POWER
SET
F.G
AC24V/DC12V
UTP OUT
⑦
When using UTP Cable
ㆍ
Connect UTP(Unshield Twisted Pair) wire to the UTP output of the camera
directly. UTP transmitter is included in the camera therefore additional UTP
transmitter is not necessary.
ㆍ
UTP receiver is necessary to connect UTP wire to Monitor or DVR.
ㆍ
When connecting UTP wire, make sure the polarity of the video signal
is correct.
ㆍ
Use UTP wire "CAT 24AWG" to have the best transmission quality.
Summary of Contents for BLK-CWS108NH
Page 1: ......
Page 18: ...MEMO...


