background image

2

1

IMPORTANT SAFEGUARDS

 When using electrical appliances, basic safety precautions should always 

be followed, including the following:

 Read all instructions.

 To protect against risk of electrical shock do not put cord, plugs or 

appliance in water or other liquid.

 Close supervision is necessary when any appliance is used by or near 

children.

 Unplug from outlet when not in use, before putting on or taking off 

parts, and before cleaning.

 Avoid contacting moving parts.

 Do not operate any appliance with a damaged cord or plug or 

after the appliance malfunctions, or is dropped or damaged in any 

manner. Return appliance to the nearest authorized service facility for 

examination, repair or electrical or mechanical adjustment. Or, call the 

appropriate toll-free number on the cover of this manual.

 The use of attachments not recommended or sold by the manufacturer 

may cause fire, electric shock or injury.

 Do not use outdoors.

 Do not let cord hang over edge of table or counter.

 Keep hands and utensils away from the cutting blade while chopping 

food to reduce the risk of severe injury to persons or damage to the food 

chopper. A scraper may be used, but only when the food chopper is not 

running.

 Blade is sharp. Handle carefully.

 To reduce the risk of injury, never place cutting blade on base without 

first putting bowl properly in place.

 Be certain cover is securely locked in place before operating appliance.

 Do not attempt to defeat the cover interlock mechanism.

 Do not let cord contact hot surface, including the stove.

 Check hopper for presence of foreign objects before using.

 To reduce the risk of fire or electric shock, do not operate any heating 

appliance beneath mounted unit.

POLARIZED PLUG (120V Models Only)

This appliance has a polarized plug (one blade is wider than the other). To reduce the 

risk of electric shock, this plug is intended to fit into a polarized outlet only one way. If 

the plug does not fit fully into the outlet, reverse the plug. If it still does not fit, contact a 

qualified electrician. Do not attempt to modify the plug in any way.

TAMPER-RESISTANT SCREW
Warning: This appliance is equipped with a tamper-resistant screw to prevent 

removal of the outer cover. To reduce the risk of fire or electric shock, do not 

attempt to remove the outer cover. There are no user-serviceable parts inside. 

Repair should be done only by authorized service personnel.

ELECTRICAL CORD

a)  A short power-supply cord (or detachable power-supply cord) is to be provided 

to reduce the risk resulting from becoming entangled in or tripping over a 

longer cord.

b) Longer detachable power-supply cords or extension cords are available and 

may be used if care is exercised in their use.

c)  If a long detachable power-supply cord or extension cord is used,
  1) The marked electrical rating of the detachable power-supply cord  

    or extension cord should be at least as great as the electrical rating of the  

    appliance,
  2)  If the appliance is of the grounded type, the extension cord should be  

    a grounding-type 3-wire cord, and
  3)  The longer cord should be arranged so that it will not drape over the  

    countertop or tabletop where it can be pulled on by children or  

    tripped over.

Note: 

If the power supply cord is damaged, it should be replaced by qualified 

personnel. In Latin America, by an authorized service center.

 Do not mount the storage bracket/unit over or near any portion of a 

heating or cooking appliance or a sink or basin.

SAVE THESE INSTRUCTIONS.

This product is for household use only.

Summary of Contents for Spacemaker CG800C

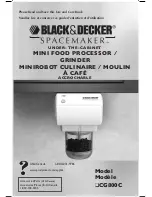
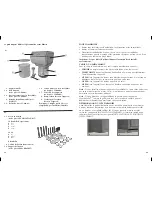
Page 1: ... Accessories Parts USA Canada Accessoires Pièces É U Canada 1 800 738 0245 Please Read and Save this Use and Care Book Veuillez lire et conserver ce guide d entretien et d utilisation UNDER THE CABINET MINI FOOD PROCESSOR GRINDER Minirobot culinaire moulin à café ACCROCHABLE ...

Page 2: ...any heating appliance beneath mounted unit POLARIZED PLUG 120V Models Only This appliance has a polarized plug one blade is wider than the other To reduce the risk of electric shock this plug is intended to fit into a polarized outlet only one way If the plug does not fit fully into the outlet reverse the plug If it still does not fit contact a qualified electrician Do not attempt to modify the pl...

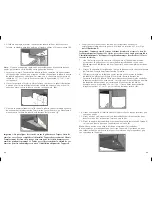
Page 3: ...aster oven or coffeemaker make sure you can easily unplug the appliance following use DETERMINE CABINET TYPE Prior to taping the mounting template and beginning to drill your holes determine if your cabinet has a flat bottom B or an overhanging lip C If your cabinet is flat follow STANDARD INSTALLATION if the cabinet has a lip refer to SPACER MOUNTING INSTALLATION STANDARD INSTALLATION FLAT CABINE...

Page 4: ...he cabinet down into appliance holes tighten 4 screws in place to secure appliance to cabinet Note Always tighten screws to ensure the appliance does not move or shake during operation D 10 Pull out cord from cord storage behind appliance and plug into standard electrical outlet Extra cord can be fed back into storage or hung over cord management hook behind unit F Note If you are connecting this ...

Page 5: ...ruler or the paper ruler provided to measure the overhang height placing your ruler vertically against the underside of the cabinet behind the overhang This number determines the number of spacers you need using a number of spacers equal to the overhang height For example a 1 overhang would use 2 spacers on each of the holes K 11 Place a washer inside the cabinet over each of the 4 holes you drill...

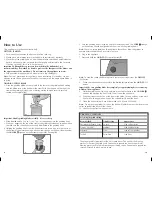
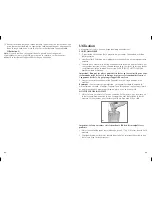
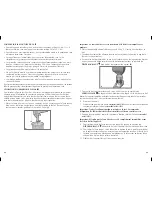
Page 6: ...ctly under the UNLOCK signage on the bottom of the motor housing N 5 Turn the grinding bowl clockwise until it locks into position The LOCK signage on the housing should be aligned with the arrow on the grinding bowl Note There is a safety feature on this appliance that will not allow the grinder to operate unless the workbowl is securely in place 6 Plug in the appliance 7 Press and hold the ON OF...

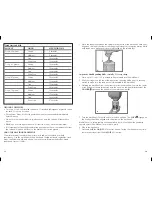
Page 7: ...ny time remove your finger from the ON OFF I O button 12 11 R Q Grind time and yield AMOUNT GRIND SUGGESTED TIME cup 23 grams Coarse 8 seconds Medium 9 seconds Fine 10 seconds Extra Fine 11 seconds 1 3 cup 31 grams Coarse 10 seconds Medium 12 seconds Fine 14 seconds Extra Fine 16 seconds cup 47 grams Coarse 10 seconds Medium 11 seconds Fine 15 seconds Extra Fine 20 seconds cup 70 grams Coarse 12 s...

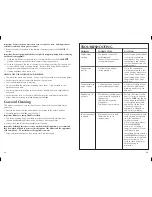
Page 8: ...d in hot soapy water 4 Always rinse and dry parts thoroughly after cleaning Important Although these parts can be washed in the dishwasher we recommend they be washed by hand to preserve the sharpness of the blades and the appearance of the workbowl Do not immerse the appliance in water 5 Wipe outside of appliance with a damp cloth dry thoroughly TROUBLESHOOTING PROBLEM POSSIBLE CAUSE SOLUTION Gri...

Page 9: ...n appareil dont la fiche ou le cordon est abîmé qui fonctionne mal ou qui a été endommagé de quelque façon que ce soit Pour un examen une réparation ou un réglage rapporter l appareil à un centre de service autorisé Ou composer le numéro sans frais inscrit sur la page couverture du présent guide L utilisation d accessoires non recommandés par le fabricant de l appareil peut occasionner un incendie...

Page 10: ...ues d incendie ou de secousses électriques ne pas tenter de retirer le couvercle extérieur L utilisateur ne peut pas remplacer les pièces de l appareil En confier la réparation seulement au personnel des centres de service autorisés CORDON ÉLECTRIQUE a Le cordon d alimentation de l appareil est court ou amovible afin de minimiser les risques d enchevêtrement ou de trébuchement b Il existe des cord...

Page 11: ...MPLACEMENT Pour le choix d un emplacement tenir compte des éléments suivants CHOISIR un emplacement situé à proximité d une prise de courant TENIR COMPTE de votre utilisation habituelle de la cuisine pour déterminer l emplacement de l appareil NE PAS fixer l appareil au dessus d un électroménager servant à la cuisson ou dégageant de la chaleur comme votre poêle ou votre four NE PAS fixer l apparei...

Page 12: ... cas où vous déménageriez ou décideriez de fixer l appareil à un autre emplacement dans l avenir D E 6 Essuyer la poussière et les débris qui ont pu se déposer sur la surface intérieure de l armoire Essuyer aussi le dessous de l armoire 7 Tenir l appareil en place en alignant l avant de ce dernier avec l avant de l armoire les trous percés dans l armoire doivent être alignés avec les trous de fixa...

Page 13: ...de 6 35 mm po voir l illustration E Important Toujours percer des trous verticaux bien droits à travers le trou de fixation indiqué sur le gabarit Le fait de percer des trous à angle peut empêcher l installation adéquate de l appareil et peut endommager les armoires si le foret traverse la cloison 7 Une fois les trous percés retirer le ruban gommé et le gabarit de fixation et conserver le gabarit ...

Page 14: ...EN ET NETTOYAGE du présent guide d utilisation Important Bien que ces pièces puissent être lavées au lave vaisselle nous vous recommandons de les laver à la main pour préserver le tranchant des lames et l apparence des bols Ne pas plonger l appareil dans l eau 4 Essuyer les surfaces extérieures de l appareil avec un linge humide bien assécher Remarque Pour assurer votre protection cet appareil est...

Page 15: ...tatif Prendre le café directement dans le bol 11 Laver le bol après chaque utilisation tel qu indiqué à la section ENTRETIEN ET NETTOYAGE Nota Ne pas utiliser le moulin à café pour les épices le bol absorbera la saveur des épices ce qui affectera la saveur du café 12 Débrancher l appareil lorsqu il n est pas en fonction N P DIRECTIVES POUR LA MOUTURE Sélection de la mouture Procédé d infusion Type...

Page 16: ...se bien au bas de la tige Les doigts en haut de la tige de la lame à hacher la faire tourner pour s assurer qu elle est bien fixée à l axe Q Q Important La lame à hacher est très tranchante Elle doit être manipulée avec prudence 2 Placer la quantité d aliments désirés jusqu à 284 g 1 tasse à hacher dans le bol 3 Distribuer également les aliments dans le bol en saisissant le haut de la tige de la l...

Page 17: ...ame Entretien et nettoyage L utilisateur ne peut effectuer lui même l entretien d aucune pièce de cet appareil Confier l entretien à du personnel qualifié 1 Retirer le bol de l appareil en le pivotant en position déverrouillée 2 Retirer la lame du bol avec prudence Important Les lames sont très tranchantes Elles doivent être manipulées avec prudence 3 Laver le bol à mouture le bol à minirobot et l...

Page 18: ... défaillante S assurer que la flèche du bol est correctement alignée sur le symbole VERROUILLAGE LOCK du logement et que le bol est complètement enclenché et de niveau avec la base S assurer que l appareil est branché et que la prise de courant fonctionne Les aliments sont hachés de façon inégale Le bol est trop plein Les aliments sont peut être coupés en morceaux inégaux Débrancher l appareil et ...

Page 19: ...35 36 NOTES NOTES ...
Page 20: ...rovince to province BESOIN D AIDE Pour communiquer avec les services d entretien ou de réparation ou pour adresser toute question relative au produit composer le numéro sans frais approprié indiqué sur la page couverture Ne pas retourner le produit où il a été acheté Ne pas poster le produit au fabricant ni le porter dans un centre de service On peut également consulter le site web indiqué sur la ...

Page 21: ...rademark of General Electric Company USA SpacemakerMC est une marque de commerce déposée de la société Générale Électrique Company É U Copyright 2008 Applica Consumer Products Inc Made in People s Republic of China Printed in People s Republic of China Fabriqué en République populaire de Chine Imprimé en République populaire de Chine Printed on recycled paper Imprimé sur du papier recyclé ...

Reviews: