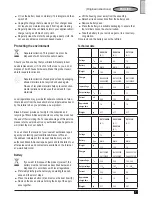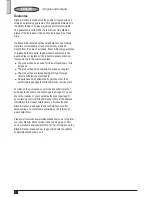
6
ENGLISH
(Original instructions)
Use
u
Before first use, the battery must be charged for at least
24 hours.
u
Place the appliance on the charging base whenever it is
not in use. (DV4810N, DV6010N, DV7210N, DV9610N
and DV1210N Only)
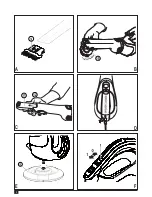
Charging the battery (Fig. D & E)
u
Make sure that the appliance is switched off. The battery
will not be charged with the on/off switch in the on posi-
tion.
u
Plug the jack plug of the charger (7) into the charg-
ing socket (4) of the appliance (Fig. D). (DV9610AN &
DV7210NWH Only)
u
Place the appliance on the charging base (8) (Fig. E).
(DV4810N, DV6010N, DV7210N, DV9610N and DV1210N
Only)
u
Plug in the charger. Switch on at the mains. The charging
indicator (3) will be lit.
u
Leave the appliance to charge for at least 16 hours.
While charging, the charger may become warm. This is
normal and does not indicate a problem. The appliance can
be left connected to the charger indefinitely. The charging
indicator (3) will be lit as long as the appliance is connected to
the plugged-in charger.
Warning!
Do not charge the battery at ambient temperatures
below 4 °C or above 40 °C.
Switching on and off (fig. F)
u
To switch the appliance on, slide the on/off switch (1)
forward to position 1.
u
To switch the appliance off, slide the on/off switch (1) back
to position 0.
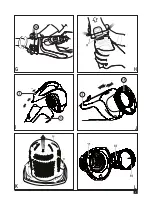
Rotating the dust collector (fig. G) (DV9610N &
DV1210N only
The nozzle can be rotated for better access in tight spots.
u
Press the rotation release catch (14).
u
Rotate the nozzle to the left or right until it clicks into
place.
Optimising the suction force
In order to keep the suction force optimised, the filters must be
cleared regularly during use.
Emptying and cleaning the product.
Emptying the dust bowl (fig. H).
u
Press the release latchs (13) and pull the dust collector (6)
straight off.
u
Empty the contents of the bowl.
u
To replace the dust collector, place it back onto the handle
until it “clicks” firmly into position.
Removing the dust bowl and filters (fig. I, J, K & L).
Warning!
The filters are re-usable and should be cleaned
regularly.
u
Press the release latch (2) and pull the dust bowl (5)
straight off.
u
While holding the dust bowl over a bin or sink, pull out the
filter (15) to empty the contents of the bowl.
u
To replace the dust bowl, place it back onto the handle
until it “clicks” firmly into position.
Warning!
Never use the appliance without the filters. Opti-
mum dust collection will only be achieved with clean filters.
Pre-filter (fig. K) (DV6010N, DV7210N & DV7210N-
WH)
The Filter and pre-filter can be separated to allow better
cleaning.
u
Twist the pre-filter (16) in a clockwise direction and lift
from the filter (15).
Quick clean filter (fig. L) (DV9610N & DV1210N
u
Lift the filter cleaning handle (19).
u
Whilst holding the quick clean filter housing (17) turn the
filter cleaning handle (18) to perform a quick clean of the
filter (18).
u
Pull the filter (18) out of the quick clean filter housing (17)
for more thorough cleaning.
Cleaning the dust bowls and filters
u
The dust bowls and filters can be washed in warm soapy
water.
u
Make sure that the filters and the dust bowl are dry before
re-fitting.
Replacing the filters
The filters should be replaced every 6 to 9 months and when-
ever worn or damaged.
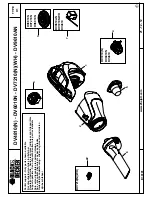
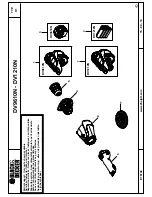
Replacement filters are available from your Black & Decker
dealer:
For models: DV4810N, DV6010N, DV7210N & DV7210NWH
use filter part number VF110-XJ
For models: DV9610N and DV1210N use filter part number
VF110FC-XJ
Maintenance
Your Black & Decker corded/cordless appliance/tool has been
designed to operate over a long period of time with a minimum
of maintenance. Continuous satisfactory operation depends
upon proper tool care and regular cleaning.
Warning!
Before performing any maintenance on corded/
cordless power tools:
u
Switch off and unplug the appliance/tool.
u
Or switch off and remove the battery from the appliance/
tool if the appliance/tool has a separate battery pack.


