background image

Summary of Contents for 0802N

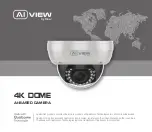
Page 1: ...ualcomm Technologies Inc and or its subsidiaries Qualcomm is a trademark of Qualcomm Incorporated registered in the United States and other countries The Made with Qualcomm Technologies logo is a trademark of Qualcomm Incorporated 4k dome AI BASED CAMERA ...

Page 2: ...Model P450 Product number 0803F 0802N 0803FW 0802NW INSTALLATION GUIDE ...

Page 3: ...G POSITION GPS antenna Option Qualcomm products contained herein are products of Qualcomm Technologies Inc and or its subsidiaries Qualcomm is a trademark of Qualcomm Incorporated registered in the United States and other countries The Made with Qualcomm Technologies logo is a trademark of Qualcomm Incorporated 4k dome AI BASED CAMERA Waterproof couplings ...

Page 4: ...x Focal length P450 0803F P450 0803FW 10 9 29mm 5 P450 0802N P450 0802NW 4 36 9 33mm 5 Field of view horizontal vertical P450 0803F P450 0803FW Near 42 22 8 Far 15 8 4 P450 0802N P450 0802NW Near 111 96 58 11 Far 47 23 26 53 Power supply POE IEEE802 3af 802 3at Maximum 13W 12VDC Weight Environmental conditions 40 C 50 C 40 F 122 F Humidity 10 100 Dimentions L x W x H L142 x W142 x H101 6mm 2kg 4 ...

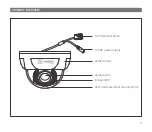
Page 5: ...Camera body 12VDC power supply RJ45 terminal block Camera lens Dust and waterproof lens protector Infrared LED PRODUCT OVERVIEW 5 ...

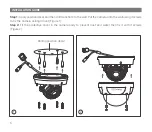
Page 6: ...n drill 4 anchors to the wall Put the camera onto the wall using 4 screws to fix the camera ceiling mount Figure 1 Step 2 Fit the protective cover in the camera body to prevent dust and water then fix it with 4 screws Figure 2 1 2 6 Drilling position decal ...

Page 7: ...witch to the waiting RJ45 terminal block no need to use 12VDC power supply Figure 1 Option 2 Use 12VDC power supply and the network cable connected from the switch Figure 2 1 RJ45 PoE switch 2 RJ45 12VDC Connect the PoE cable Insert the cable into the waterproof coupling before connecting the wires into the terminal ...

Page 8: ...the position as in the figure below Step 2 Use sharp pointed pliers to insert the GPS antenna connector into the waiting cable terminal tighten enough screw thread Step 3 Fix the GPS antenna onto the camera body using silicone glue as in the figure below GPS antenna ...

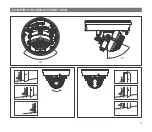
Page 9: ...ADJUSTING THE CAMERA VIEWING ANGLE 80 65 9 ...

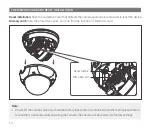
Page 10: ...ntinue to hold the factory reset button for another 10 seconds while powering the camera the camera will be restored to factory settings Note Reset installation Open the protective cover that protects the camera against dust and water to reset the device Memory card Open the protective cover you can find the location of Micro SD card ...

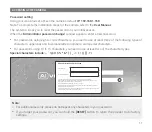
Page 11: ...es of characters uppercase and lowercase letters numbers and special characters For passwords using 10 to 15 characters you need to use at least two of the character types Special characters include _ User name Password Administrator password change New password Confirm new password For a new password with 8 to 9 digits you must use at least 3 of the following uppercase lowercase letters numbers a...

Page 12: ...ng the camera a login window will appear Enter your user name and password to access the camera 1 Enter admin in the User name box 2 Enter your chosen password in Password box 3 Click SOFTWARE INSTALLATION User name Password 12 ...

Page 13: ...ort or authorized Bkav agents if you experience any problems This equipment has been tested and found to comply with the limits for a Class A digital device pursuant to part 15 of the FCC rules These limit are designed to provide reasonable protection against harmful interference when the equipment is operated in a commercial environment This equipment generates uses and can radiate radio frequenc...

Page 14: ......

Page 15: ...BKAV CORPORATION Address 2nd Floor HH1 Building Yen Hoa Ward Cau Giay District Ha Noi Viet Nam Website www aiview ai Email aiview bkav com ...

Reviews: